Your car window switch is something you use every day, yet it rarely gets the cleaning attention it deserves. Over time, dirt, dust, and grime build up, making your switches sticky or unresponsive.
If you’ve noticed your windows acting slow or not moving at all, the switch might be the culprit. But don’t worry—you don’t need to be a mechanic to fix it. In this guide, you’ll learn simple, step-by-step ways to clean your car window switch quickly and safely.
Keep reading to bring smooth control back to your windows and avoid costly repairs down the road.
Credit: www.shopfesler.com
Tools Needed
Cleaning a car window switch needs the right tools for best results. Using proper tools helps avoid damage and makes the job easier.
Prepare all tools before starting. This saves time and keeps the process smooth.
Small Flathead Screwdriver
This tool helps gently pry out the switch panel. It fits into tight spots without scratching the surface.
Soft Brush
A soft brush removes dust and dirt from inside the switch. It reaches small crevices without causing harm.
Microfiber Cloth
Use a microfiber cloth to wipe the switch surface. It cleans well and does not leave lint behind.
Isopropyl Alcohol
Isopropyl alcohol cleans sticky residue and kills germs. Use a small amount on the cloth for safe cleaning.
Compressed Air Can
Compressed air blows out dust from hard-to-reach areas. It prevents dirt build-up that blocks switch function.
Safety Precautions
Cleaning your car window switch is a simple task. Safety is important before you start. Taking precautions protects you and your car’s electrical parts. Follow these steps to stay safe while cleaning.
Turn Off The Car Power
Always switch off your car’s engine. Remove the key from the ignition. This stops any electrical flow to the switch. It prevents short circuits or shocks during cleaning.
Use Proper Tools
Use small, soft tools like a cotton swab or soft cloth. Avoid sharp or metal objects. They can damage the switch or wiring. Gentle tools help clean without harm.
Avoid Wetting Electrical Parts
Do not spray water or cleaning liquid directly on the switch. Use a slightly damp cloth instead. Excess moisture can cause electrical faults. Keep the area dry to protect the switch.
Wear Protective Gloves
Wear gloves to protect your hands from dirt and chemicals. Gloves also reduce the risk of static electricity. Static can damage sensitive car electronics. Choose gloves that fit well for better control.
Work In A Well-lit Area
Good lighting helps you see dirt and parts clearly. It reduces mistakes and accidents. A bright space makes cleaning easier and safer. Use a flashlight if needed.
Accessing The Window Switch
Accessing the window switch is the first step to clean it properly. This part is usually inside the door panel. You need to remove the door panel carefully to reach the switch. Understanding this process helps avoid damage to your car door.
Removing Door Panel
Start by lowering the window completely. Use a screwdriver to remove screws around the door panel. Some screws hide behind covers or handles. Gently pry the panel away using a trim tool or flat plastic object. Work slowly to avoid breaking clips. Once loose, lift the panel upward to detach it from the door.
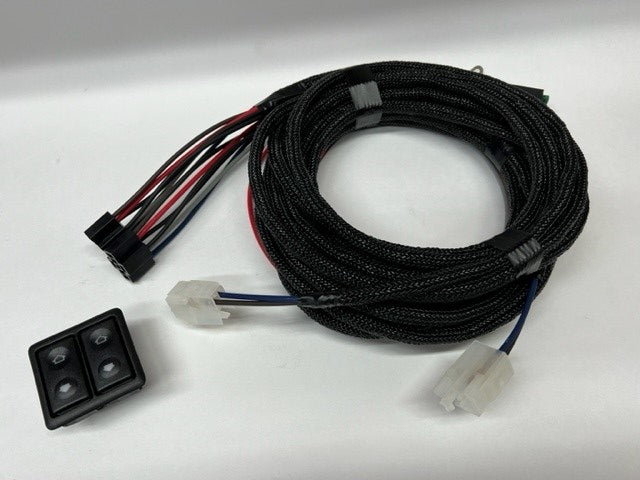
Locating The Switch
The window switch is attached to the door panel’s inner side. Look for a small plastic box with buttons. It connects to the car’s wiring with a plug. Carefully unplug the connector to free the switch. Now you can clean or replace the switch as needed.
Cleaning Materials
Choosing the right cleaning materials is key to cleaning a car window switch safely. Using harsh tools or liquids can damage the switch. Soft and gentle items work best to avoid scratches or electrical problems.
It is important to gather all needed materials before starting. This makes the process smooth and quick. Clean tools also help keep dirt from spreading inside the switch.
Microfiber Cloth
A microfiber cloth is perfect for cleaning car window switches. It traps dirt and dust without scratching the surface. Use it dry or slightly dampened with water for best results.
Isopropyl Alcohol
Isopropyl alcohol cleans well and dries fast. It removes grease and sticky residue effectively. Use a small amount on a cloth or cotton swab. Avoid pouring alcohol directly on the switch.
Cotton Swabs
Cotton swabs reach tight spots inside the switch. Dip them lightly in alcohol or water. Swab gently to clean corners and edges without damaging parts.
Soft-bristle Brush
A soft-bristle brush helps remove dust and debris. Choose a small brush like a paintbrush or a toothbrush. Brush carefully to loosen dirt without pushing it further inside.
Cleaning Process
Cleaning the car window switch keeps it working smoothly and extends its life. Dirt and dust can build up inside the switch, causing it to stick or fail. A careful cleaning process removes these particles and restores proper function. This process is simple and can be done with a few basic tools.
Dust And Debris Removal
Start by turning off the car’s power to avoid any accidents. Use a soft brush or a can of compressed air to remove dust from around the switch. Gently clean the gaps and crevices where dirt hides. Be careful not to push debris further inside the switch. This step clears loose particles and prepares the surface for deeper cleaning.
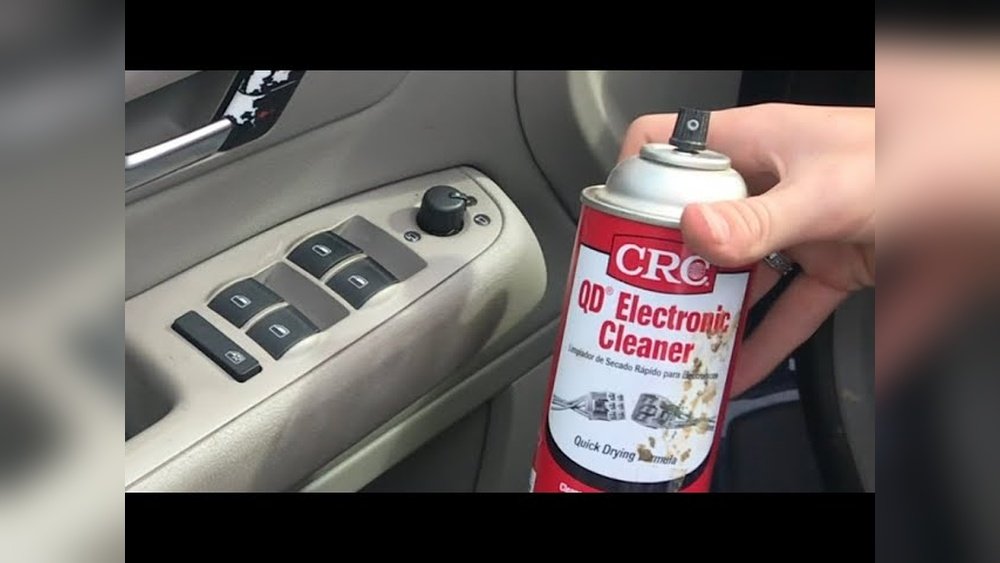
Using Cleaning Solutions
Choose a mild electronic cleaner or a mix of water and isopropyl alcohol. Dampen a cotton swab or soft cloth with the solution. Wipe the switch surface and buttons carefully. Avoid soaking the switch to prevent damage. Cleaning solutions dissolve grime and help lift sticky residue.
Drying The Switch
After cleaning, let the switch air dry for several minutes. Use a dry cloth to remove any leftover moisture. Ensure no liquid remains inside the switch before turning the power back on. Proper drying prevents short circuits and keeps the switch safe to use.

Credit: www.automerchants.com
Reassembling The Door Panel
Reassembling the door panel is the final step after cleaning the car window switch. It requires careful handling to avoid damage and ensure everything fits properly. Taking time to align parts correctly makes the panel look neat and work well.
Follow simple steps to put the door panel back on. Check each part before securing it in place. Doing this helps avoid loose pieces and rattling sounds while driving.
Aligning The Door Panel With Clips And Screws
Start by positioning the door panel close to the door frame. Line up the clips with their holes carefully. Press gently to snap them in place without forcing. Use the screws you removed earlier to tighten the panel securely. Tight screws keep the panel stable and stop it from moving.
Reconnecting Electrical Connectors
Find all electrical connectors you unplugged before cleaning. Attach each connector firmly to its socket. Make sure connections are tight to avoid switch problems. Check the wires are not pinched or twisted. Proper connections help the window switch work smoothly.
Testing The Window Switch Function
Before closing the door completely, test the window switch. Press each button to check if windows move up and down. Confirm all functions respond correctly. Fix any issues by adjusting connections or panel position. Testing saves time and prevents rework later.
Testing The Switch
Testing the car window switch ensures it works correctly after cleaning. This step checks if the switch sends the right signals to the window motor. Testing helps find any hidden problems before reinstalling the switch. It saves time and prevents future issues with the window operation.
Gather Necessary Tools
Prepare a multimeter to measure electrical signals. Have a screwdriver ready to remove the switch panel. Keep the car keys nearby to turn on the ignition. These tools make testing easy and safe.
Remove The Switch From The Door
Use the screwdriver to carefully pry out the switch panel. Disconnect the wiring harness from the back of the switch. Keep track of screws and parts to avoid losing them. Handle the switch gently to prevent damage.
Check For Power Supply
Turn the car ignition on without starting the engine. Use the multimeter to check voltage at the switch terminals. A reading near 12 volts means power is present. No voltage means a wiring or fuse problem.
Test The Switch Function
Press the switch and measure if the multimeter shows voltage change. The switch should allow current flow when pressed. No change means the switch contacts may be dirty or broken. Clean or replace the switch if needed.
Reinstall The Switch
Once testing is complete, reconnect the wiring harness. Snap the switch panel back into the door frame. Tighten any screws removed during disassembly. Test the window operation again to confirm success.
Maintenance Tips
Maintaining your car window switch keeps it working smoothly and lasts longer. Dirt and dust can block the switch and cause problems. Simple steps can help avoid sticky or unresponsive switches. Regular care saves money on repairs and keeps your car comfortable.
Clean The Switch Regularly
Use a soft cloth to wipe the switch surface. Avoid wetting the switch directly with water. A small brush can remove dust from tight spaces. Keep the switch free from dirt and grime.
Use Proper Cleaning Products
Choose mild cleaners like rubbing alcohol or electronic cleaner spray. Avoid harsh chemicals that can damage plastic parts. Spray cleaner on a cloth, not directly on the switch. This prevents moisture from entering the switch.
Check For Signs Of Wear
Look for cracks, loose buttons, or unusual sounds when pressing. Early detection helps fix issues before they worsen. Replace damaged parts as soon as possible. Safe driving needs reliable window controls.
Avoid Forceful Pressing
Press the switch gently to avoid damage. Hard pressing may break internal components. Smooth operation extends the switch’s life. Teach others in the car to handle controls carefully.
Keep The Interior Dry
Moisture can cause corrosion inside the switch. Avoid spilling drinks or water near the controls. Use floor mats and keep windows closed during rain. Dry any wet spots immediately.

Credit: www.youtube.com
Frequently Asked Questions
How Often Should I Clean My Car Window Switch?
Clean your car window switch every 3 to 6 months. Regular cleaning prevents dirt buildup and ensures smooth operation. Frequent use attracts dust and grime, which can cause malfunctions.
What Tools Are Needed To Clean A Car Window Switch?
Use a soft cloth, cotton swabs, and isopropyl alcohol. A small brush helps remove dirt from crevices. Avoid harsh chemicals to prevent damage to the switch.
Can I Clean The Switch Without Removing It?
Yes, gently clean the switch surface with a cloth and cotton swabs. Avoid excessive moisture to prevent electrical damage. For deep cleaning, removing the switch is safer.
What Should I Avoid When Cleaning The Window Switch?
Avoid using excessive water or harsh chemicals. Do not spray cleaners directly on the switch. Prevent moisture from entering electrical components to avoid damage.
Conclusion
Cleaning your car window switch keeps it working smoothly. Dirt and dust can cause problems over time. Use a soft cloth and gentle cleaner for best results. Take care not to let moisture inside the switch. Regular cleaning helps avoid costly repairs later.
Simple steps save time and money. Keep your car’s controls clean and responsive. A little effort goes a long way. Try this easy task today for better car care.
Leave a Reply