Your car windows slide up and down every day, but have you ever stopped to think about what’s hiding inside the window channels? Dirt, dust, and grime can build up there, making your windows stick or even damage the seals.
Cleaning these channels might sound tricky, but it’s easier than you think—and it can save you money on repairs. In this post, you’ll learn simple, effective steps to clean your car window channels like a pro. Keep reading to discover how a little maintenance can make your windows work smoothly and keep your car looking great.

Credit: www.youtube.com
Tools Needed
Cleaning car window channels requires the right tools to do the job well. Using proper tools helps remove dirt and debris from tight spaces. It also prevents damage to the car’s window seals. Prepare these tools before starting to save time and effort.
Essential Cleaning Supplies
A small brush is key for scrubbing dirt from channels. Choose one with soft bristles to avoid scratching. Microfiber cloths help wipe away dust and moisture gently. A spray bottle with water or mild cleaner loosens grime inside channels. Cotton swabs reach narrow corners that cloths cannot. A vacuum with a narrow nozzle removes loose dirt quickly.
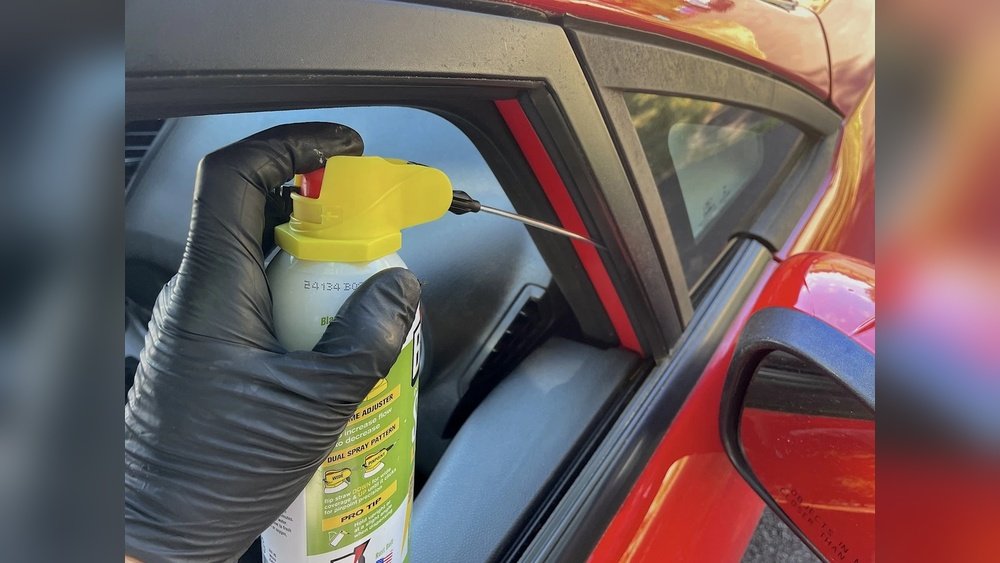
Optional Accessories For Tough Dirt
Plastic pry tools help lift stubborn debris without scratching surfaces. Foam pipe cleaners fit well inside narrow channels for deep cleaning. Compressed air cans blow out dust trapped in hard-to-reach areas. Rubber gloves keep your hands clean and provide a better grip. Use these if dirt is old or tightly packed inside the channels.
Credit: seashorerubber.com
Preparing The Car
Preparing the car is the first step to clean car window channels effectively. It helps you work safely and comfortably. Proper preparation saves time and avoids damage to your vehicle. Follow simple steps to get ready before starting the cleaning process.
Parking In A Suitable Location
Find a flat and open space to park your car. Avoid places with heavy traffic or dirt. Shade is best to protect from sun glare and heat. This makes cleaning easier and safer. Keep the area clear around your car for easy access.
Gathering Materials
Collect all tools and cleaning supplies before you begin. Use a small brush, microfiber cloth, and a vacuum cleaner if possible. Mild soap and water work well for cleaning. Avoid harsh chemicals that can damage window seals. Keep everything close to avoid interruptions.
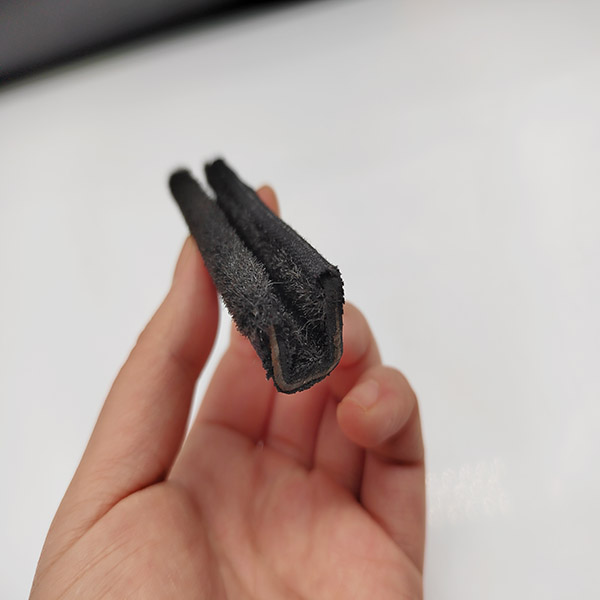
Removing Window Seals
Removing window seals is a key step in cleaning car window channels. These seals protect the window and keep water out. Taking off the seals carefully helps avoid damage to both the seal and the car. This process needs patience and the right tools.
Careful Seal Removal Techniques
Start by pulling the seal gently at one corner. Use a plastic trim tool to lift the seal without scratching the paint. Work slowly along the edge, loosening the seal bit by bit. Avoid using metal tools that can cause dents or tears. Keep the seal intact to reuse it later.
Handling Fragile Components
Window seals are made of soft rubber and can tear easily. Hold the seal firmly but gently to prevent stretching. Watch for clips or fasteners that hold the seal in place. Remove these parts carefully and keep them safe. Treat every part with care to protect your car’s finish.
Cleaning The Channels
Cleaning the car window channels is a key step to keep your windows working smoothly. Dirt and debris often get stuck in these narrow spaces. This can cause the windows to jam or move slowly. Regular cleaning helps avoid damage and keeps your car looking neat.
Removing Dirt And Debris
Start by opening the car window halfway. Use a small, soft cloth to wipe out loose dirt. You can also use a plastic scraper or an old credit card. Gently scrape the edges to lift stuck debris. Take your time to reach all corners of the channel.
Using Brushes And Vacuum
Use a narrow brush to sweep out remaining dirt. A toothbrush or a small paintbrush works well. Brush along the channel edges and corners carefully. Then, use a vacuum cleaner with a thin nozzle. Vacuum the channel to remove loosened dust and dirt. This prevents grime from settling back inside.
Applying Cleaning Solutions
Choose a mild cleaner, like a mix of water and dish soap. Lightly spray the solution inside the channels. Avoid soaking the area too much. Use a cloth or sponge to wipe the channel surfaces. This removes grease and sticky residues. Finally, dry the channels with a clean cloth before closing the window.
Drying And Inspecting
After cleaning the car window channels, drying and inspecting are vital steps. Water or moisture left inside can cause rust or mold. Taking time to dry well helps keep the channels in good shape. Checking for damage ensures the channels work smoothly and prevent leaks.
Ensuring Complete Dryness
Use a clean, dry cloth to wipe the channels thoroughly. Reach into corners and tight spaces to remove all moisture. Let the channels air dry for a few minutes after wiping. Avoid closing the windows too soon to stop trapping moisture inside. A fully dry channel prevents rust and mold buildup.
Checking For Damage Or Wear
Look closely at the rubber seals and metal parts in the channel. Check for cracks, tears, or worn-out spots in the rubber. Inspect for rust, dents, or bends in the metal frame. Damaged parts can cause window leaks and noise. Replace or repair any worn areas to keep your windows working well.
Reinstalling Window Seals
Reinstalling window seals is a key step after cleaning car window channels. It protects the window from water and dust. Proper installation helps the window move smoothly. Take time to place the seals correctly. This prevents leaks and noise while driving.
Proper Seal Placement
Start by aligning the seal with the window frame. Make sure the rubber fits snugly in the channel. Press the seal evenly along the edges. Avoid stretching or twisting the seal. Check for gaps or loose spots. Use gentle pressure to secure the seal in place. A well-placed seal keeps out dirt and water effectively.
Testing Window Movement
After installing the seals, test the window’s movement. Slowly roll the window up and down several times. Listen for any unusual sounds or sticking points. The window should move smoothly without resistance. If the seal blocks the window, adjust it carefully. Proper testing ensures the seal fits well and works as intended.
Maintaining Clean Channels
Keeping car window channels clean helps windows slide smoothly. Dirt and debris can build up in these narrow spaces. This causes windows to stick or make noise. Clean channels also stop water leaks and rust. Simple care keeps them working well longer.
Regular Cleaning Schedule
Clean the window channels every few weeks. Use a soft brush or cloth to remove loose dirt. For stubborn grime, use a mild soap solution. Dry the channels fully to avoid rust. Regular cleaning prevents buildup and damage.
Tips To Prevent Dirt Build-up
Park your car away from dusty areas. Keep windows closed when not driving. Wipe channels with a damp cloth after rainy days. Avoid spraying water directly into the channels. Use a silicone spray to keep channels smooth and clean.

Credit: www.youtube.com
Frequently Asked Questions
How Often Should Car Window Channels Be Cleaned?
Car window channels should be cleaned every 3 to 6 months. Regular cleaning prevents dirt buildup and ensures smooth window operation. Frequent maintenance also avoids damage to seals and reduces noise while driving.
What Tools Are Best For Cleaning Window Channels?
Use a soft brush, microfiber cloth, and a vacuum cleaner. A small brush helps remove debris in tight spaces. Avoid harsh tools that can damage the rubber seals or metal surfaces.
Can I Use Household Cleaners On Window Channels?
Avoid harsh household cleaners as they can damage rubber seals. Use mild soap and water or a dedicated automotive cleaner. This protects the channels and prevents premature wear or corrosion.
What Causes Window Channels To Get Dirty Quickly?
Dust, pollen, leaves, and road grime commonly accumulate in window channels. Frequent driving in dusty or wet conditions speeds up dirt buildup. Regular cleaning helps maintain window function and vehicle appearance.
Conclusion
Cleaning car window channels keeps windows running smooth and quiet. Dirt and debris block movement and cause damage over time. Regular cleaning prevents costly repairs and improves window function. Use simple tools like brushes and cloths for best results. Take your time and be gentle to avoid harm.
Clean channels help your car look better and work well. Small efforts make a big difference in car care. Keep your windows clear and easy to open every day.
Leave a Reply