Category: Glass Clean

  • How to Clean Car Windows And Mirrors: Ultimate Guide for Sparkling Clarity

    How to Clean Car Windows And Mirrors: Ultimate Guide for Sparkling Clarity

    Are your car windows and mirrors looking streaky or foggy? Clear windows and mirrors aren’t just about good looks—they keep you safe by giving you a sharp view of the road.

    You might think cleaning them is tricky or time-consuming, but with the right tips, you can make them spotless in no time. Keep reading, and you’ll discover simple, effective ways to clean your car’s glass surfaces so you can drive with confidence and style.

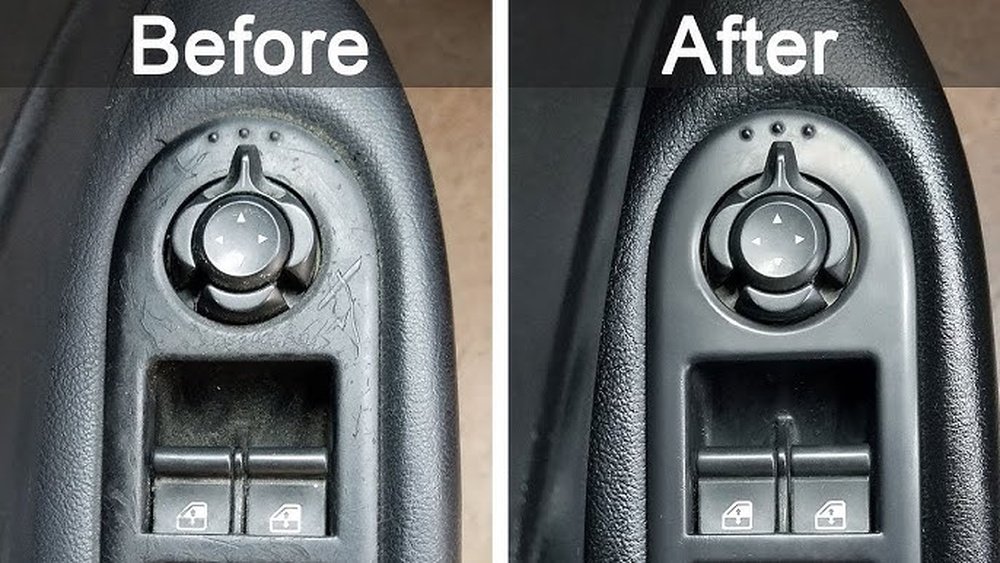
    Choosing The Right Cleaning Supplies

    Choosing the right cleaning supplies makes car window and mirror cleaning easier and more effective. Using proper tools helps avoid streaks and scratches. It saves time and keeps surfaces clear for better visibility. Let’s explore the best options for glass cleaners, cloths, and special tools.

    Best Glass Cleaners For Cars

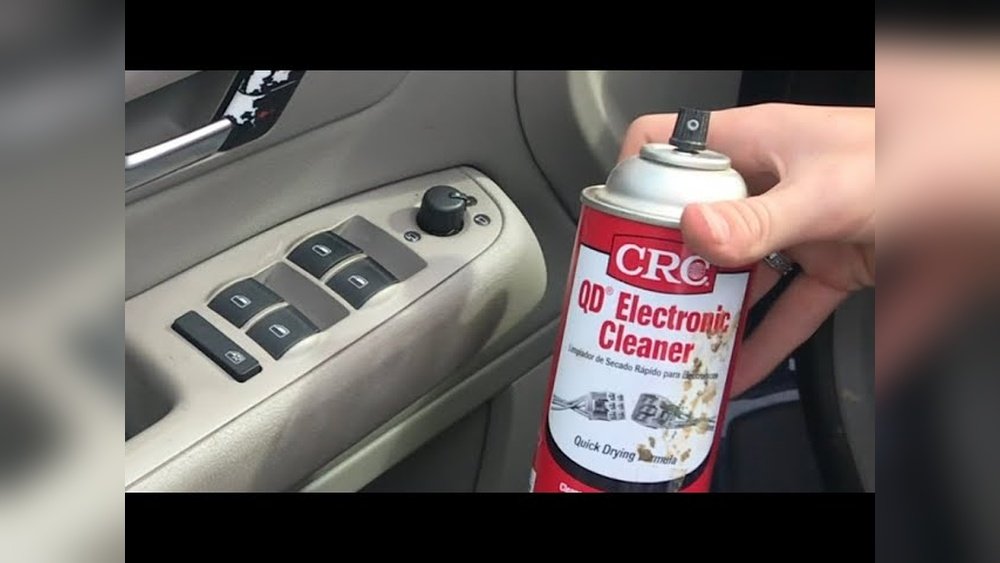
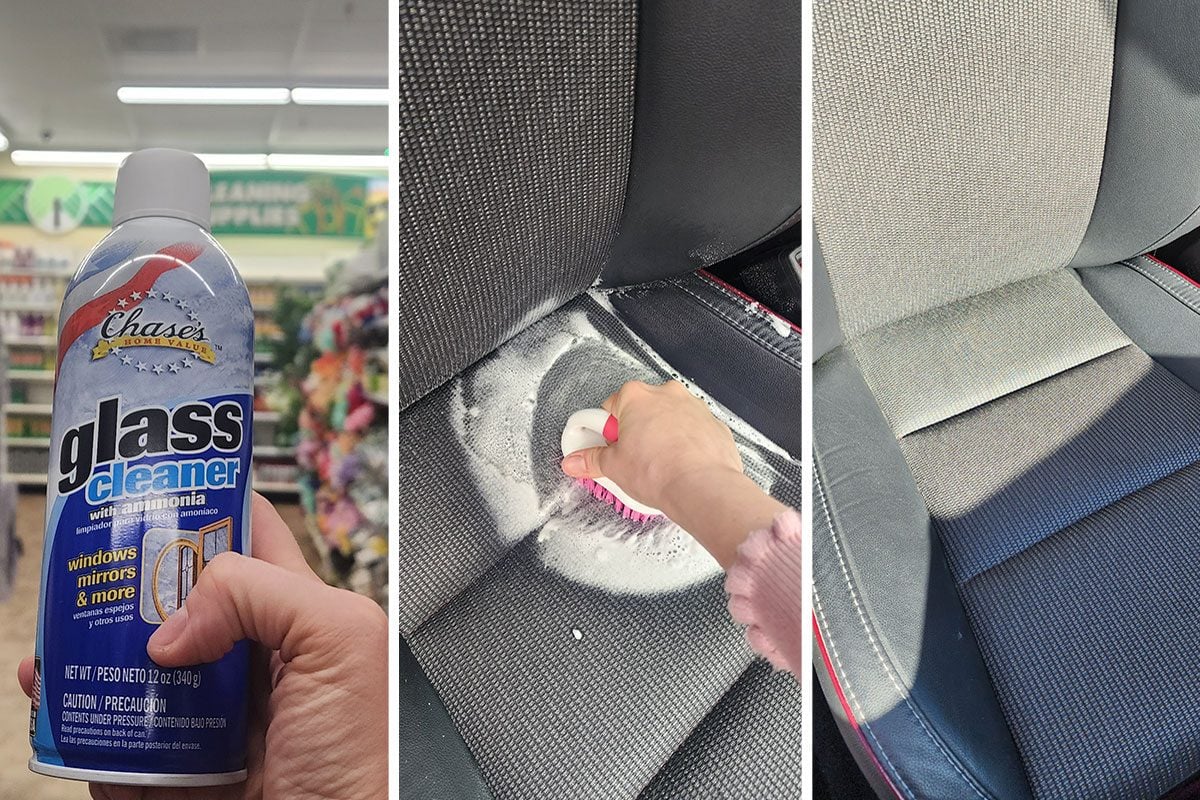
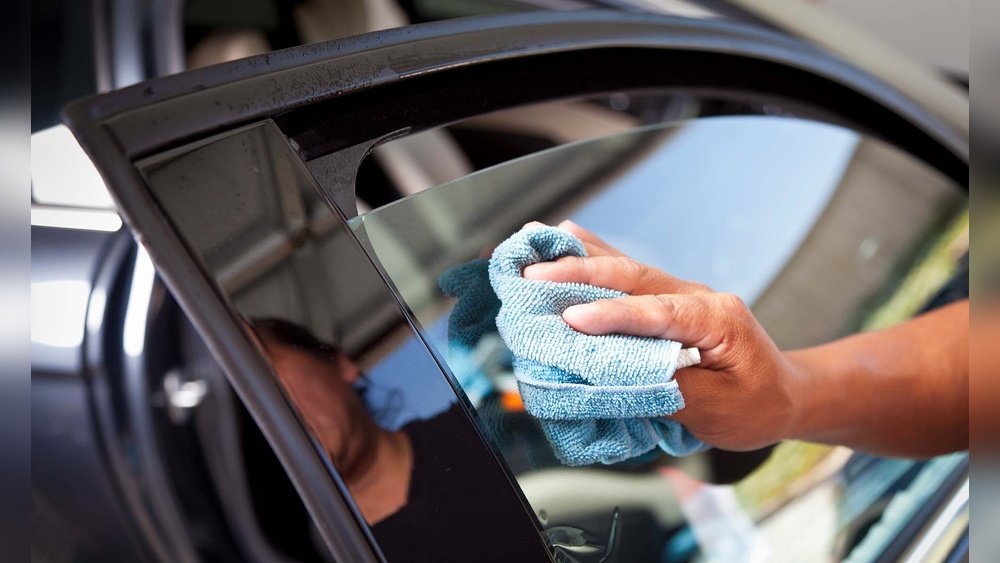
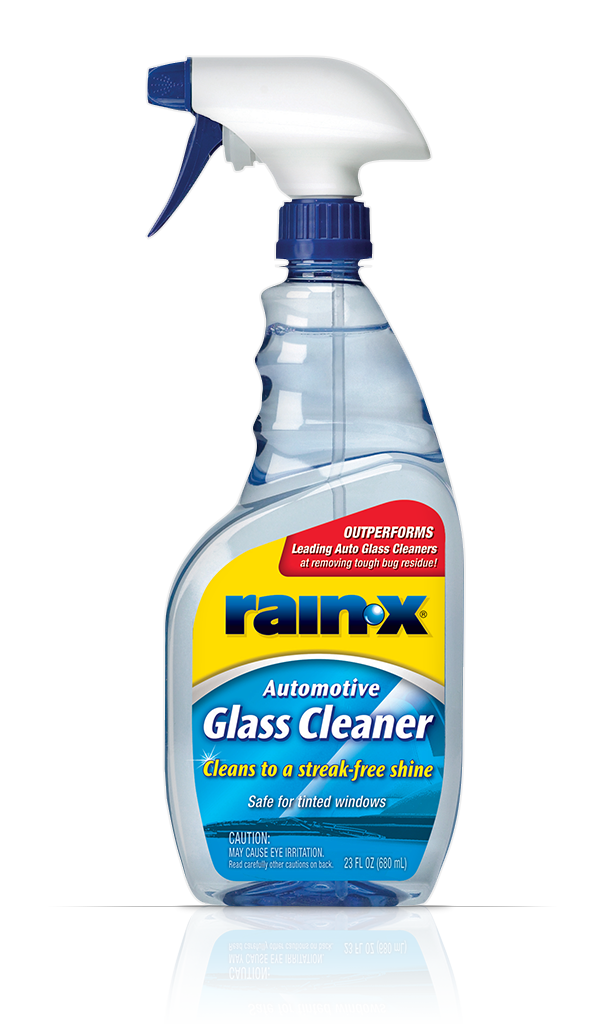
    Car glass cleaners differ from regular ones. They remove dirt, grease, and bugs without leaving residue. Look for ammonia-free formulas to protect window tint. Some cleaners also reduce fogging inside the car. Spray the cleaner directly on the glass or on a cloth for better control.

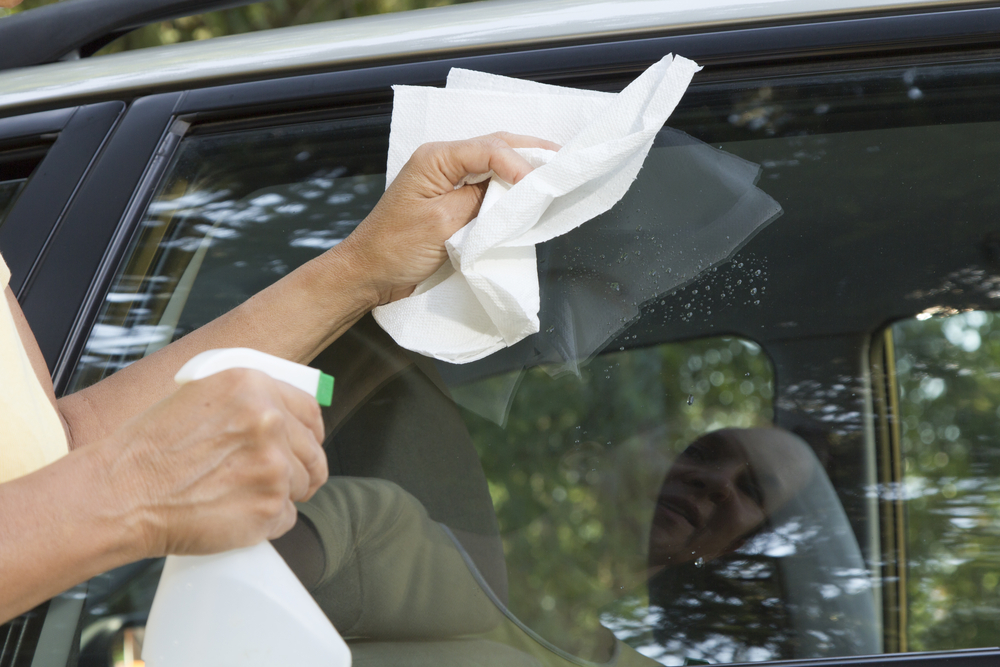
    Microfiber Cloths Vs Paper Towels

    Microfiber cloths are soft and absorbent. They catch dirt and dust without scratching glass. Paper towels can leave lint and streaks behind. Microfiber cloths also dry windows faster. Wash and reuse microfiber cloths to save money and reduce waste.

    Tools For Hard-to-reach Areas

    Small crevices need special tools for thorough cleaning. Use foam swabs or cotton buds for corners and edges. A soft brush helps remove dirt from mirror frames and seals. Extendable squeegees reach tall or wide windows easily. These tools keep every part clean and clear.

    How to Clean Car Windows And Mirrors: Ultimate Guide for Sparkling Clarity

    Credit: cleanmycar.ca

    Preparing Your Car For Cleaning

    Preparing your car for cleaning is a key step to get clear windows and mirrors. Proper preparation makes cleaning easier and prevents dirt from spreading. A clean surface helps the cleaner work better.

    Start by clearing away loose dust and debris. This prevents scratching the glass during cleaning. Also, protect the inside of your car from water and cleaner spills. These small steps save time and effort.

    Removing Dust And Debris

    Use a soft brush or microfiber cloth to remove dust. Wipe gently to avoid scratching glass surfaces. Pay close attention to window edges and corners. These spots often collect dirt that can smear when wet.

    Check mirrors carefully for dust and bugs. Removing them first keeps the mirrors clear after cleaning. Avoid harsh scrubbing that can damage glass or mirror coatings.

    Protecting Interior Surfaces

    Close windows tightly to keep water out. Cover dashboard and door panels with a cloth or plastic sheet. This protects against cleaner drips and water splashes.

    Use painter’s tape or masking tape around window seals. It stops cleaner from seeping inside the car. This step keeps interior surfaces dry and clean during the process.

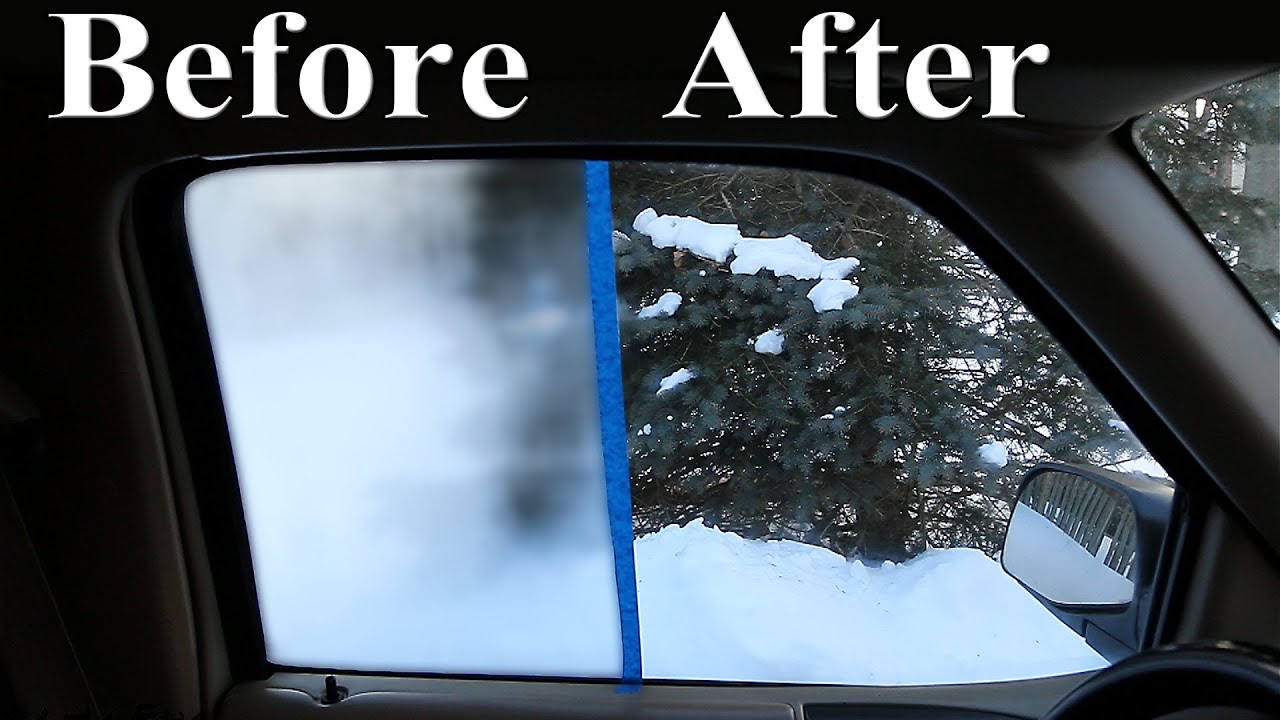
    Cleaning Car Windows Step-by-step

    Cleaning car windows step-by-step makes the job easier and more effective. Clear windows improve driving safety and enhance your car’s look. Follow simple steps to clean both outside and inside surfaces.

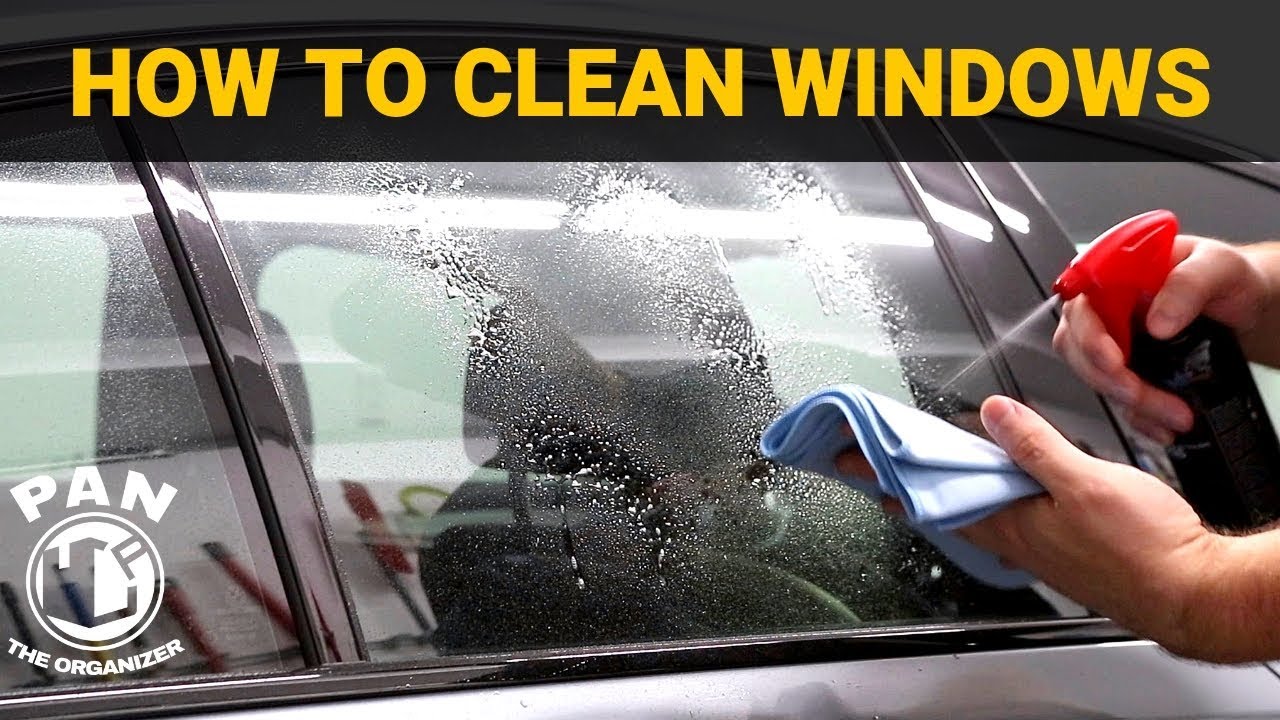
    Exterior Window Cleaning Techniques

    Start by rinsing the windows with water to remove loose dirt. Use a soft sponge or microfiber cloth with glass cleaner. Wipe in horizontal strokes to cover all areas. Pay extra attention to corners and edges. Avoid harsh scrubbing to prevent scratches. Rinse again with clean water to remove cleaner residue. Dry with a clean microfiber towel for a clear finish.

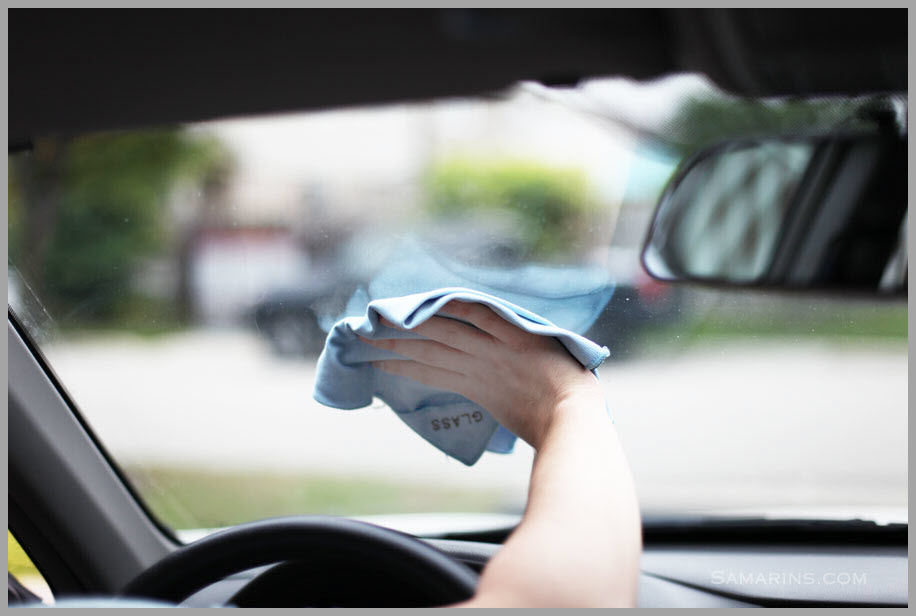
    Interior Window Cleaning Tips

    Use a glass cleaner safe for indoor use or a mix of water and vinegar. Spray lightly to avoid drips on the dashboard or upholstery. Wipe with a clean microfiber cloth in vertical strokes. Focus on removing fingerprints and smudges. Open the doors for better ventilation to avoid fogging. Repeat if needed to get a clear view through the glass.

    Avoiding Streaks And Smudges

    Choose the right cleaner and cloth for a streak-free shine. Avoid paper towels; they leave lint and streaks. Work in the shade or cooler parts of the day to prevent fast drying. Use circular motions followed by straight strokes for even cleaning. Change cloths if they become dirty or wet. Finish with a dry cloth to polish and remove any leftover marks.

    How to Clean Car Windows And Mirrors: Ultimate Guide for Sparkling Clarity

    Credit: www.youtube.com

    Cleaning Car Mirrors Effectively

    Cleaning car mirrors is essential for safe driving. Clear mirrors help you see better and avoid accidents. Dirt, water spots, and grime can block your view. Regular cleaning keeps mirrors spotless and shiny. Follow simple steps to clean mirrors effectively and quickly.

    Removing Water Spots And Grime

    Start by rinsing the mirrors with water. Use a soft cloth or sponge to wipe away loose dirt. For water spots, apply a mixture of vinegar and water. Spray it gently on the mirror surface. Let it sit for a few minutes to dissolve spots. Wipe with a clean microfiber cloth in a circular motion. Avoid harsh scrubbing to prevent scratches. Repeat if spots remain until the mirror looks clear.

    Polishing For Extra Shine

    After cleaning, polish the mirrors for a bright finish. Use a small amount of glass cleaner or a polish made for car mirrors. Apply with a soft cloth using light, circular strokes. This removes streaks and adds shine. Buff the surface until it feels smooth and looks glossy. Polishing also helps protect mirrors from future dirt buildup. Clean, shiny mirrors improve visibility and safety on the road.

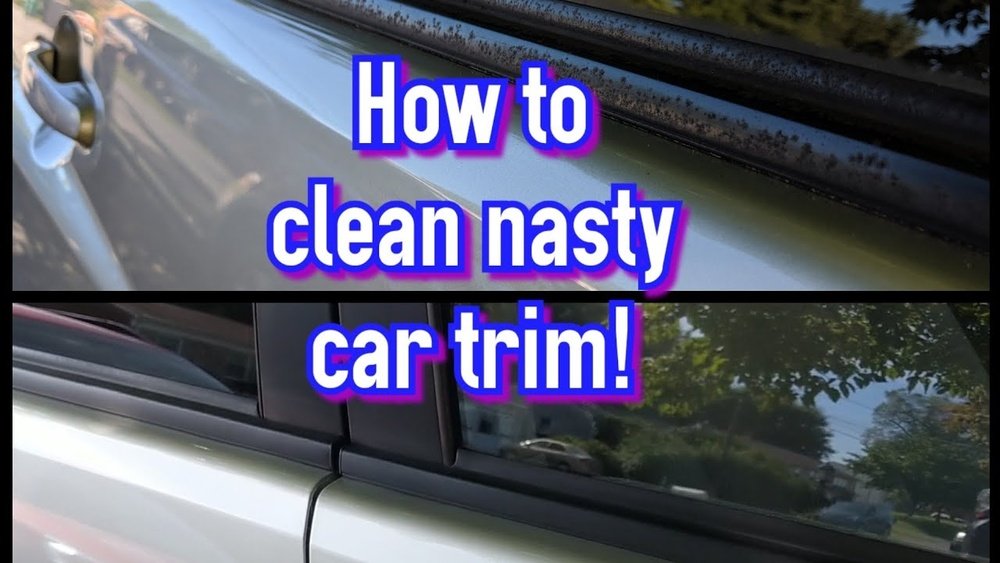
    Dealing With Tough Stains And Residue

    Tough stains and residue on car windows and mirrors can block your view. These spots need special care to clear safely. Cleaning them right keeps your glass clear and scratch-free. Use gentle methods and the right tools for best results.

    Removing Bug Splatter And Tree Sap

    Bug splatter and tree sap stick hard to glass. Soften these spots before wiping. Spray a glass cleaner or rubbing alcohol on the stains. Let it sit for a few minutes. Use a soft cloth or sponge to wipe gently. Avoid scraping, which can scratch your glass. Repeat if any residue remains. This method loosens sticky substances without damage.

    Handling Hard Water Spots

    Hard water spots leave white marks on windows and mirrors. These spots form from minerals in water. Use vinegar diluted with water to clean them. Spray the mixture on the spots and wait five minutes. Wipe with a clean, soft cloth in a circular motion. Rinse with plain water afterward. Dry the surface with a microfiber cloth. This removes mineral buildup and brightens glass.

    How to Clean Car Windows And Mirrors: Ultimate Guide for Sparkling Clarity

    Credit: www.championautoglass.com.au

    Maintaining Sparkling Windows And Mirrors

    Maintaining sparkling car windows and mirrors improves safety and appearance. Clean glass gives clear views and reduces glare. Dust, dirt, and water spots can build up fast. Regular care keeps surfaces bright and easy to see through. Simple steps make a big difference in your car’s look and your driving experience.

    Regular Cleaning Schedule

    Set a routine to clean windows and mirrors every two weeks. Use a soft cloth and a gentle glass cleaner. Wipe in circular motions to avoid streaks. Clean both inside and outside surfaces. Check for spots after drying and polish with a dry cloth. Regular cleaning stops dirt from hardening and damaging the glass.

    Protective Treatments To Consider

    Apply water-repellent treatments to windows and mirrors. These products help rainwater slide off quickly. This keeps glass clearer in bad weather. Use anti-fog sprays inside the car to stop mist. Protective coatings reduce dust and grime buildup. Reapply treatments every few months for best results.

    Safety Tips During Cleaning

    Cleaning car windows and mirrors improves visibility and safety on the road. Doing it safely protects your car and yourself. Follow simple safety tips to avoid damage and harm during cleaning. These tips help keep your car’s appearance and function in top shape.

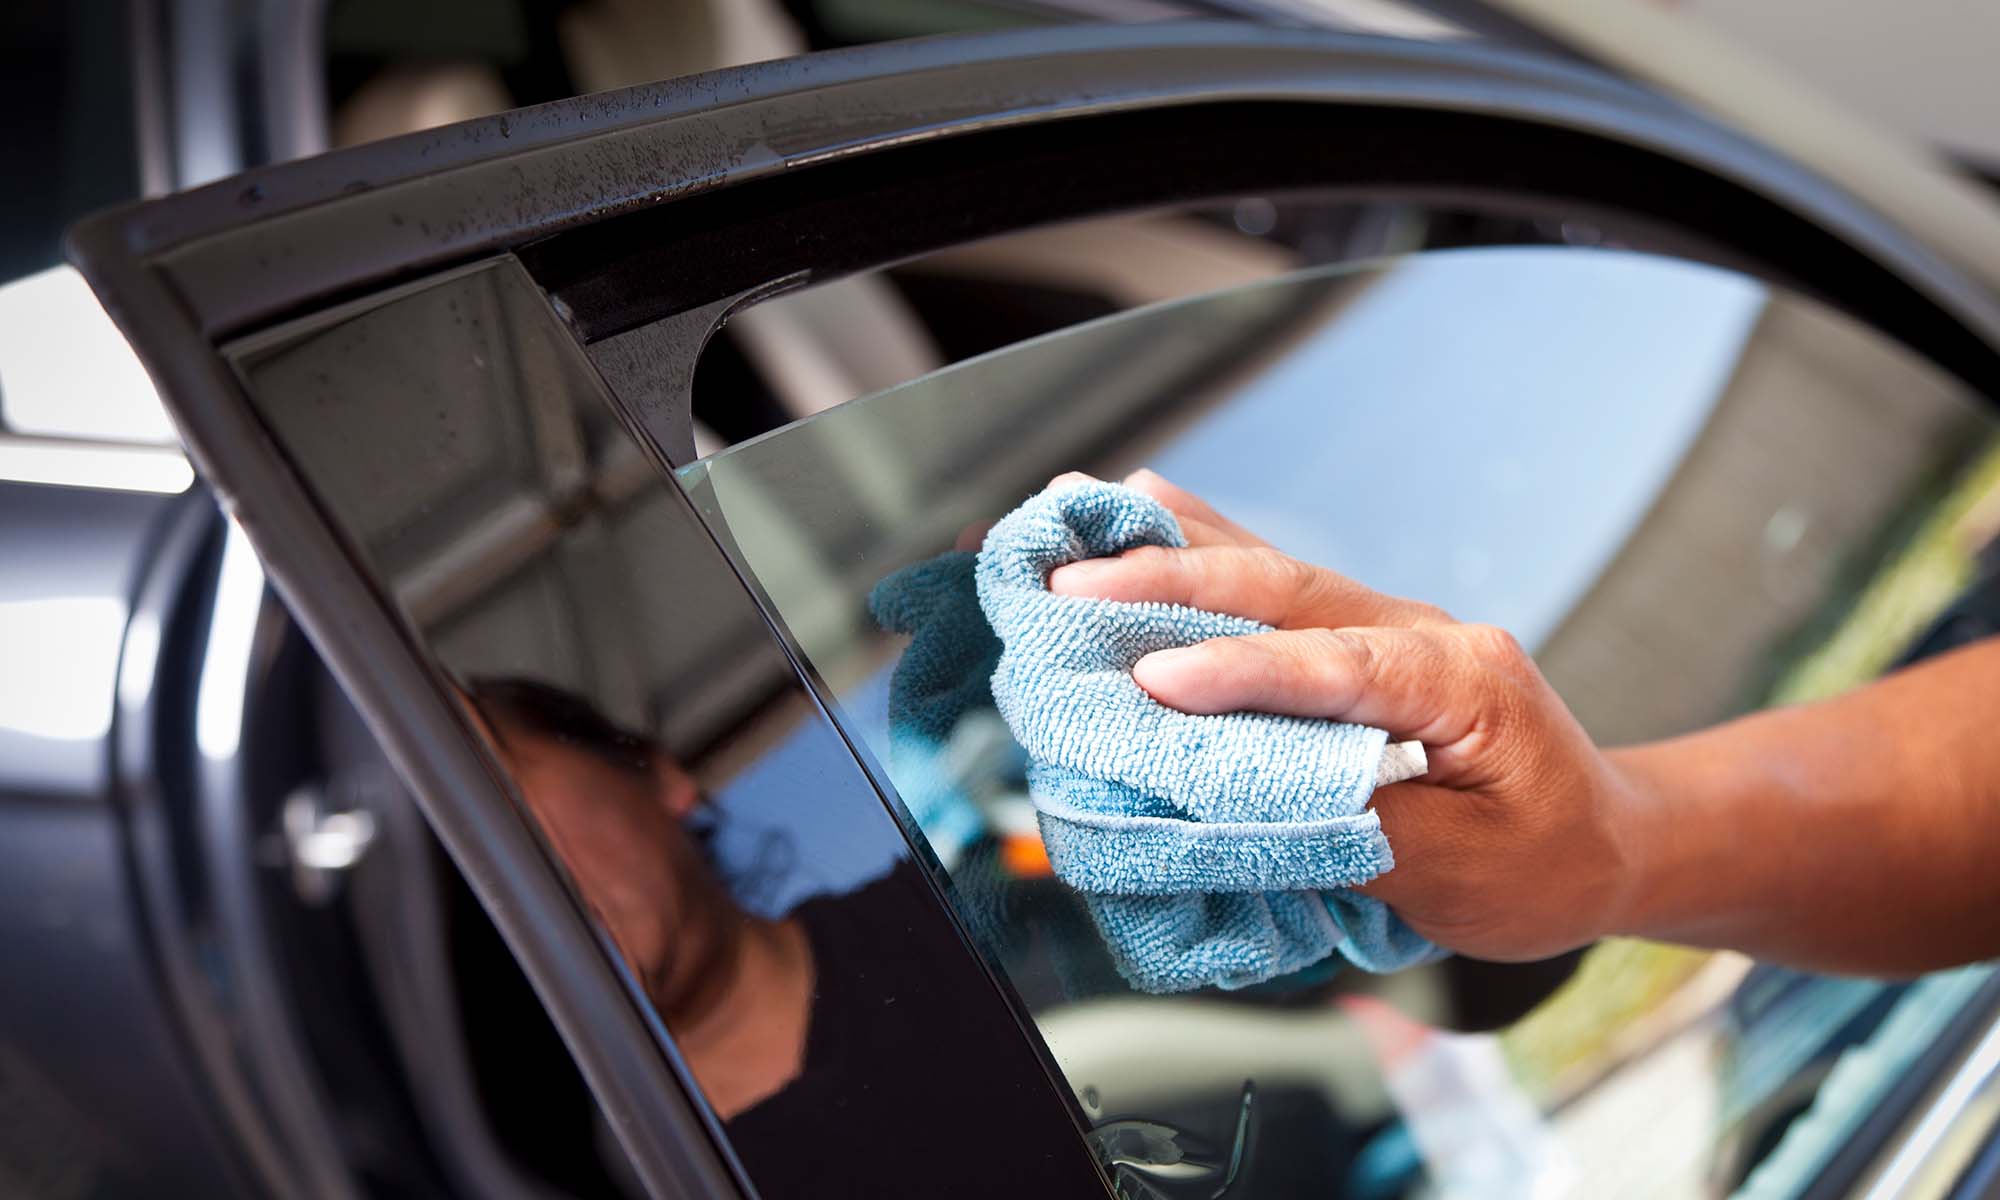
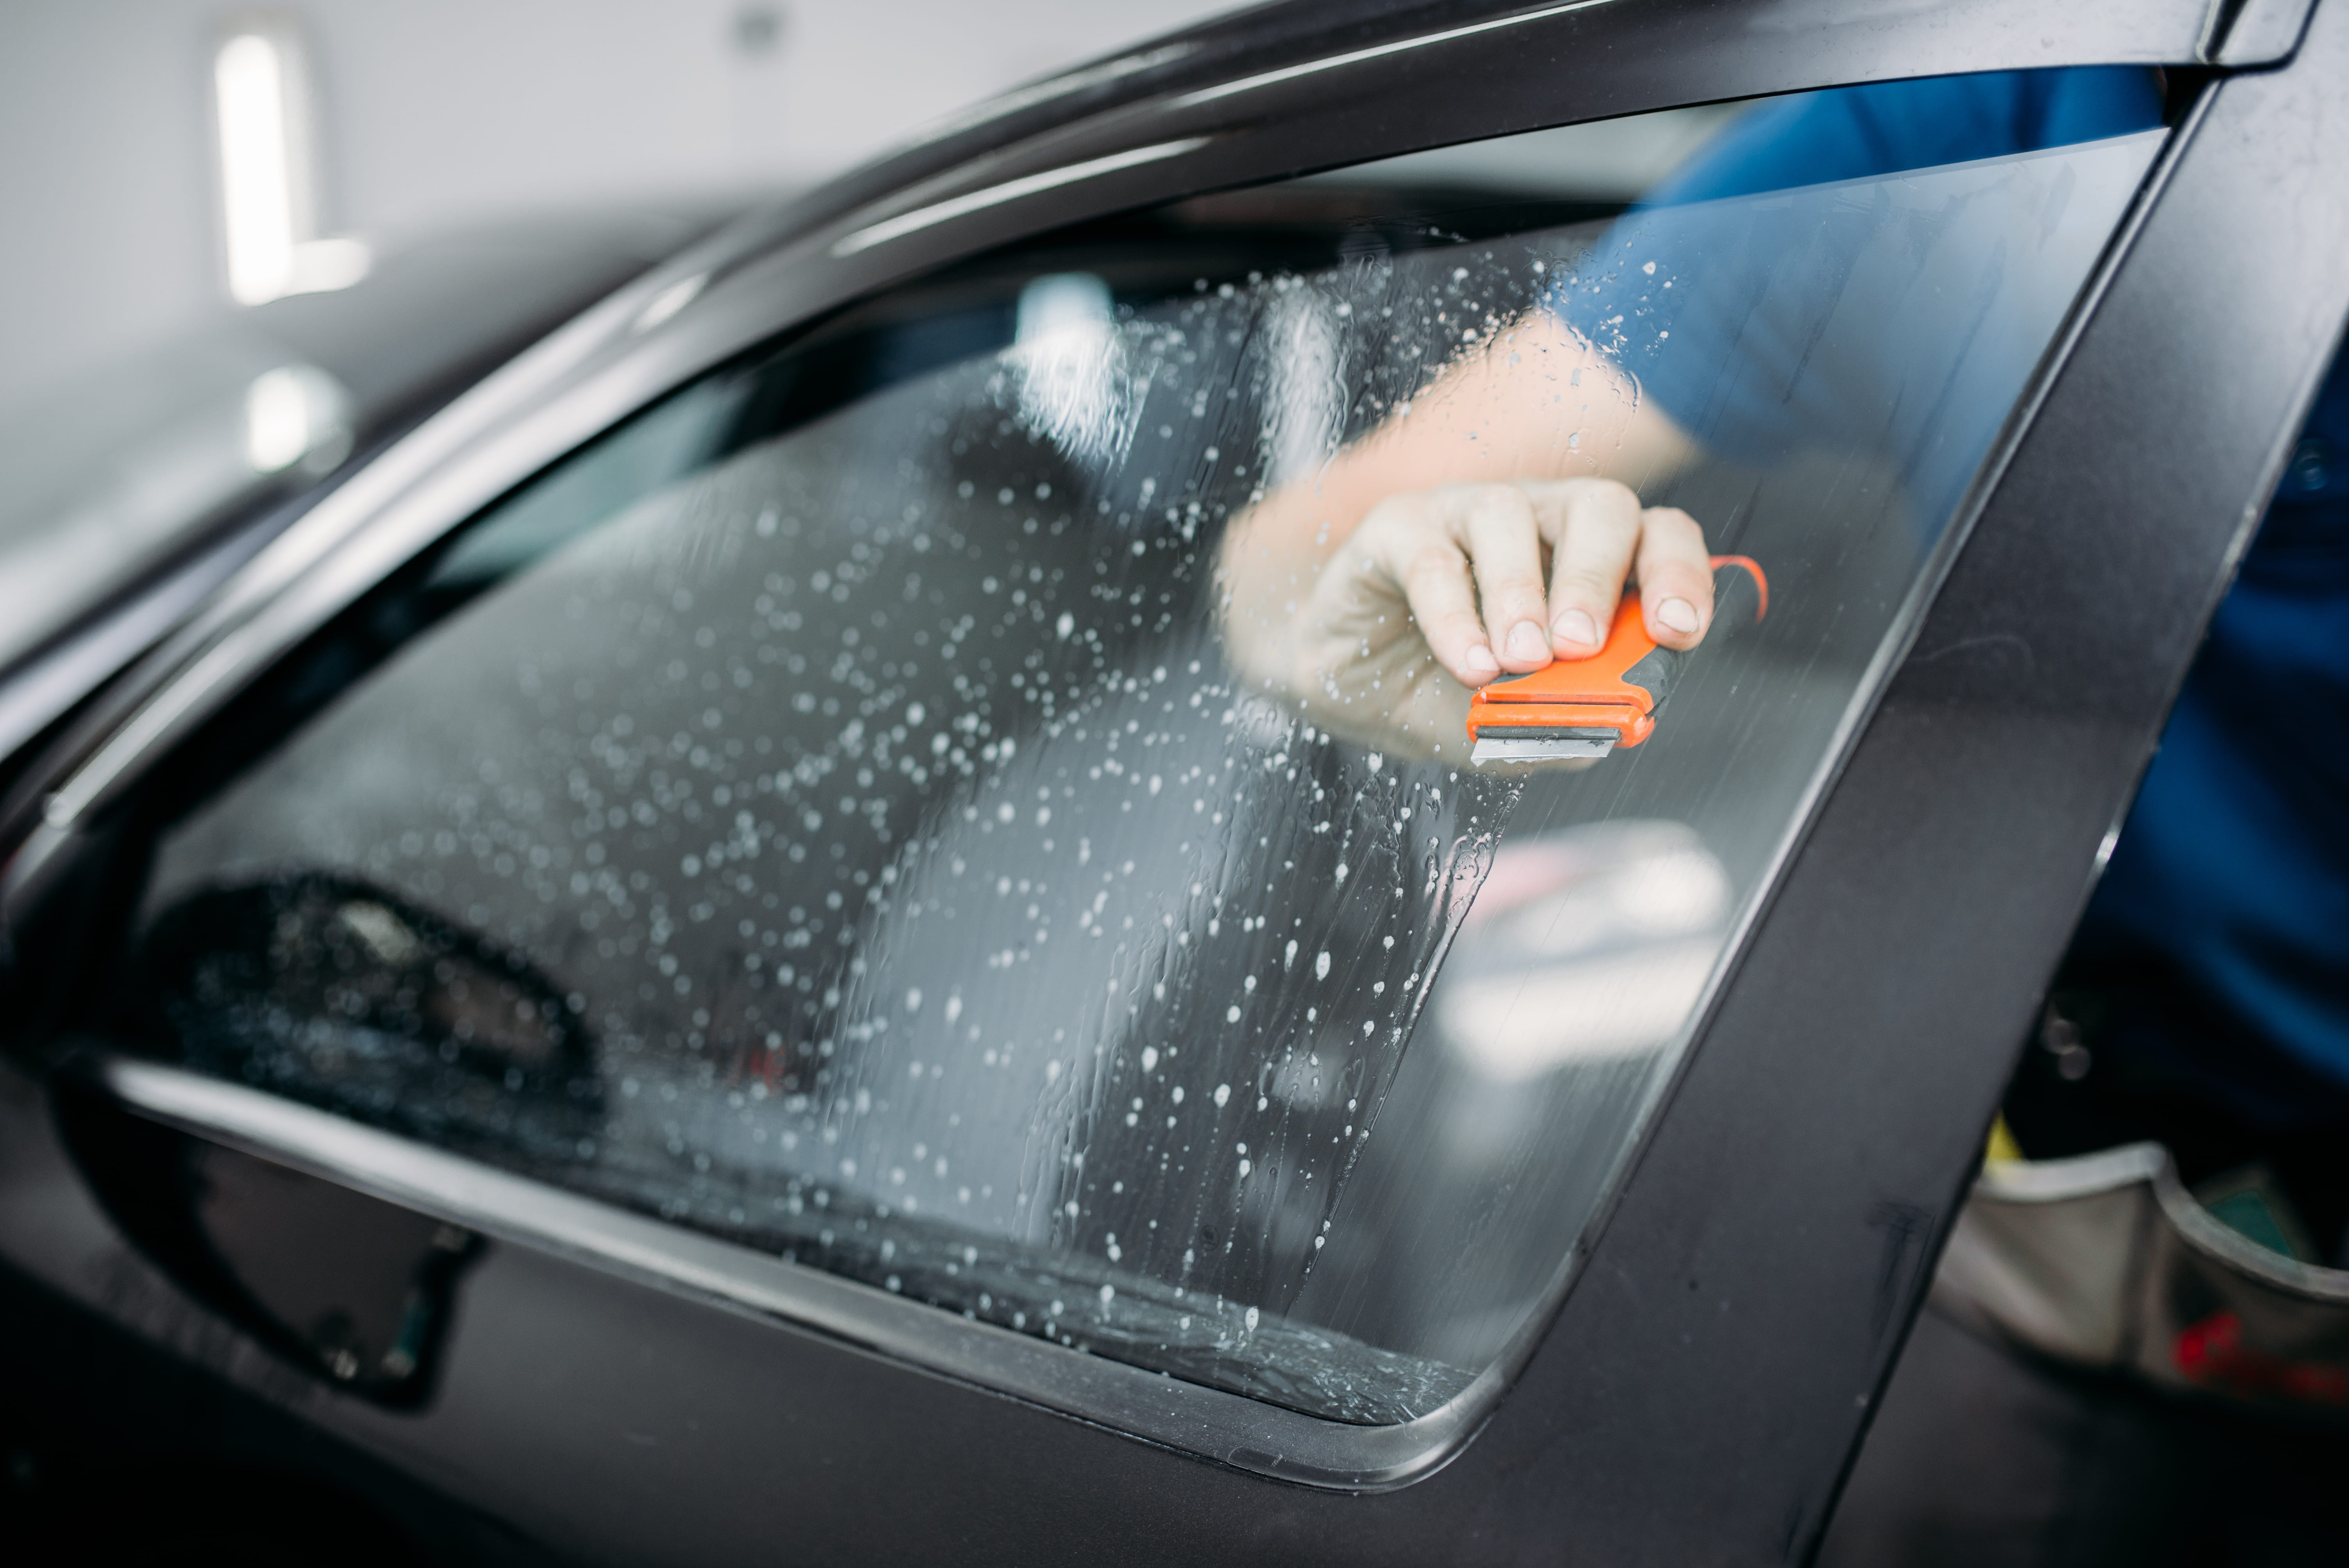
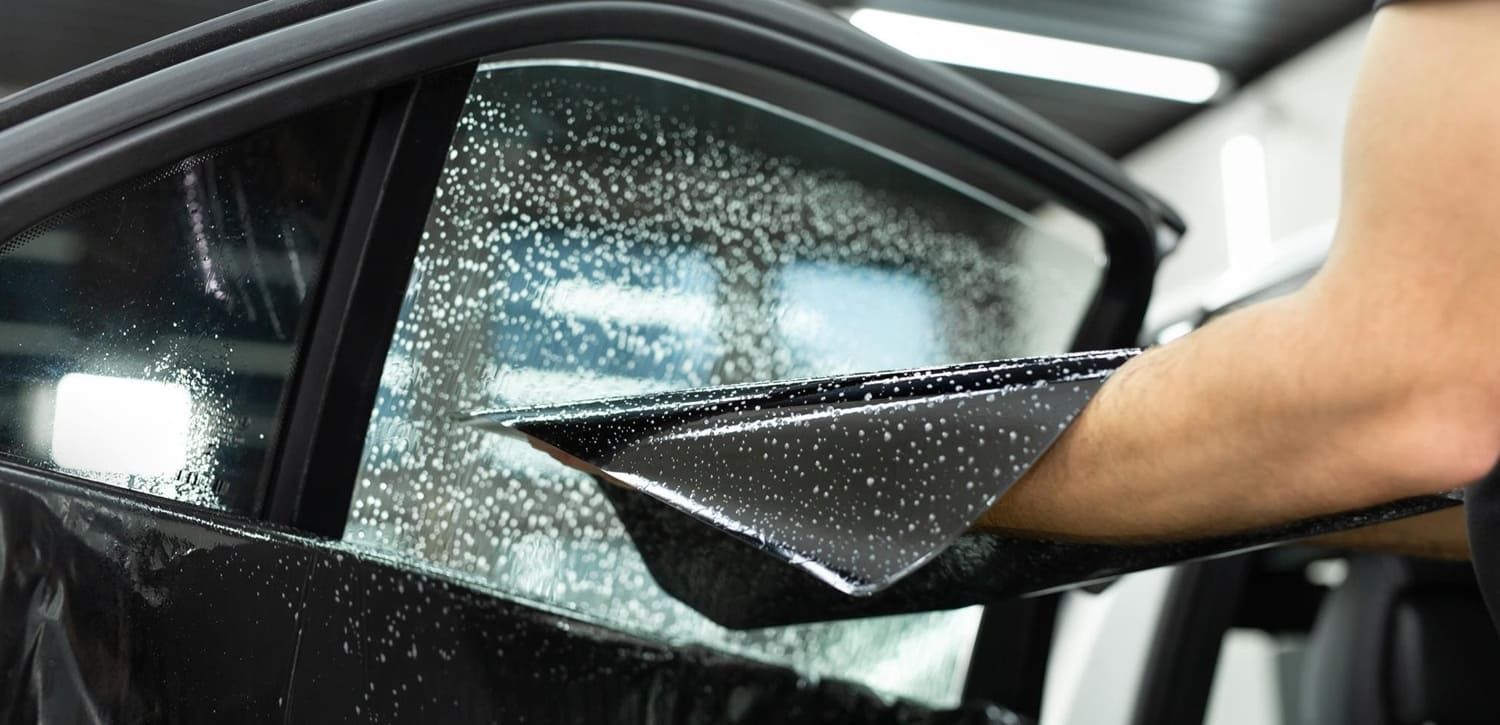
    Avoiding Damage To Window Tint

    Window tint can be delicate. Use only cleaning products that are safe for tinted glass. Avoid ammonia-based cleaners as they can peel or discolor tint. Use a soft microfiber cloth to prevent scratches. Clean gently in circular motions to protect the film. Avoid sharp tools or scrapers on tinted windows.

    Safe Use Of Cleaning Chemicals

    Choose mild, non-toxic cleaning solutions for car windows and mirrors. Read labels carefully to avoid harmful ingredients. Wear gloves to protect your skin from irritation. Work in a well-ventilated area to reduce fumes. Never mix different cleaning chemicals; this can create dangerous gases. Store cleaning products safely away from children and pets.

    Frequently Asked Questions

    How Often Should I Clean Car Windows And Mirrors?

    Clean your car windows and mirrors every two weeks. Frequent cleaning improves visibility and safety while driving. Regular maintenance prevents buildup of dirt and grime, ensuring clear views.

    What Is The Best Solution For Cleaning Car Windows?

    Use a mixture of water and vinegar or a commercial glass cleaner. Avoid ammonia-based products as they can damage window tint. Always use a microfiber cloth for streak-free results.

    How Do I Remove Stubborn Stains From Car Mirrors?

    Apply a small amount of rubbing alcohol on a cloth. Gently rub the stain until it lifts. Avoid harsh scrubbing to prevent scratches or damage to the mirror surface.

    Can I Use Household Glass Cleaner On Car Windows?

    Yes, but ensure it is ammonia-free. Ammonia can damage tint films and rubber seals. Choose a product specifically designed for automotive glass for best results.

    Conclusion

    Cleaning car windows and mirrors keeps your view clear and safe. Use simple tools like microfiber cloths and gentle cleaners. Wipe in circular motions to avoid streaks. Regular cleaning stops dirt from building up. Clean mirrors help you see better on the road.

    Small efforts save you from big problems later. Stay consistent and make cleaning part of your routine. Clear windows and mirrors mean safer driving every time. Easy steps lead to better visibility and peace of mind.

  • How to Clean Broken Glass from Car: Quick & Safe Cleanup Tips

    How to Clean Broken Glass from Car: Quick & Safe Cleanup Tips

    Imagine finding broken glass scattered all over your car’s seat or floor. It’s not just messy—it’s dangerous.

    You want to get rid of every tiny shard quickly and safely, but how? If you’re worried about missing pieces or accidentally hurting yourself, you’re in the right place. This guide will show you exactly how to clean broken glass from your car with simple, effective steps.

    By the end, you’ll feel confident handling the mess without stress or risk. Keep reading to protect yourself and your car.

    How to Clean Broken Glass from Car: Quick & Safe Cleanup Tips

    Credit: miracleagc.com

    Assess The Situation

    Assessing the situation is the first step after glass breaks in your car. It helps you stay safe and clean up correctly. Take a moment to look around and understand what happened. This careful check makes the cleanup easier and safer.

    Do not rush. Stay calm and follow simple steps to avoid injuries and further damage.

    Check For Injuries

    Look for any cuts or wounds on yourself and passengers. Broken glass can cause small but painful injuries. If someone is hurt, give first aid right away. Use a clean cloth to stop bleeding. Seek medical help if the injury is serious. Never ignore any pain or bleeding after glass breaks.

    Identify Glass Type

    Know what kind of glass has broken. Car windows often use tempered or laminated glass. Tempered glass breaks into small pieces and is easier to clean. Laminated glass cracks but stays mostly in place. This knowledge helps you choose the right cleaning method. It also guides you on what safety gear to use during cleanup.

    How to Clean Broken Glass from Car: Quick & Safe Cleanup Tips

    Credit: www.youtube.com

    Gather Cleaning Tools

    Gathering the right tools makes cleaning broken glass from your car safer and easier. Prepare before you start. This helps avoid injury and speeds up the cleaning process. Use tools designed for handling sharp glass pieces. Organize everything in one place. This keeps you focused and efficient.

    Protective Gear

    Wear thick gloves to protect your hands from cuts. Safety goggles shield your eyes from tiny glass shards. Long sleeves and pants prevent scratches on your skin. Use closed shoes to protect your feet. Proper protection reduces the risk of accidents. Never skip this step for your safety.

    Cleaning Supplies

    Gather a broom and dustpan to sweep up larger glass pieces. Use a vacuum cleaner for tiny shards in tight spaces. Sticky tape helps pick up small glass fragments easily. Have a sturdy trash bag ready to dispose of broken glass. Prepare a damp cloth to wipe the area clean. These supplies make the cleanup thorough and safe.

    Remove Large Glass Pieces

    Removing large glass pieces from your car is the first step to a safe cleanup. Broken glass can cause cuts and injuries. Handle big shards carefully to avoid harm. Use the right tools and methods to pick up these pieces. Safety should be your top priority.

    Use Gloves And Tongs

    Wear thick gloves to protect your hands from sharp edges. Do not try to pick up glass with bare hands. Use tongs or pliers to grab large shards. This keeps your hands far from danger. Move slowly and carefully to avoid dropping glass.

    Dispose Safely

    Put large glass pieces in a strong container. Use a cardboard box or a thick plastic container. Seal the container tightly before throwing it away. Label it as broken glass to warn others. This prevents injuries to trash handlers and pets.

    Vacuum Small Shards

    Cleaning up broken glass from your car needs careful attention. Small shards can hide in tight spots. Vacuuming these tiny pieces helps keep your car safe and clean. It removes sharp bits that might cut skin or damage upholstery. Use a vacuum that works well on small debris. Take your time to cover all areas where glass can hide. This step is important to finish the cleanup properly.

    Choose The Right Vacuum

    Select a vacuum with strong suction for small shards. A handheld vacuum or one with a narrow nozzle fits well in tight spaces. Check if the vacuum has a HEPA filter to trap tiny glass pieces. Avoid vacuums with weak suction that may leave shards behind. Make sure the vacuum is easy to handle for detailed cleaning.

    Vacuum Interior And Carpets

    Start vacuuming from hard surfaces like the dashboard and door panels. Use slow, steady movements to catch all glass fragments. Move to the seats and carpets, paying close attention to seams and crevices. Change vacuum attachments to reach under seats and between cushions. Repeat vacuuming several times to ensure no shards remain.

    Wipe Down Surfaces

    Cleaning broken glass from your car is not just about picking up the big pieces. Tiny shards can stick to surfaces and cause harm later. Wiping down all areas carefully helps remove these hidden bits. It also clears dust and dirt stirred by the glass breakage. This step makes your car safer and cleaner.

    Use Damp Cloth

    Take a soft cloth and dampen it with water. Avoid soaking it too much to prevent water damage. Gently wipe all flat surfaces where glass might have landed. Seats, dashboard, and door panels need attention. The damp cloth traps small glass pieces that a dry cloth might miss. Rinse the cloth often to keep it clean and effective.

    Check Hard-to-reach Areas

    Glass shards hide in corners and crevices. Look under seats, between cushions, and in door pockets. Use a damp cloth or a small brush to clean these spots. Shine a flashlight to spot shiny glass bits. Taking time here prevents injuries and keeps your car truly clean.

    Prevent Future Breakage

    Preventing future glass breakage in your car saves time and money. It also keeps you safe. Taking simple steps helps avoid costly repairs. Protect your car by caring for its windows and choosing safe parking spots.

    Inspect Windows Regularly

    Check your car windows often for cracks or chips. Small damage can grow bigger fast. Fix minor cracks before they spread. Clean windows clearly to spot problems early. Regular checks keep your glass strong and intact.

    Park In Safe Areas

    Choose parking spots away from high traffic or risky zones. Avoid places near construction or busy streets. Park under lights or in secure lots. Safe parking reduces chances of accidents or vandalism. Protect your car glass by picking safe locations every time.

    How to Clean Broken Glass from Car: Quick & Safe Cleanup Tips

    Credit: miracleagc.com

    Frequently Asked Questions

    How Do I Safely Remove Broken Glass From My Car?

    Wear thick gloves and use a broom to sweep large shards carefully. Use a vacuum with a hose attachment to pick up smaller pieces. Dispose of glass in a sturdy container to avoid injury. Always check for hidden shards in upholstery and crevices.

    What Tools Are Best For Cleaning Car Broken Glass?

    Use thick gloves, a broom, dustpan, and a vacuum cleaner with a narrow nozzle. Sticky tape or a damp cloth helps pick up tiny shards. Having a flashlight can help spot hidden glass pieces in dark areas.

    Can Broken Glass Damage Car Upholstery?

    Yes, sharp glass pieces can puncture or scratch upholstery. Tiny shards can embed in fabric and cause discomfort or injury. Thoroughly vacuum and inspect seats and carpet after glass removal to prevent damage and ensure safety.

    How Do I Prevent Glass Shards After A Car Window Breaks?

    Remove large glass pieces immediately and vacuum the area thoroughly. Use sticky tape to lift small shards from fabric and hard surfaces. Avoid touching the glass directly with bare hands. Clean the area multiple times to ensure no shards remain.

    Conclusion

    Cleaning broken glass from your car takes care and patience. Use gloves and a broom to remove large pieces safely. A vacuum helps pick up tiny shards. Check every corner carefully to avoid injuries later. Always dispose of glass in a sturdy container.

    Keep your car clean and safe for everyone inside. Taking these simple steps protects you and your passengers. Stay cautious and handle broken glass with care. Safety is the most important part of the cleanup.

  • How to Quickly Clean Car Windows: Easy Tips for a Streak-Free Shine

    How to Quickly Clean Car Windows: Easy Tips for a Streak-Free Shine

    Are your car windows foggy, streaked, or covered in dirt? Clear windows don’t just make your car look great—they keep you safer by improving your vision on the road.

    But cleaning them can feel like a hassle, especially when you’re short on time. What if you could make your car windows spotless in just a few minutes? You’ll discover simple, effective tips to quickly clean your car windows and enjoy a crystal-clear view every time you drive.

    Keep reading—you’ll be amazed at how easy it is to get professional-level results without the fuss.

    How to Quickly Clean Car Windows: Easy Tips for a Streak-Free Shine

    Credit: www.endurancewarranty.com

    Tools You Need

    Cleaning car windows fast needs the right tools. Using proper tools makes the job easier and gives better results. You save time and get sparkling clear windows that improve your view and safety.

    Best Cleaning Solutions

    Choose a cleaning solution made for glass. Avoid harsh chemicals that can leave streaks or damage tint. Spray bottles with ammonia-free glass cleaner work well. Homemade mixes of water and vinegar also clean effectively. Use enough solution to loosen dirt but not soak the glass.

    Effective Cloth Types

    Microfiber cloths are best for cleaning windows. They absorb dirt and liquid without scratching glass. Avoid paper towels or rough fabrics that leave lint or streaks. Use a dry cloth to polish the glass after cleaning. Keep cloths clean to avoid spreading dirt again.

    Helpful Accessories

    A squeegee helps remove water and cleaning solution quickly. It leaves a smooth, streak-free finish. Use small brushes for corners and edges. A spray bottle allows even application of cleaner. Gloves protect your hands from chemicals and dirt. Keep all tools handy for fast cleaning.

    How to Quickly Clean Car Windows: Easy Tips for a Streak-Free Shine

    Credit: www.wikihow.com

    Preparing The Windows

    Preparing your car windows properly makes cleaning faster and easier. It helps remove surface dirt that can cause streaks. A clean start leads to clearer windows and better results. Focus on two main steps before you begin wiping the glass.

    Removing Dust And Debris

    Start by brushing off loose dust and debris. Use a soft cloth or a microfiber duster. This prevents scratches on the glass during cleaning. Dirt and grit can smear and reduce visibility. Take your time to clear every corner and edge.

    Choosing The Right Environment

    Pick a shaded spot to clean your windows. Direct sunlight can dry the cleaner too fast. It leaves streaks and spots on the glass. Avoid windy areas to stop dust from settling again. A calm, cool place works best for a spotless finish.

    Step-by-step Cleaning Process

    Cleaning car windows fast and well needs a clear plan. Follow each step to get clear, shiny windows without stress. This simple process saves time and makes your car look great.

    Applying Cleaner Correctly

    Spray the cleaner evenly across the window surface. Hold the bottle about 6 inches from the glass. Avoid soaking the edges to stop drips. Use a cleaner made for glass to avoid streaks and damage.

    Wiping Techniques For Streak-free Shine

    Use a clean, dry microfiber cloth for wiping. Move the cloth in a circular motion first. Then wipe in a vertical or horizontal line. This helps remove dirt and avoid streaks. Flip the cloth to a dry side often.

    Dealing With Tough Spots

    For stubborn marks, apply cleaner directly to the spot. Let it sit for a few seconds to loosen dirt. Use a soft cloth or sponge to rub gently. Repeat if needed, but do not scrub hard to avoid scratches.

    Tips For Interior Windows

    Cleaning car interior windows is important for clear vision and safety. Dirt and smudges inside can block sunlight and cause glare. Regular cleaning keeps windows clear and your drive safer.

    Use the right tools and products to avoid damage. A few simple steps make interior window cleaning fast and effective.

    Avoiding Fog And Smudges

    Foggy windows reduce visibility and can be dangerous. To stop fog, clean windows often and dry them well. Use a microfiber cloth to avoid leaving streaks. Wipe in a circular motion for best results. Avoid touching glass with dirty hands to keep smudges away.

    Safe Cleaning Products For Interiors

    Choose cleaning products made for car interiors. Avoid ammonia or harsh chemicals that can damage glass or plastics. Water with a little vinegar or a gentle glass cleaner works well. Spray cleaner on the cloth, not directly on the window. This prevents overspray on dashboard or seats.

    Maintaining Clean Windows

    Keeping car windows clean improves visibility and safety. It also makes your car look neat and well cared for. Regular care helps avoid tough stains and spots. Small efforts every day keep windows clear and shiny.

    Simple habits can reduce the time spent on deep cleaning. Clean windows let sunlight in and give a better driving experience. Follow these easy tips to maintain spotless car windows quickly.

    Quick Daily Wipes

    Use a microfiber cloth for fast daily cleaning. It removes dust and light dirt without scratching glass. Keep a cloth in your car for quick access. Wiping windows each day stops grime buildup. Focus on the inside glass where fog and fingerprints form fast.

    Preventing Dirt Build-up

    Park in shaded or covered areas to reduce dust on windows. Avoid parking under trees to prevent sap and bird droppings. Wash your car regularly to stop dirt from sticking. Use water-repellent sprays to help dirt slide off. Clean windows stay clearer longer with these small steps.

    Common Mistakes To Avoid

    Cleaning car windows seems simple, but many people make common mistakes. These errors slow down the process and leave streaks or smudges. Avoiding these mistakes helps you clean faster and get clearer windows.

    Using The Wrong Materials

    Using old newspapers or rough cloth can scratch your windows. Avoid paper towels that leave lint behind. Choose a microfiber cloth or a soft, clean towel. Use a cleaner made for glass, not household cleaners with harsh chemicals.

    Cleaning In Direct Sunlight

    Cleaning windows under the hot sun causes the cleaner to dry too fast. This leaves streaks and spots on the glass. Clean your windows in the shade or during cooler parts of the day. This helps the cleaner work better and gives a clearer finish.

    How to Quickly Clean Car Windows: Easy Tips for a Streak-Free Shine

    Credit: www.youtube.com

    Frequently Asked Questions

    How Do I Clean Car Windows Quickly?

    Use a microfiber cloth and a glass cleaner for fast results. Spray cleaner, wipe in circular motions, then dry with a clean cloth. This method removes dirt and streaks efficiently.

    What Is The Best Cleaner For Car Windows?

    A commercial glass cleaner or a mixture of vinegar and water works well. Avoid ammonia-based products as they can damage tint films. Always choose a cleaner that leaves no residue.

    How Often Should I Clean My Car Windows?

    Clean your car windows at least once every two weeks. Regular cleaning improves visibility and safety. More frequent cleaning is needed in dusty or rainy conditions.

    Can I Use Household Glass Cleaner On Car Windows?

    Yes, but only if it’s ammonia-free to protect window tint. Ammonia can cause fading and damage to tint films. Always check the product label before use.

    Conclusion

    Cleaning car windows quickly can make a big difference. Clear windows help you see better and drive safely. Use simple tools like a microfiber cloth and glass cleaner. Wipe in a circular motion for best results. Don’t forget to clean both inside and outside surfaces.

    Regular cleaning keeps dirt and streaks away. A little effort saves time later. Try these easy steps next time your windows look dirty. Clean windows make every drive more pleasant and safe.

  • How to Clean Car Windows After Removing Tint: Easy Sparkling Tips

    How to Clean Car Windows After Removing Tint: Easy Sparkling Tips

    Removing tint from your car windows can leave behind sticky residue and streaks that are frustrating to clean. If you want your windows to look crystal clear and spotless again, you need the right steps and tools.

    You’ll discover simple and effective methods to get your car windows shining like new after tint removal. By following these tips, you’ll avoid common mistakes and save time, making your car look fresh and well-maintained. Keep reading to learn exactly how to clean your car windows the right way.

    How to Clean Car Windows After Removing Tint: Easy Sparkling Tips

    Credit: blog.edenautoglass.com

    Prepare Your Cleaning Supplies

    Preparing your cleaning supplies is the first step after removing tint from car windows. Having the right tools makes cleaning easier and prevents damage. It helps you get clear, streak-free glass fast. Take time to gather everything before starting.

    Choose The Right Cleaner

    Select a glass cleaner made for automotive windows. Avoid ammonia-based products. They can harm window seals and tint residue. Use a gentle, non-abrasive cleaner for best results. A cleaner with a spray nozzle works well. It helps cover large areas quickly.

    Gather Soft Cloths And Tools

    Use soft microfiber cloths to avoid scratches. Have several cloths ready for different cleaning stages. A plastic scraper or razor blade can remove stubborn adhesive. Be careful not to scratch the glass. Paper towels leave lint and are not recommended.

    How to Clean Car Windows After Removing Tint: Easy Sparkling Tips

    Credit: www.chemicalguys.com

    Remove Residue From Tint Adhesive

    After removing window tint, sticky residue often stays on the glass. This residue comes from the adhesive used to hold the tint film. It can be tough and ugly. Cleaning it properly makes your windows clear and smooth again.

    Removing tint adhesive residue is important. It improves visibility and stops dirt from sticking. Use gentle, easy methods to avoid scratching the glass. Here are three simple ways to clean off the residue effectively.

    Use Warm Soapy Water

    Start with warm water mixed with mild soap. Dip a soft cloth or sponge into the solution. Rub the residue gently in circular motions. The soap breaks down the sticky glue slowly. Rinse with clean water and dry with a microfiber cloth. This method works well for light residue.

    Apply Vinegar Solution

    Mix equal parts white vinegar and water in a spray bottle. Spray the solution onto the adhesive spots. Let it sit for 5 minutes to soften the glue. Wipe the area with a clean cloth or paper towel. Vinegar helps dissolve the sticky film without harsh chemicals.

    Try Rubbing Alcohol For Stubborn Spots

    Use rubbing alcohol on tough adhesive marks. Apply it to a cotton ball or cloth. Rub gently over the sticky residue until it lifts. Alcohol breaks down the glue quickly. Avoid using too much to protect window surfaces. Finish by wiping the glass with a damp cloth.

    Clean The Windows Thoroughly

    Cleaning car windows after removing tint is important for clear vision. Residue and dirt often remain on the glass. A thorough cleaning helps remove all marks and streaks. This step ensures your windows look fresh and spotless. Follow simple steps for the best results.

    Spray Glass Cleaner Evenly

    Start by spraying a good glass cleaner on the window. Hold the bottle about six inches away. Cover the entire surface with an even layer of cleaner. Avoid soaking the window to prevent drips. Use a cleaner made for glass to avoid damage.

    Wipe Using Circular Motions

    Use a clean microfiber cloth to wipe the glass. Move the cloth in small circles to lift dirt. Circular motions help avoid streaks on the glass. Change cloth sides if one side gets dirty. Keep wiping until the glass looks clear.

    Focus On Edges And Corners

    Edges and corners often hold leftover glue or dirt. Use the cloth to reach these tight spots carefully. Apply a bit more cleaner if needed for stubborn areas. Make sure no residue remains near the window frame. Clean corners improve overall window clarity.

    Dry And Polish For Sparkle

    Drying and polishing your car windows after tint removal helps bring out a clear shine. This step removes leftover moisture and tiny streaks that can hide the true sparkle of your glass. It also prepares the surface for better visibility and a fresh look.

    Using the right tools and technique makes this process simple. The goal is to leave your windows spotless and smooth without causing scratches or smudges.

    Use Microfiber Towels

    Choose soft microfiber towels for drying your car windows. These towels absorb water quickly and prevent scratching the glass. Avoid rough cloths or paper towels. They can leave lint or damage the surface.

    Gently wipe the window using a circular motion. Cover all areas to remove any wet spots. Replace towels if they become too wet. This ensures a dry and clean finish every time.

    Buff For Streak-free Shine

    Buffing your windows after drying removes streaks and marks. Use a clean, dry microfiber towel for this step. Lightly rub the glass in small circles. This action evens out the surface and boosts clarity.

    Pay attention to edges and corners. These areas often hold leftover residue from tint removal. Buffing here keeps the entire window crystal clear. A streak-free shine improves your car’s appearance and your driving safety.

    Prevent Future Stains And Damage

    After removing window tint, car glass can be more prone to stains and damage. Protecting the windows helps keep them clear and strong. Taking simple steps prevents dirt build-up and scratches. This also extends the life of your car windows.

    Avoid Harsh Chemicals

    Strong cleaners can harm car glass and seals. Use mild soap and water for cleaning. Avoid ammonia or bleach-based products. These chemicals cause discoloration and weaken the glass surface. Choose cleaners made for automotive windows. They clean well without causing damage.

    Maintain Regular Cleaning Schedule

    Cleaning windows often stops dirt from building up. Wipe down windows at least once a week. Use a soft cloth or microfiber towel. This prevents scratches from dust and grit. Regular cleaning also helps spot small damage early. Keep the glass clear and smooth for safe driving.

    How to Clean Car Windows After Removing Tint: Easy Sparkling Tips

    Credit: www.leostouchwindowtinting.com

    Frequently Asked Questions

    How Do I Remove Leftover Adhesive From Car Windows?

    Use a mixture of warm water and dish soap. Apply with a soft cloth and gently scrub. For stubborn residue, use a commercial adhesive remover safe for glass.

    What Is The Best Cleaner For Car Windows After Tint Removal?

    A vinegar and water solution works well. It cleans without streaks and removes dirt easily. Avoid ammonia-based cleaners to protect window seals.

    How Soon Can I Clean My Car Windows After Tint Removal?

    Wait at least 24 hours. This allows any moisture or chemicals from tint removal to dry fully. Cleaning too soon may smear or damage the glass.

    Can I Use Razor Blades To Clean Tint Residue?

    Yes, but carefully. Use a new, clean razor at a 45-degree angle. Avoid scratching by keeping the blade flat and moving gently.

    Conclusion

    Cleaning car windows after tint removal takes care and patience. Use gentle cleaners and soft cloths for best results. Avoid harsh chemicals that can damage glass surfaces. Take your time to remove all residue for a clear, streak-free finish. Clean windows improve visibility and keep your car looking neat.

    Simple steps make a big difference. Keep these tips in mind for a smooth cleaning process next time. Your car will thank you with clearer, brighter windows.

  • How to Clean Car Window Switch: Easy Steps for a Sparkling Result

    How to Clean Car Window Switch: Easy Steps for a Sparkling Result

    Your car window switch is something you use every day, yet it rarely gets the cleaning attention it deserves. Over time, dirt, dust, and grime build up, making your switches sticky or unresponsive.

    If you’ve noticed your windows acting slow or not moving at all, the switch might be the culprit. But don’t worry—you don’t need to be a mechanic to fix it. In this guide, you’ll learn simple, step-by-step ways to clean your car window switch quickly and safely.

    Keep reading to bring smooth control back to your windows and avoid costly repairs down the road.

    How to Clean Car Window Switch: Easy Steps for a Sparkling Result

    Credit: www.shopfesler.com

    Tools Needed

    Cleaning a car window switch needs the right tools for best results. Using proper tools helps avoid damage and makes the job easier.

    Prepare all tools before starting. This saves time and keeps the process smooth.

    Small Flathead Screwdriver

    This tool helps gently pry out the switch panel. It fits into tight spots without scratching the surface.

    Soft Brush

    A soft brush removes dust and dirt from inside the switch. It reaches small crevices without causing harm.

    Microfiber Cloth

    Use a microfiber cloth to wipe the switch surface. It cleans well and does not leave lint behind.

    Isopropyl Alcohol

    Isopropyl alcohol cleans sticky residue and kills germs. Use a small amount on the cloth for safe cleaning.

    Compressed Air Can

    Compressed air blows out dust from hard-to-reach areas. It prevents dirt build-up that blocks switch function.

    Safety Precautions

    Cleaning your car window switch is a simple task. Safety is important before you start. Taking precautions protects you and your car’s electrical parts. Follow these steps to stay safe while cleaning.

    Turn Off The Car Power

    Always switch off your car’s engine. Remove the key from the ignition. This stops any electrical flow to the switch. It prevents short circuits or shocks during cleaning.

    Use Proper Tools

    Use small, soft tools like a cotton swab or soft cloth. Avoid sharp or metal objects. They can damage the switch or wiring. Gentle tools help clean without harm.

    Avoid Wetting Electrical Parts

    Do not spray water or cleaning liquid directly on the switch. Use a slightly damp cloth instead. Excess moisture can cause electrical faults. Keep the area dry to protect the switch.

    Wear Protective Gloves

    Wear gloves to protect your hands from dirt and chemicals. Gloves also reduce the risk of static electricity. Static can damage sensitive car electronics. Choose gloves that fit well for better control.

    Work In A Well-lit Area

    Good lighting helps you see dirt and parts clearly. It reduces mistakes and accidents. A bright space makes cleaning easier and safer. Use a flashlight if needed.

    Accessing The Window Switch

    Accessing the window switch is the first step to clean it properly. This part is usually inside the door panel. You need to remove the door panel carefully to reach the switch. Understanding this process helps avoid damage to your car door.

    Removing Door Panel

    Start by lowering the window completely. Use a screwdriver to remove screws around the door panel. Some screws hide behind covers or handles. Gently pry the panel away using a trim tool or flat plastic object. Work slowly to avoid breaking clips. Once loose, lift the panel upward to detach it from the door.

    Locating The Switch

    The window switch is attached to the door panel’s inner side. Look for a small plastic box with buttons. It connects to the car’s wiring with a plug. Carefully unplug the connector to free the switch. Now you can clean or replace the switch as needed.

    Cleaning Materials

    Choosing the right cleaning materials is key to cleaning a car window switch safely. Using harsh tools or liquids can damage the switch. Soft and gentle items work best to avoid scratches or electrical problems.

    It is important to gather all needed materials before starting. This makes the process smooth and quick. Clean tools also help keep dirt from spreading inside the switch.

    Microfiber Cloth

    A microfiber cloth is perfect for cleaning car window switches. It traps dirt and dust without scratching the surface. Use it dry or slightly dampened with water for best results.

    Isopropyl Alcohol

    Isopropyl alcohol cleans well and dries fast. It removes grease and sticky residue effectively. Use a small amount on a cloth or cotton swab. Avoid pouring alcohol directly on the switch.

    Cotton Swabs

    Cotton swabs reach tight spots inside the switch. Dip them lightly in alcohol or water. Swab gently to clean corners and edges without damaging parts.

    Soft-bristle Brush

    A soft-bristle brush helps remove dust and debris. Choose a small brush like a paintbrush or a toothbrush. Brush carefully to loosen dirt without pushing it further inside.

    Cleaning Process

    Cleaning the car window switch keeps it working smoothly and extends its life. Dirt and dust can build up inside the switch, causing it to stick or fail. A careful cleaning process removes these particles and restores proper function. This process is simple and can be done with a few basic tools.

    Dust And Debris Removal

    Start by turning off the car’s power to avoid any accidents. Use a soft brush or a can of compressed air to remove dust from around the switch. Gently clean the gaps and crevices where dirt hides. Be careful not to push debris further inside the switch. This step clears loose particles and prepares the surface for deeper cleaning.

    Using Cleaning Solutions

    Choose a mild electronic cleaner or a mix of water and isopropyl alcohol. Dampen a cotton swab or soft cloth with the solution. Wipe the switch surface and buttons carefully. Avoid soaking the switch to prevent damage. Cleaning solutions dissolve grime and help lift sticky residue.

    Drying The Switch

    After cleaning, let the switch air dry for several minutes. Use a dry cloth to remove any leftover moisture. Ensure no liquid remains inside the switch before turning the power back on. Proper drying prevents short circuits and keeps the switch safe to use.

    How to Clean Car Window Switch: Easy Steps for a Sparkling Result

    Credit: www.automerchants.com

    Reassembling The Door Panel

    Reassembling the door panel is the final step after cleaning the car window switch. It requires careful handling to avoid damage and ensure everything fits properly. Taking time to align parts correctly makes the panel look neat and work well.

    Follow simple steps to put the door panel back on. Check each part before securing it in place. Doing this helps avoid loose pieces and rattling sounds while driving.

    Aligning The Door Panel With Clips And Screws

    Start by positioning the door panel close to the door frame. Line up the clips with their holes carefully. Press gently to snap them in place without forcing. Use the screws you removed earlier to tighten the panel securely. Tight screws keep the panel stable and stop it from moving.

    Reconnecting Electrical Connectors

    Find all electrical connectors you unplugged before cleaning. Attach each connector firmly to its socket. Make sure connections are tight to avoid switch problems. Check the wires are not pinched or twisted. Proper connections help the window switch work smoothly.

    Testing The Window Switch Function

    Before closing the door completely, test the window switch. Press each button to check if windows move up and down. Confirm all functions respond correctly. Fix any issues by adjusting connections or panel position. Testing saves time and prevents rework later.

    Testing The Switch

    Testing the car window switch ensures it works correctly after cleaning. This step checks if the switch sends the right signals to the window motor. Testing helps find any hidden problems before reinstalling the switch. It saves time and prevents future issues with the window operation.

    Gather Necessary Tools

    Prepare a multimeter to measure electrical signals. Have a screwdriver ready to remove the switch panel. Keep the car keys nearby to turn on the ignition. These tools make testing easy and safe.

    Remove The Switch From The Door

    Use the screwdriver to carefully pry out the switch panel. Disconnect the wiring harness from the back of the switch. Keep track of screws and parts to avoid losing them. Handle the switch gently to prevent damage.

    Check For Power Supply

    Turn the car ignition on without starting the engine. Use the multimeter to check voltage at the switch terminals. A reading near 12 volts means power is present. No voltage means a wiring or fuse problem.

    Test The Switch Function

    Press the switch and measure if the multimeter shows voltage change. The switch should allow current flow when pressed. No change means the switch contacts may be dirty or broken. Clean or replace the switch if needed.

    Reinstall The Switch

    Once testing is complete, reconnect the wiring harness. Snap the switch panel back into the door frame. Tighten any screws removed during disassembly. Test the window operation again to confirm success.

    Maintenance Tips

    Maintaining your car window switch keeps it working smoothly and lasts longer. Dirt and dust can block the switch and cause problems. Simple steps can help avoid sticky or unresponsive switches. Regular care saves money on repairs and keeps your car comfortable.

    Clean The Switch Regularly

    Use a soft cloth to wipe the switch surface. Avoid wetting the switch directly with water. A small brush can remove dust from tight spaces. Keep the switch free from dirt and grime.

    Use Proper Cleaning Products

    Choose mild cleaners like rubbing alcohol or electronic cleaner spray. Avoid harsh chemicals that can damage plastic parts. Spray cleaner on a cloth, not directly on the switch. This prevents moisture from entering the switch.

    Check For Signs Of Wear

    Look for cracks, loose buttons, or unusual sounds when pressing. Early detection helps fix issues before they worsen. Replace damaged parts as soon as possible. Safe driving needs reliable window controls.

    Avoid Forceful Pressing

    Press the switch gently to avoid damage. Hard pressing may break internal components. Smooth operation extends the switch’s life. Teach others in the car to handle controls carefully.

    Keep The Interior Dry

    Moisture can cause corrosion inside the switch. Avoid spilling drinks or water near the controls. Use floor mats and keep windows closed during rain. Dry any wet spots immediately.

    How to Clean Car Window Switch: Easy Steps for a Sparkling Result

    Credit: www.youtube.com

    Frequently Asked Questions

    How Often Should I Clean My Car Window Switch?

    Clean your car window switch every 3 to 6 months. Regular cleaning prevents dirt buildup and ensures smooth operation. Frequent use attracts dust and grime, which can cause malfunctions.

    What Tools Are Needed To Clean A Car Window Switch?

    Use a soft cloth, cotton swabs, and isopropyl alcohol. A small brush helps remove dirt from crevices. Avoid harsh chemicals to prevent damage to the switch.

    Can I Clean The Switch Without Removing It?

    Yes, gently clean the switch surface with a cloth and cotton swabs. Avoid excessive moisture to prevent electrical damage. For deep cleaning, removing the switch is safer.

    What Should I Avoid When Cleaning The Window Switch?

    Avoid using excessive water or harsh chemicals. Do not spray cleaners directly on the switch. Prevent moisture from entering electrical components to avoid damage.

    Conclusion

    Cleaning your car window switch keeps it working smoothly. Dirt and dust can cause problems over time. Use a soft cloth and gentle cleaner for best results. Take care not to let moisture inside the switch. Regular cleaning helps avoid costly repairs later.

    Simple steps save time and money. Keep your car’s controls clean and responsive. A little effort goes a long way. Try this easy task today for better car care.

  • Car Glass Cleaning Hacks: Expert Tips for a Crystal Clear Shine

    Car Glass Cleaning Hacks: Expert Tips for a Crystal Clear Shine

    Your car’s glass can make or break your driving experience. Imagine cruising down the road with spotless, streak-free windows that give you crystal-clear views every time.

    But cleaning car glass isn’t always easy—smudges, dirt, and streaks can be stubborn. What if you could learn simple, effective hacks to make your glass shine like new, without spending a fortune or hours scrubbing? Keep reading, because these car glass cleaning hacks will change the way you clean your windows forever—and save you time and frustration.

    Choosing The Right Cleaning Tools

    Choosing the right tools makes car glass cleaning easier and more effective. Using proper items saves time and avoids scratches or streaks. It also helps keep your glass clear and safe for driving. Here are some essential tools to consider for a spotless finish.

    Microfiber Cloths Vs Regular Rags

    Microfiber cloths trap dirt and dust better than regular rags. They absorb moisture quickly and dry without leaving lint. Regular rags often leave streaks and tiny fibers behind. Microfiber cloths are gentle on glass and reduce scratches. Choose microfiber for a cleaner, clearer shine every time.

    Best Squeegees For Car Glass

    Squeegees remove water and cleaning solution efficiently. A good squeegee has a soft rubber blade to avoid glass damage. Small or handheld squeegees fit well on curved car windows. Look for squeegees with ergonomic handles for better grip. They help prevent streaks and speed up drying.

    Recommended Brushes For Tough Spots

    Brushes reach dirt in corners and edges where cloths cannot. Soft-bristle brushes avoid scratching the glass surface. Use brushes to clean stubborn grime and bug residue. Choose brushes with long handles for better control. They improve cleaning in hard-to-reach areas without damage.

    Car Glass Cleaning Hacks: Expert Tips for a Crystal Clear Shine

    Credit: www.youtube.com

    Effective Cleaning Solutions

    Keeping your car glass spotless requires the right cleaning solutions. The right products help remove dirt, grime, and streaks. Choose solutions that clean well without damaging the glass or car finish. This section covers simple DIY cleaners and trusted commercial products. It also highlights chemicals to avoid for safe cleaning.

    Diy Natural Cleaners

    Natural cleaners use ingredients found at home. Mix equal parts water and white vinegar for a strong cleaner. Add a few drops of dish soap to cut grease. Use a spray bottle for easy application. Clean with a microfiber cloth for best results. Baking soda also helps remove tough stains. These natural options are safe and cheap.

    Commercial Products That Work

    Many commercial glass cleaners offer quick, streak-free results. Look for products made specifically for car glass. These cleaners remove bugs, sap, and road grime well. Choose ammonia-free formulas to protect tinted windows. Spray on, wipe with a soft cloth, and watch the glass shine. Test a small area first to avoid damage.

    Avoiding Harmful Chemicals

    Harsh chemicals can damage your car’s glass and paint. Avoid cleaners with ammonia, bleach, or strong acids. These can cause discoloration or weaken window seals. Stay away from abrasive powders or rough scrubbing tools. Gentle cleaners and soft cloths keep your car looking its best. Protect your investment by choosing safe products.

    Step-by-step Cleaning Process

    Cleaning car glass can be simple with the right steps. Follow this clear process to get shiny, clear windows. Each step helps remove dirt and smudges without scratching the glass. This guide works for all car windows, inside and out.

    Preparing The Glass Surface

    Start by removing loose dirt and dust. Use a soft brush or dry cloth to wipe the glass. Avoid harsh scrubbing that can cause scratches. Make sure the glass is dry before applying any cleaner. This step helps the cleaner work better on the surface.

    Applying Cleaner Properly

    Choose a glass cleaner made for cars or a simple mix of water and vinegar. Spray the cleaner evenly on the glass. Use a microfiber cloth to spread the cleaner in small circles. Cover the entire window to avoid streaks. Work on one section at a time for best results.

    Removing Stubborn Stains

    For tough spots like bird droppings or sap, apply a little rubbing alcohol on a cloth. Gently rub the stain without pressing hard. Repeat if needed, but do not overdo it. After removing stains, wipe the glass again with a clean cloth. This will clear any leftover residue.

    Tips For Inside And Outside Glass

    Cleaning car glass both inside and outside is key for safety and clear views. Dirt, dust, and smudges can block your vision. Proper care keeps glass shiny and streak-free. These tips help clean every part of your car windows easily.

    Cleaning Interior Windows

    Start by rolling down the windows slightly. This makes cleaning corners easier. Use a soft microfiber cloth to avoid scratches. Spray a glass cleaner or a mix of vinegar and water. Wipe in a circular motion to remove dirt and fingerprints. Avoid strong chemicals that can harm the interior. Finish with vertical strokes to prevent streaks.

    Exterior Glass Maintenance

    Rinse the outside glass with water to remove loose dirt. Use a gentle car soap and a soft sponge. Clean in straight lines to avoid swirl marks. Dry with a clean microfiber towel for a clear finish. Check windshield wipers often and replace them when worn. Dirty wipers can leave streaks and scratch glass.

    Handling Tinted Windows

    Use mild cleaners safe for tint films. Avoid ammonia-based products as they damage tint. Apply cleaner to the cloth, not directly on glass. Clean gently to protect the tint layer. Dry the glass with a soft cloth to stop water spots. Careful cleaning keeps tints clear and long-lasting.

    Preventing Future Smudges And Streaks

    Keeping car glass clean is not just about wiping it once. It needs care to stop smudges and streaks from returning fast. Clean glass helps you see better and drives safer.

    Preventing future marks on your car glass makes every drive clearer. Small steps can keep your windshield shiny and neat longer. Let’s explore easy ways to protect your car glass.

    Using Water Repellents

    Water repellents create a thin layer on glass. This layer pushes water and dirt away. Rain slides off quickly, leaving less chance for spots. Apply repellents every few months for best results. Use a clean cloth to spread it evenly. Let it dry before driving.

    Regular Maintenance Schedule

    Clean your car glass often to avoid buildup. Set a weekly or biweekly cleaning time. Use gentle glass cleaner and soft cloths. Avoid harsh chemicals that damage glass or coatings. Check wiper blades regularly. Replace them if they leave streaks.

    Avoiding Common Mistakes

    Do not clean glass under direct sunlight. It causes cleaner to dry too fast and streak. Avoid using paper towels; they leave lint and scratches. Don’t spray too much cleaner; excess makes smudges. Wipe in circular motions or straight lines. Always clean inside and outside glass surfaces.

    Car Glass Cleaning Hacks: Expert Tips for a Crystal Clear Shine

    Credit: www.familyhandyman.com

    Seasonal Glass Care

    Seasonal changes affect your car glass in many ways. Each season brings unique challenges for glass care. Proper cleaning and protection help keep your glass clear and safe. Simple habits can make a big difference all year round.

    Follow these easy tips for each season to maintain spotless car windows. Your view stays clear and your driving safer.

    Winter De-icing Techniques

    Frost and ice form quickly on cold mornings. Avoid scraping hard with metal tools to protect your glass. Use a mixture of water and rubbing alcohol as a spray. This melts ice fast without damage. Cover your windshield with a towel or plastic sheet at night. It stops ice from building up. Start your engine early and turn on the defroster. Warm air loosens ice for easy removal.

    Summer Dust And Bug Removal

    Summer heat dries dust on your glass, making it hard to clean. Use a soft microfiber cloth with water to wipe dust gently. For bugs, soak the area with a vinegar and water mix. Let it sit a few minutes before wiping. Avoid harsh scrubbing that can scratch glass. Clean your windows often to prevent build-up and keep clear vision.

    Protecting Glass In Harsh Weather

    Strong sun, rain, and wind can wear down your car glass. Apply a water-repellent treatment to help rain slide off quickly. This reduces water spots and improves visibility. Park your car in shaded or covered areas to prevent sun damage. Regular cleaning removes dirt and grime that can scratch glass. Use gentle cleaners made for car windows only.

    Car Glass Cleaning Hacks: Expert Tips for a Crystal Clear Shine

    Credit: www.novusglass.com

    Frequently Asked Questions

    How Do I Clean Car Glass Without Streaks?

    Use a microfiber cloth and a vinegar-water mix for streak-free glass. Wipe in circular motions and finish with vertical strokes. Avoid cleaning in direct sunlight to prevent streaks.

    What Household Items Clean Car Windows Effectively?

    Vinegar, dish soap, and rubbing alcohol are great for cleaning car glass. Mix vinegar and water or a drop of dish soap with water. Apply with a microfiber cloth for best results.

    Can I Use Newspaper To Clean Car Glass?

    Yes, newspaper can clean car glass effectively. It absorbs moisture and leaves a streak-free finish. Avoid colored or glossy newspapers to prevent ink transfer.

    How Often Should I Clean My Car Windows?

    Clean car windows every two weeks or more often if dirty. Regular cleaning improves visibility and removes dirt, grime, and pollutants. It also prolongs the life of your glass.

    Conclusion

    Clean car glass helps you see clearly and drive safely. Use simple hacks to keep your windows spotless. Regular cleaning stops dirt and grime from building up. Try natural ingredients like vinegar or baking soda for best results. Small efforts save money and time in the long run.

    Keep your car glass clear and enjoy better visibility. A clean windshield also improves your car’s look. Start using these easy tips today and notice the difference. Clear glass means safer trips and a nicer ride.

  • How to Clean Car Windows So They Don’T Fog: Expert Tips Revealed

    Nothing is more frustrating than trying to drive with foggy car windows blocking your view. You want clear, spotless windows that keep you safe and confident on the road.

    But how do you stop that annoying fog from forming in the first place? If you’ve struggled with this problem, you’re not alone—and the good news is, the solution is simpler than you think. Keep reading to discover easy, effective ways to clean your car windows so they don’t fog up again.

    Your next drive will be clearer and safer.

    How to Clean Car Windows So They Don'T Fog: Expert Tips Revealed

    Credit: stonercarcare.com

    Causes Of Foggy Car Windows

    Foggy car windows can be a real problem. They block your view and make driving unsafe. Understanding why this happens helps you stop it fast. Knowing the causes is the first step to clear windows every time.

    Why Windows Fog Up

    Windows fog up when warm, moist air meets cold glass. The moisture in the air turns into tiny water droplets. These droplets stick to the glass and form fog. Inside your car, moisture comes from breathing, wet clothes, and spills. This moisture causes the windows to fog.

    Effect Of Temperature And Humidity

    Temperature differences between inside and outside the car affect fogging. Cold glass cools the air near it, causing moisture to condense. High humidity inside the car means more moisture in the air. This increases the chance of fog forming on windows. Lower humidity and balanced temperatures help keep windows clear.

    How to Clean Car Windows So They Don'T Fog: Expert Tips Revealed

    Credit: www.youtube.com

    Essential Cleaning Tools

    Cleaning car windows properly stops fog from building up inside. The right tools make the process simple and effective. Using poor tools can leave streaks and dirt behind. Choose the best cloths and cleaning solutions for clear, fog-free windows. This section covers the essential tools for cleaning car windows well.

    Best Cloths For Streak-free Cleaning

    Microfiber cloths work best for cleaning car windows. They absorb dirt and moisture without scratching glass. Avoid paper towels or regular cloths; they leave lint and streaks. Use a clean, dry microfiber cloth for the final wipe. This ensures the glass stays clear and shiny. Soft, lint-free cloths help prevent fogging by removing all residue.

    Effective Cleaning Solutions

    Use a gentle, ammonia-free glass cleaner for car windows. Ammonia can damage window tint and rubber seals. A mix of water and vinegar also cleans well. Spray the solution lightly on the cloth, not directly on the glass. This avoids drips and spots. Clean windows dry quickly and stay clear longer with the right solution.

    Step-by-step Cleaning Process

    Cleaning car windows properly stops fog from building up. Follow these simple steps to get clear, streak-free windows. This helps you see better and drives safer. Each step is easy and takes just a few minutes.

    Preparing The Windows

    Start by removing loose dirt and dust from the windows. Use a soft brush or cloth to wipe the surface. Avoid harsh scrubbing that can scratch the glass. Make sure the car is parked in the shade to prevent quick drying.

    Next, open the doors or windows slightly. This improves air flow and helps with cleaning. Check for any sticky spots or residue that need extra attention.

    Applying Cleaning Solution

    Use a gentle glass cleaner made for cars or mix water with vinegar. Spray the solution evenly on the glass surface. Avoid soaking the edges to prevent damage to seals.

    Wipe the windows with a clean microfiber cloth. Use circular motions to lift dirt and grime. Flip the cloth to a dry side to avoid smearing.

    Drying And Polishing

    Dry the windows with a fresh, dry microfiber cloth. This removes any leftover moisture and stops streaks. Buff the glass in small circles for a clear shine.

    Make sure no spots or smudges remain. Clean both inside and outside surfaces for the best results. This final step keeps fog from forming on your windows.

    How to Clean Car Windows So They Don'T Fog: Expert Tips Revealed

    Credit: www.billholtblueridge.com

    Preventing Fog With Anti-fog Treatments

    Foggy car windows reduce visibility and cause safety risks. Anti-fog treatments help stop this problem by creating a thin layer that stops moisture buildup. This layer keeps windows clear and improves driving comfort.

    Anti-fog treatments come in many forms. Some are sprays, others are wipes or coatings. Choosing the right type depends on your needs and window material.

    Types Of Anti-fog Products

    Spray-on solutions are easy to use. They cover the window evenly and dry fast. These sprays work well for daily use.

    Wipes come pre-soaked with anti-fog solution. They clean and protect windows at the same time. Wipes are good for quick touch-ups.

    Permanent coatings provide long-lasting protection. They need careful application but last longer than sprays or wipes. These coatings suit people who want less frequent treatment.

    How To Apply Anti-fog Coatings

    Start by cleaning the window thoroughly. Use a glass cleaner and dry it well. This step removes dirt and oils that block the treatment.

    Apply the anti-fog product as the instructions say. For sprays, spray evenly and wipe gently. For wipes, rub the surface in small circles.

    Let the coating dry completely before touching the window. Avoid wiping or exposing it to water during this time. This ensures the treatment sticks well.

    Repeat the application regularly to keep windows fog-free. Follow product guidelines for best results.

    Additional Tips To Keep Windows Clear

    Keeping car windows clear is important for safe driving. Foggy windows block your view and cause accidents. Cleaning alone is not enough. Follow these extra tips to stop windows from fogging up quickly.

    Proper Ventilation Techniques

    Ventilation helps reduce moisture inside the car. Open a window slightly to let fresh air in. This stops warm air from building up inside. Use the air vents to move air around. Avoid recirculating air, as it traps moisture inside. Fresh air lowers humidity and clears fog faster.

    Using Car’s Defrost System Effectively

    The defrost system clears fog on windows quickly. Turn it on as soon as you start driving. Set the fan to high and direct air to the windshield. Use warm air, not hot, to avoid cracking glass. The defrost removes moisture from the glass surface. It also warms the inside of the car, reducing fog.

    Common Mistakes To Avoid

    Cleaning car windows seems simple but many make common mistakes. These errors can cause fogging and streaks. Avoiding these mistakes helps keep your windows clear and safe. Focus on the right cleaning habits for better results.

    Using Wrong Cleaners

    Not all cleaners work well on car windows. Some contain chemicals that leave residue. These residues attract dust and cause fogging. Avoid household cleaners with ammonia or bleach. Use cleaners made for automotive glass only. They clean well and do not harm window coatings.

    Ignoring Interior Window Cleaning

    Many people clean only the outside of windows. Inside surfaces get dirty and fog easily. Smoke, moisture, and dust build up on the inside. This buildup causes fog to form quickly. Clean both sides of the window regularly. Use a microfiber cloth for a streak-free finish.

    Frequently Asked Questions

    How Do I Prevent Car Windows From Fogging?

    Clean windows with a vinegar-water mix to remove dirt and residue. Use an anti-fog spray for added protection. Ensure your car’s ventilation system works well to reduce humidity inside.

    What’s The Best Cleaner For Car Windows?

    Use a mixture of vinegar and water or a dedicated automotive glass cleaner. Avoid ammonia-based products as they can damage tint and cause streaks.

    Why Do Car Windows Fog Up Inside?

    Fog forms when warm, moist air meets the cold glass surface. This condensation happens due to differences in temperature and humidity inside and outside the vehicle.

    How Often Should I Clean My Car Windows?

    Clean car windows at least once a week. Regular cleaning prevents buildup of dirt and oils that cause fogging and reduce visibility.

    Conclusion

    Cleaning car windows prevents fog and keeps your view clear. Use simple tools like a microfiber cloth and a good cleaner. Wipe windows regularly to stop dirt and moisture buildup. Keep your car ventilated to reduce inside humidity. These small steps make driving safer and more comfortable.

    Clear windows mean better visibility, especially in cold or rainy weather. Stay consistent with cleaning, and fog won’t be a problem. A clean car window helps you focus on the road ahead. Easy habits bring big benefits.

  • How to Clean Car Window Buttons: Easy Steps for Sparkling Results

    How to Clean Car Window Buttons: Easy Steps for Sparkling Results

    Have you ever noticed how sticky or unresponsive your car window buttons can get over time? Dirt, dust, and grime build-up can make them frustrating to use and even damage the controls.

    But don’t worry—you can fix this quickly and easily. In this guide, you’ll learn simple steps to clean your car window buttons, restore their smooth function, and keep your car’s interior looking fresh. Keep reading, and you’ll discover practical tips that save you time and money while making your daily drive more comfortable.

    Tools Needed

    Cleaning car window buttons is easy with the right tools. Using proper tools makes the job faster and better. You avoid damage and get a neat finish. Prepare these tools before you start to clean.

    Cleaning Solutions

    Choose a mild cleaning solution for the buttons. A mix of water and gentle soap works well. Avoid strong chemicals that can harm plastic parts. Isopropyl alcohol is good for tough grime. Use it sparingly to prevent damage.

    Brushes And Cloths

    Soft brushes help remove dirt from small spaces. A clean toothbrush is a perfect tool. Use microfiber cloths to wipe the buttons. They are gentle and absorb dirt well. Avoid rough cloths that might scratch the surface.

    Additional Supplies

    Cotton swabs help reach tight corners around buttons. Toothpicks can remove stubborn dirt carefully. A small vacuum cleaner can suck loose dust. Keep a bowl of clean water nearby for rinsing. Use gloves to protect your hands during cleaning.

    How to Clean Car Window Buttons: Easy Steps for Sparkling Results

    Credit: www.the-sun.com

    Prepare The Area

    Preparing the area before cleaning car window buttons is important. It helps avoid damage and makes cleaning easier. Follow simple steps to get ready.

    Turn Off The Car

    Always turn off the car before cleaning the buttons. This stops any electrical problems or accidents. Removing the key or pressing the power button off is best. Wait a few minutes to let the system shut down fully.

    Protect Surrounding Surfaces

    Cover nearby areas like the door panel and seats. Use a soft cloth or plastic wrap to keep them safe from cleaning liquids. This prevents stains and water damage. Avoid harsh chemicals that can harm the car’s interior.

    Remove Loose Dirt

    Removing loose dirt from car window buttons is the first step to clean them properly. Dirt and dust can gather around and inside the buttons. This makes the buttons sticky or hard to press. Cleaning loose dirt keeps the buttons working smoothly and looks better.

    Dusting The Buttons

    Use a soft brush or a microfiber cloth to dust the buttons. Gently brush around each button to remove loose dirt. Avoid using too much pressure to prevent damage. Dusting helps clear away dirt on the surface and edges.

    Work slowly and cover all buttons. Clean every corner to remove hidden dust. This step prepares the buttons for deeper cleaning later.

    Using Compressed Air

    Compressed air is great to blow out dirt from tight spaces. Hold the can upright and spray short bursts around the buttons. This pushes dirt out from hard-to-reach places inside the button gaps.

    Keep the nozzle a few inches away from the buttons. Avoid spraying too close to prevent moisture buildup. This method cleans dirt that brushing cannot reach.

    How to Clean Car Window Buttons: Easy Steps for Sparkling Results

    Credit: www.breakerlink.com

    Clean The Buttons

    Cleaning the car window buttons keeps them working well and looking neat. Dirt and grime build up quickly around these buttons. Regular cleaning stops sticky residue and dust from causing problems. It also improves the overall feel of your car’s interior.

    Applying Cleaning Solution

    Choose a mild cleaning solution like diluted dish soap or a gentle all-purpose cleaner. Lightly dampen a soft cloth or cotton swab with the solution. Avoid soaking the buttons to prevent moisture damage. Carefully apply the cleaner around and on the buttons’ surface.

    Scrubbing Gently

    Use a soft-bristled brush or a clean toothbrush. Gently scrub around the edges and between the buttons. This removes dirt trapped in small spaces. Take your time and be gentle to avoid damaging the buttons.

    Wiping Excess Moisture

    Use a dry microfiber cloth to wipe away excess moisture. Make sure no water remains on or inside the buttons. This prevents electrical issues and stops dirt from sticking again. Let the area dry completely before using the buttons.

    Clean Around The Buttons

    Dirt gathers quickly around car window buttons. Use a soft brush or cloth with mild cleaner to remove dust and grime. Keep buttons dry to avoid damage and ensure smooth operation.

    Reaching Tight Spaces

    Dirt and dust gather in small gaps around car window buttons. These spots are hard to reach with a cloth. Use a thin tool like a soft brush or a toothpick to clean these tight spaces. Move gently to avoid damage. This helps remove grime stuck in crevices and keeps buttons working smoothly.

    Using Cotton Swabs

    Cotton swabs are perfect for detailed cleaning. Dip a swab in a little rubbing alcohol or mild cleaner. Wipe carefully around each button’s edges and corners. Change swabs often to avoid spreading dirt. This method cleans stubborn dirt without harming the button surface.

    Dry And Test

    After cleaning your car window buttons, the next important step is to dry and test them. This step prevents damage and ensures the buttons work correctly. Moisture can cause electrical issues, so thorough drying is essential. Testing confirms the cleaning did not affect functionality.

    Ensuring Complete Dryness

    Use a soft cloth to wipe away any moisture. Let the buttons air dry for at least 15 minutes. Avoid pressing the buttons during this time. This allows any trapped water to evaporate. Use a fan or gentle airflow to speed drying if needed. Never use heat sources like hair dryers, as they can damage the plastic.

    Testing Button Functionality

    Once dry, press each window button several times. Check if they respond smoothly without sticking. Test all windows to confirm each button works. If a button feels sticky or unresponsive, repeat cleaning or drying. Proper testing ensures safe and reliable use of your car windows.

    Maintenance Tips

    Maintaining your car window buttons keeps them working well and looking clean. Dirt and dust can build up quickly, causing buttons to stick or fail. Simple care steps help avoid costly repairs.

    Regular Cleaning Schedule

    Clean the buttons at least once a week. Use a soft cloth slightly dampened with water. Gently wipe around each button to remove dust and grime. Avoid spraying water directly on the buttons. This prevents moisture from entering the electrical parts.

    Avoiding Common Mistakes

    Never use harsh chemicals or abrasive materials. These can damage the button surface and nearby plastic. Avoid pressing buttons too hard during cleaning. Excessive force may cause the buttons to break. Keep liquids away from the control panel. Moisture can cause electrical problems or corrosion.

    How to Clean Car Window Buttons: Easy Steps for Sparkling Results

    Credit: www.youtube.com

    Frequently Asked Questions

    How Often Should I Clean Car Window Buttons?

    Clean car window buttons every 1-2 months. Regular cleaning prevents dirt buildup and ensures smooth operation. Frequent use exposes buttons to dust and grime, so timely cleaning maintains their functionality and appearance.

    What Tools Are Best For Cleaning Window Buttons?

    Use a soft microfiber cloth, cotton swabs, and a small brush. These tools help reach tight spaces gently without damaging buttons. Avoid abrasive materials to prevent scratches or button malfunctions.

    Can I Use Water To Clean Car Window Buttons?

    Use minimal water with a damp cloth, never soak buttons. Excess moisture can cause electrical issues. Opt for a mild cleaning solution designed for electronics or car interiors for safe cleaning.

    How Do I Remove Sticky Residue From Window Buttons?

    Apply a small amount of isopropyl alcohol on a cotton swab. Gently rub the residue until it lifts. Avoid harsh chemicals to prevent damage to button surfaces and electrical components.

    Conclusion

    Cleaning car window buttons keeps them working well and looking nice. Dirt and dust can cause buttons to stick or stop working. A little care goes a long way. Use soft cloths and gentle cleaners for best results. Regular cleaning prevents damage and saves repair costs.

    Keep your car interior fresh and neat with simple steps. Clean buttons make driving more comfortable and safe. Small habits make a big difference. Try these tips today for a cleaner car.

  • How to Clean Car Window Trim: Easy Tips for a Stunning Shine

    How to Clean Car Window Trim: Easy Tips for a Stunning Shine

    Your car’s window trim might seem like a small detail, but it plays a big role in keeping your vehicle looking sharp. Dirt, grime, and fading can make your trim look old and worn out fast.

    If you want your car to stand out and shine, knowing how to clean your window trim properly is key. In this guide, you’ll discover simple, effective steps to restore that fresh, polished look—without spending hours or using harsh chemicals.

    Ready to make your car look its best? Keep reading and learn how easy it is to clean your car window trim like a pro.

    Tools And Materials Needed

    Cleaning car window trim is simple with the right tools and materials. Having everything ready makes the job faster and easier. It helps protect the trim and gives a clean, polished look.

    Essential Cleaning Supplies

    • Soft microfiber cloths for gentle cleaning
    • Mild soap or car wash detergent
    • Soft-bristle brush for tough dirt
    • Plastic trim cleaner or all-purpose cleaner
    • Water bucket for rinsing
    • Spray bottle for easy application
    • Trim protectant or conditioner to finish

    Optional Protective Gear

    • Rubber gloves to protect hands
    • Safety glasses to shield eyes
    • Old towel or apron to keep clothes clean
    How to Clean Car Window Trim: Easy Tips for a Stunning Shine

    Credit: www.youtube.com

    Preparing The Window Trim

    Preparing the window trim is the first step in cleaning car window trim. It ensures the surface is ready for a deeper clean. Proper preparation helps remove dirt that can scratch the trim during washing. It also allows cleaning products to work better on the trim surface.

    Removing Loose Dirt And Debris

    Start by removing loose dirt and debris from the trim. Use a soft brush or a microfiber cloth. Gently brush along the trim edges to lift dirt away. Avoid pressing too hard to prevent damage. Clear away leaves, dust, and small stones carefully. This step prevents scratching during washing.

    Washing The Trim Surface

    Next, wash the trim surface with mild soap and water. Mix a small amount of car soap in a bucket of water. Dip a soft cloth or sponge in the solution. Wipe the trim gently to remove grime and stains. Rinse the cloth often to avoid spreading dirt. After washing, rinse the trim with clean water. Dry the trim with a clean towel to stop water spots.

    Choosing The Right Cleaner

    Choosing the right cleaner is key to keeping your car window trim looking fresh and new. Different trims need different care. Using the wrong cleaner can cause damage or leave streaks. Picking a product that fits your trim material will make cleaning easier and safer.

    Types Of Cleaners For Different Materials

    Car window trims can be plastic, rubber, or metal. Each material needs a special cleaner. Plastic trims do well with mild soap and water or plastic-safe cleaners. Rubber trims need gentle cleaners that won’t dry or crack the material. Metal trims often need cleaners that remove dirt without causing rust or scratches. Always check the cleaner’s label to match your trim type.

    Natural Vs Commercial Products

    Natural cleaners use ingredients like vinegar, baking soda, or lemon juice. They are gentle and eco-friendly. These can work well for light dirt and regular cleaning. Commercial products are made for tougher grime and stains. They often contain chemicals that clean deeper but may be harsh. Choose natural cleaners for regular care and commercial ones for stubborn dirt. Test any cleaner on a small area first.

    How to Clean Car Window Trim: Easy Tips for a Stunning Shine

    Credit: www.reddit.com

    Cleaning Techniques

    Cleaning car window trim needs care and the right methods. Good techniques remove dirt without damage. Using proper tools helps protect your trim and keeps it looking new.

    Using Soft Brushes And Cloths

    Soft brushes are gentle on the trim surface. They remove dirt and dust without scratching. Use a brush with soft bristles for best results. Microfiber cloths work well to wipe the trim clean. They pick up dirt without leaving lint behind. Always use clean cloths to avoid rubbing dirt back on the trim.

    Detailing Hard-to-reach Areas

    Trim often has small crevices that collect grime. Use a small brush or cotton swab to clean these spots. These tools reach places cloths cannot. Spray a little cleaner on the brush for better dirt removal. Take your time to clean every corner carefully. This attention keeps the trim looking fresh and well maintained.

    Restoring Shine And Protecting Trim

    Restoring shine and protecting car window trim keeps your vehicle looking fresh and clean. Over time, trim loses its color and becomes dull. Dirt, sun, and weather can cause damage. Proper care brings back the original look and adds a layer of protection. This helps prevent cracking and fading. A few simple steps can extend the life of your trim and keep it looking new.

    Applying Conditioners Or Protectants

    Choose a conditioner made for car trim. These products restore color and add moisture. Apply a small amount to a clean cloth. Rub it gently onto the trim in circular motions. Let it sit for a few minutes. Wipe off any extra product with a dry cloth. Avoid using products meant for tires or interiors. These can damage the trim or leave a sticky residue.

    Tips For Long-lasting Shine

    Clean the trim regularly to avoid buildup. Use mild soap and water before applying protectants. Park in shaded areas to reduce sun damage. Avoid harsh chemicals that can strip the trim. Reapply conditioners every few weeks for best results. Check the trim often for cracks or fading. Early care keeps the trim healthy and shiny for longer.

    How to Clean Car Window Trim: Easy Tips for a Stunning Shine

    Credit: www.reddit.com

    Common Mistakes To Avoid

    Cleaning car window trim seems easy but many make simple mistakes. These errors can damage the trim or reduce its lifespan. Avoiding common pitfalls helps keep your car looking neat and fresh. Here are two mistakes to watch out for.

    Using Harsh Chemicals

    Harsh chemicals can ruin the trim’s finish. Many cleaners contain acids or strong solvents. These substances cause fading, cracking, or discoloration. Choose gentle, trim-safe products instead. Always test a cleaner on a small area first. Protect the trim by avoiding bleach, ammonia, or strong detergents.

    Neglecting Regular Maintenance

    Cleaning trim only once in a while causes dirt buildup. Dust and grime stick to the surface, making cleaning harder later. Regular washing prevents damage and keeps the trim shiny. Set a schedule to clean the trim every few weeks. This simple habit extends the life of your car’s trim.

    Frequently Asked Questions

    How Often Should I Clean Car Window Trim?

    Cleaning car window trim every two weeks keeps it free from dirt and grime. Regular maintenance prevents buildup and damage, preserving the trim’s appearance and durability.

    What Products Work Best For Cleaning Window Trim?

    Use mild soap, water, and a soft cloth for gentle cleaning. Specialized trim cleaners and protectants are ideal for tougher stains and UV protection.

    Can I Use Household Cleaners On Car Window Trim?

    Avoid harsh household cleaners as they can damage trim material. Stick to automotive-specific products to ensure safe and effective cleaning.

    How Do I Remove Stubborn Stains From Window Trim?

    Apply a dedicated trim cleaner or use isopropyl alcohol on a soft cloth. Gently rub stains until they lift, then rinse and dry the area.

    Conclusion

    Cleaning car window trim keeps your vehicle looking neat and cared for. Use gentle cleaners to avoid damage and clean regularly. Simple tools and a bit of effort make a big difference. Clean trim helps protect your car from dirt and wear.

    Keep up this easy routine to enjoy a fresh, polished look. Your car will thank you with better appearance and longer-lasting parts. Small steps add up to great results. Try it today and see the change yourself.

  • Clean Glass Car Windows: Ultimate Tips for a Sparkling Shine

    Clean Glass Car Windows: Ultimate Tips for a Sparkling Shine

    Have you ever noticed how a simple streak on your car window can ruin your entire driving experience? Clean glass car windows don’t just make your vehicle look great—they keep you safe by giving you a clear view of the road.

    If you want to avoid glare, smudges, and annoying spots that distract you while driving, this guide is for you. Keep reading to discover easy tips and tricks that will make your car windows sparkle like new, helping you drive with confidence every time.

    Choosing The Right Cleaning Tools

    Choosing the right tools is key for clean glass car windows. The right tools make cleaning easier and give better results. Using poor tools can leave streaks or even scratch the glass. It is important to pick tools that work well on glass surfaces.

    Best Cloths For Streak-free Windows

    Microfiber cloths are the best choice for cleaning car windows. They are soft and absorbent. Microfiber picks up dirt without scratching the glass. Avoid rough or old cloths that can leave lint behind. Use a clean cloth for each window to prevent dirt spread. Cotton cloths work but may leave fibers on the glass.

    Recommended Cleaning Solutions

    Use a gentle, ammonia-free glass cleaner. Ammonia can damage window tint and rubber seals. Simple mixtures of water and vinegar work well too. Avoid harsh chemicals that can harm car surfaces. Spray the cleaner lightly and wipe with a clean cloth. For tough spots, let the cleaner sit briefly before wiping.

    Tools To Avoid

    Do not use paper towels for cleaning car windows. They leave fibers and cause streaks. Avoid abrasive pads or scrapers that can scratch the glass. Household glass cleaners with ammonia can damage tint. Never use dirty cloths or sponges; they spread dirt and create smudges. Choose tools designed for automotive glass for best results.

    Preparing Your Car For Window Cleaning

    Preparing your car for window cleaning is an important step. It helps get the best results and protects your car’s inside. A clean window starts with a clean surface. Small dirt and dust can cause streaks or scratches during cleaning. Taking time to prepare makes the process smoother and safer.

    Removing Dust And Debris

    Start by wiping off loose dust and dirt from the windows. Use a soft cloth or a microfiber towel. Avoid using rough materials that can scratch the glass. A gentle brush can help remove stuck dirt from corners. Cleaning dust first stops it from mixing with cleaning liquids. This step prevents smudges and damage.

    Protecting Interior Surfaces

    Protect the inside of your car before cleaning windows. Cover seats and dashboard with old towels or cloths. This keeps cleaning sprays and water from damaging these areas. Close windows and doors tightly to stop water from entering. Taking these steps keeps your car interior safe and dry during cleaning.

    Effective Cleaning Techniques

    Clean glass car windows improve your driving safety and car appearance. Using the right cleaning techniques makes this task easier and more effective. Follow simple steps and use proper tools for the best results. Focus on both inside and outside surfaces for a clear view. Tackle tough stains with the right methods to keep windows spotless.

    Step-by-step Cleaning Process

    Start by gathering cleaning supplies: microfiber cloth, glass cleaner, water, and a bucket. First, rinse the windows with water to remove loose dirt. Spray the glass cleaner evenly on the surface. Use a clean microfiber cloth to wipe in circular motions. Flip the cloth to a dry side and buff the glass. Repeat if needed to remove all smudges and streaks. Finish by wiping window edges and corners carefully.

    Cleaning Interior Vs Exterior Windows

    Exterior windows often have more dirt and grime from weather and road dust. Rinse the outside before applying cleaner to avoid scratches. Interior windows need gentle cleaning to protect tint and dashboard reflections. Use less cleaner inside to prevent streaks. Clean interior windows more often to remove fingerprints and fog. Always dry both sides well for clear visibility.

    Dealing With Tough Stains And Spots

    Bird droppings, tree sap, and bug splatters need special care. Soften stains by spraying glass cleaner and letting it sit for a few minutes. Use a soft cloth or sponge to gently scrub the spots. For stubborn stains, try a mixture of vinegar and water. Avoid harsh chemicals that can damage window tint or seals. Always rinse and dry the area after treatment to avoid residue.

    Clean Glass Car Windows: Ultimate Tips for a Sparkling Shine

    Credit: www.youtube.com

    Preventing Fog And Smudges

    Clean car windows improve driving safety and comfort. Fog and smudges block vision. They cause distractions and reduce clarity. Preventing fog and smudges keeps windows clear. It helps maintain a smooth driving experience. Simple methods work well to keep glass spotless.

    Anti-fog Treatments

    Anti-fog treatments stop moisture from forming on glass. These products create a thin layer that repels water. Apply the treatment on the inside of windows. It reduces fogging during cold or humid weather. Some sprays come in easy-to-use bottles. Others are wipes that leave no residue. Regular use keeps windows clear longer. Choose treatments made for car glass only. Avoid using household cleaners that may damage glass.

    Tips To Maintain Clarity

    Clean windows regularly with a soft cloth. Use a glass cleaner made for cars. Avoid harsh chemicals that leave streaks or damage. Wipe windows in a circular motion for better results. Keep the car’s interior dry to reduce fog. Use the air conditioner or defroster to control humidity. Do not touch windows with dirty hands. Clean smudges immediately to prevent buildup. Small habits help keep glass clear and safe.

    Maintaining Sparkling Windows

    Clean glass car windows improve driving safety and enhance your vehicle’s look. Maintaining sparkling windows requires simple, regular care. Clear windows help you see better and keep your car fresh. Follow easy steps to keep your glass spotless all year.

    Regular Cleaning Schedule

    Set a weekly routine to clean your car windows. Use a soft cloth and a gentle glass cleaner. Wipe both inside and outside surfaces thoroughly. Avoid harsh chemicals that can damage the glass or tint. Clean windows prevent dirt build-up and reduce glare while driving.

    Seasonal Care Tips

    Adjust your cleaning habits for different seasons. In winter, remove salt and ice residue quickly. Use a scraper carefully to avoid scratches. In summer, clean off dust and pollen often. Protect windows from direct sunlight damage by parking in shade. Seasonal care keeps glass clear and extends its life.

    Clean Glass Car Windows: Ultimate Tips for a Sparkling Shine

    Credit: www.rainx.com

    Clean Glass Car Windows: Ultimate Tips for a Sparkling Shine

    Credit: www.turtlewax.com

    Frequently Asked Questions

    How Do I Clean Glass Car Windows Effectively?

    Use a glass cleaner and microfiber cloth for streak-free windows. Spray cleaner, wipe in circular motions, then finish with vertical strokes. Avoid ammonia-based cleaners on tinted windows to prevent damage. Regular cleaning improves visibility and safety.

    What Is The Best Solution For Car Window Cleaning?

    A mixture of water and vinegar or a commercial glass cleaner works best. Both remove dirt, grime, and smudges effectively. Use a microfiber cloth for a streak-free finish. Avoid paper towels as they leave lint.

    How Often Should I Clean My Car Windows?

    Clean car windows at least once every two weeks. More frequent cleaning is needed if you drive in dusty or rainy conditions. Regular cleaning prevents buildup and maintains clear visibility for safe driving.

    Can I Use Household Glass Cleaner On Car Windows?

    Yes, but avoid ammonia-based cleaners on tinted windows. Ammonia can damage window tint films. Use automotive glass cleaners or vinegar-water mix for tinted glass. Always test a small area first.

    Conclusion

    Clean glass car windows improve your safety and driving comfort. Clear windows help you see the road and other vehicles better. Regular cleaning stops dirt and grime from building up. Use simple tools like microfiber cloths and mild cleaners. Avoid harsh chemicals that can damage glass or tint.

    Keeping windows clean also makes your car look neat. Small efforts bring big benefits for your daily drive. Take a few minutes often to wipe your windows. Enjoy clearer views and safer trips every time you drive.