Author: Alex Carey

  • Best Way to Clean Car Windows on the Inside: Easy Streak-Free Tips

    Best Way to Clean Car Windows on the Inside: Easy Streak-Free Tips

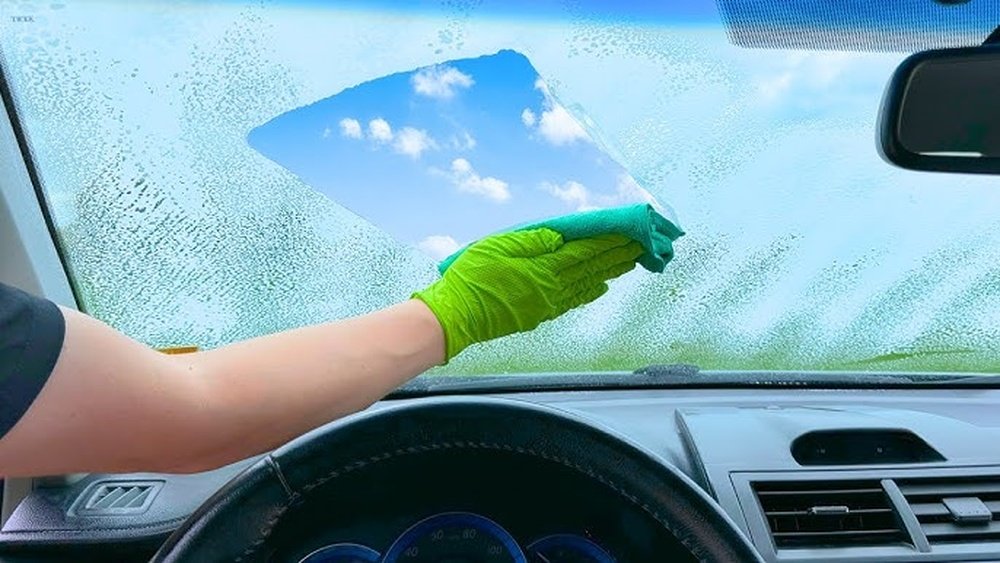
    Have you ever struggled to get your car windows spotless from the inside? Smudges, streaks, and dust can block your view and make driving less safe and less enjoyable.

    But cleaning the inside of your car windows doesn’t have to be a hassle. You’ll discover the best way to clean your car windows quickly and effectively. Imagine looking through crystal-clear glass every time you drive—no more annoying spots or glare.

    Keep reading to learn simple steps and expert tips that will make your windows shine like new.

    Choosing The Right Cleaner

    Choosing the right cleaner for your car’s inside windows is key for clear, streak-free glass. The cleaner must remove dirt and grease without harming the glass or car interior. Picking the best option saves time and keeps your car looking fresh.

    Commercial Vs Homemade Solutions

    Commercial cleaners are made specifically for car windows. They often contain ingredients that cut through tough grime quickly. These products usually come in spray bottles for easy use.

    Homemade solutions use simple ingredients like vinegar and water. They are cheap and easy to make at home. Vinegar cuts through dirt and leaves windows shining.

    Both types work well, but consider your budget and preferences. Commercial cleaners offer convenience. Homemade cleaners avoid chemicals and save money.

    Avoiding Harsh Chemicals

    Harsh chemicals can damage your car’s interior and window tint. Avoid cleaners with ammonia or bleach. These can cause fogging or peeling of tint films.

    Choose gentle, non-toxic cleaners instead. They protect your glass and car surfaces. Safe cleaners keep your windows clear without harm.

    Best Way to Clean Car Windows on the Inside: Easy Streak-Free Tips

    Credit: www.chemicalguys.com

    Essential Cleaning Tools

    Cleaning car windows from the inside needs the right tools. These tools make the job easier and leave windows clear. Choosing good tools saves time and effort. It helps remove dirt, dust, and streaks quickly. Focus on tools that are gentle but effective.
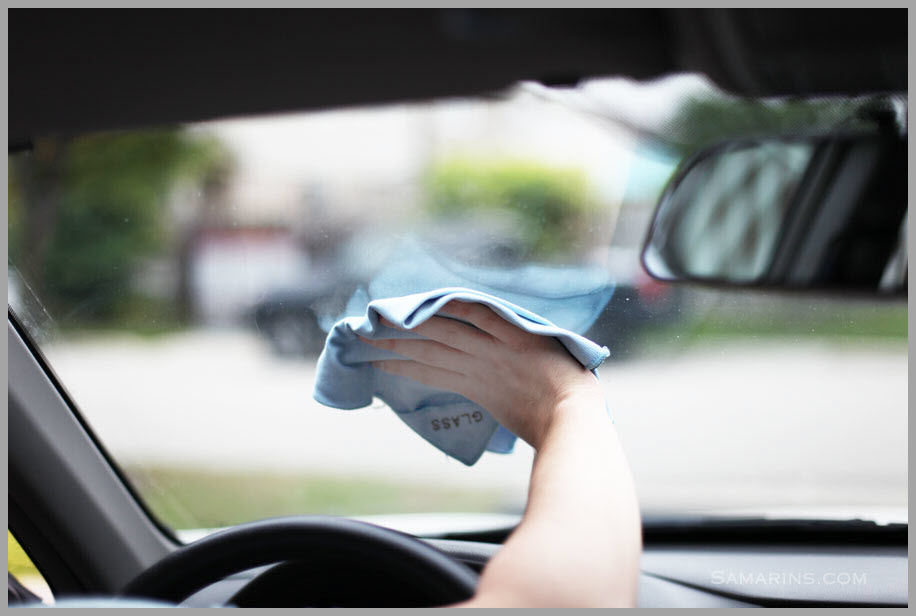
    Microfiber Cloths

    Microfiber cloths are soft and absorbent. They catch dust and dirt without scratching glass. Use a clean cloth to avoid spreading grime. They work well with water or cleaning sprays. Microfiber cloths dry fast and don’t leave lint behind.

    Squeegees And Scrubbers

    Squeegees remove water and cleaning solution smoothly. They help prevent streaks on the glass surface. Scrubbers loosen stuck dirt and grime gently. Use a scrubber before wiping with a squeegee. Both tools help achieve a spotless finish quickly.

    Preparing The Car Interior

    Cleaning car windows inside starts with good preparation. A clean interior helps you see dirt clearly. It makes the cleaning process smooth and effective.

    Before wiping windows, clear the area around them. This stops dust from falling back onto clean glass. It also protects your car’s interior parts from water or cleaning spray.

    Removing Dust And Debris

    Use a soft brush or vacuum to remove dust and debris. Focus on corners and edges of windows first. Dust can scratch glass if rubbed during cleaning. Clean seats and floor mats to avoid dust spreading back.

    Protecting Dashboard And Seats

    Cover your dashboard and seats with a cloth or plastic sheet. This stops cleaning liquids from staining or damaging surfaces. Make sure covers fit well and do not block air vents. Protecting these areas keeps your car neat and safe during cleaning.

    Best Way to Clean Car Windows on the Inside: Easy Streak-Free Tips

    Credit: cleanmycar.ca

    Step-by-step Cleaning Process

    Cleaning car windows inside requires a clear plan. Follow a simple step-by-step process for the best results. This method removes dirt, smudges, and streaks fast. Your windows will look clean and clear again.

    Initial Wipe Down

    Start by wiping the windows with a dry microfiber cloth. This removes dust and loose dirt. Use gentle, circular motions. Avoid pressing too hard to stop scratches. This step prepares the glass for deeper cleaning.

    Applying Cleaner

    Spray a small amount of glass cleaner on the window. Use a cleaner made for cars or a mild homemade mix. Do not soak the glass. Spread the cleaner evenly with a clean microfiber cloth. Cover all areas, especially corners and edges.

    Buffing And Drying

    Use a dry microfiber cloth to buff the window. Move the cloth in small circles or side to side. This removes cleaner residue and prevents streaks. Make sure the glass is fully dry before touching it. The result is a clear, streak-free window.

    Tips To Avoid Streaks

    Cleaning car windows on the inside can be tricky. Streaks often spoil the clear look. Simple tips help avoid streaks and keep windows spotless. Focus on the right techniques and conditions.

    Using The Right Motion

    Wipe the window in a circular motion first. This removes dirt and grime well. Then use vertical or horizontal strokes to finish. This helps prevent streaks from forming. Use a clean, soft microfiber cloth. Avoid paper towels, which can leave lint.

    Optimal Temperature And Lighting

    Clean windows in cool conditions. Avoid bright sunlight on the glass. Heat causes cleaner to dry too fast, leaving streaks. Shade or cloudy days work best for cleaning. Good lighting helps spot any missed spots easily.

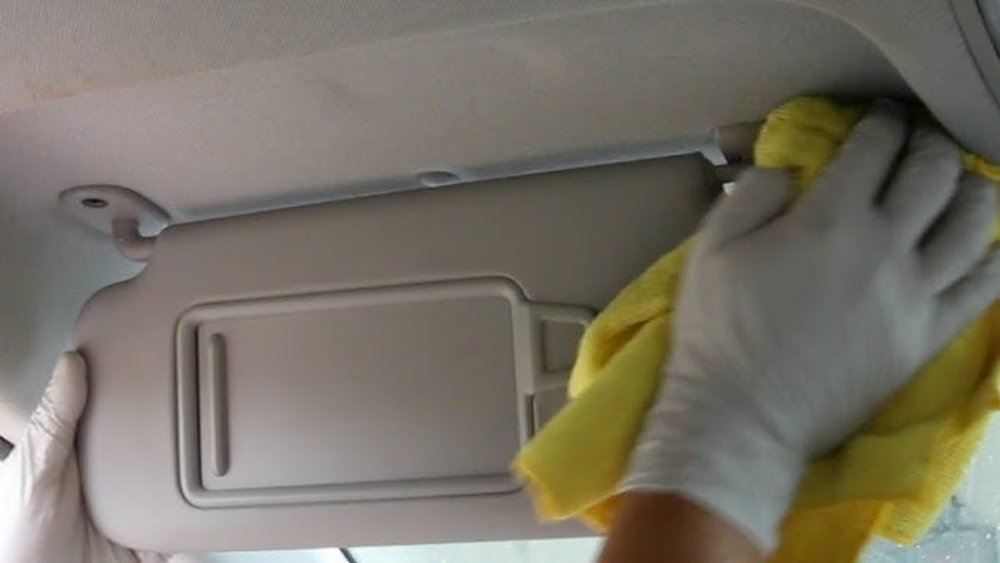
    Maintaining Spotless Windows

    Keeping car windows clean inside is key for clear views and safety. Dirt, dust, and smudges can build up fast. Clean windows help drivers see better and reduce glare from sunlight or headlights.

    Maintaining spotless windows inside takes a little effort but pays off. A regular cleaning habit keeps dirt from sticking and makes the job easier each time. Quick touch-ups between full cleans prevent grime buildup. Both steps work well together for crystal-clear windows.

    Regular Cleaning Schedule

    Set a regular time to clean your car windows inside. Once every two weeks works well for many drivers. Use a good glass cleaner and a soft microfiber cloth. Spray cleaner on the cloth, not directly on the glass. Wipe in a circular motion to avoid streaks. Clean corners and edges carefully. Regular cleaning removes oils and dust before they harden.

    Quick Touch-ups

    Spot clean your windows after long drives or bad weather. Use a small spray bottle with water and a little vinegar. Lightly spray the cloth and wipe smudges or fingerprints. Quick touch-ups keep windows clear and prevent heavy dirt. These little efforts stop buildup and save time during full cleans.

    Best Way to Clean Car Windows on the Inside: Easy Streak-Free Tips

    Credit: www.youtube.com

    Frequently Asked Questions

    How Do I Clean Car Windows Without Streaks?

    Use a microfiber cloth and a vinegar-water solution. Spray lightly, wipe in circular motions, then finish with vertical strokes. Avoid paper towels, as they cause streaks and lint.

    What Is The Best Cleaner For Inside Car Windows?

    A mixture of equal parts distilled water and white vinegar works best. It removes grime without harsh chemicals, ensuring a clear, streak-free finish.

    How Often Should I Clean My Car’s Interior Windows?

    Clean inside car windows every two weeks. Regular cleaning prevents buildup of dirt, grime, and film that reduce visibility and safety.

    Can I Use Newspaper To Clean Car Windows Inside?

    Yes, newspaper can be used for cleaning car windows. It is lint-free and helps prevent streaks, but avoid colored or glossy paper to prevent residue.

    Conclusion

    Cleaning car windows inside keeps your view clear and safe. Use a good cleaner and soft cloth for best results. Wipe in circles to avoid streaks and spots. Don’t forget to clean the edges and corners well. Regular cleaning stops dirt and dust from building up.

    A clean window makes driving more comfortable and safer. Try these simple steps next time you clean your car. You will see the difference right away. Clear windows help you focus on the road ahead. Easy and quick, it is worth the effort.

  • How to Clean Car Window Visors: Easy Tips for a Spotless Shine

    How to Clean Car Window Visors: Easy Tips for a Spotless Shine

    Your car window visors protect you from rain, sun, and wind while driving. But over time, dirt, dust, and grime build up on them, making your car look dull and reducing their effectiveness.

    Cleaning your window visors might seem tricky, but it’s easier than you think. You’ll discover simple, step-by-step tips to clean your car window visors quickly and safely. Keep reading, and you’ll learn how to restore their shine and keep them working perfectly every time you hit the road.

    How to Clean Car Window Visors: Easy Tips for a Spotless Shine

    Credit: www.amazon.com

    Choosing The Right Cleaning Tools

    Choosing the right cleaning tools is key to keeping car window visors spotless. The right tools protect the visors from scratches and damage. Cleaning with the proper items makes the process easier and faster. This guide covers soft cloths, gentle cleaning solutions, and chemicals to avoid.

    Soft Cloths And Sponges

    Use soft cloths or sponges to clean window visors. Microfiber cloths work best because they are gentle and absorbent. Avoid rough materials like scrubbing pads or brushes. These can scratch the visor surface. Always use a clean cloth or sponge to prevent dirt from causing damage.

    Gentle Cleaning Solutions

    Choose mild soap or car-specific cleaners for washing visors. Mix a small amount of soap with water for a gentle solution. Harsh detergents can dull the visor’s finish. A gentle cleaner removes dirt without harming the material. Rinse with clean water after cleaning to remove residue.

    Avoiding Harsh Chemicals

    Never use bleach, ammonia, or strong solvents on window visors. These chemicals can cause discoloration or cracks. Avoid glass cleaners with ammonia as they damage the visor’s tint. Stick to products designed for automotive use. Protect the visors by choosing safe, mild options only.

    How to Clean Car Window Visors: Easy Tips for a Spotless Shine

    Credit: www.ebay.com

    Preparing The Visors For Cleaning

    Preparing the visors for cleaning is an important first step. It helps remove dirt and protects your car’s paint. Proper preparation makes the cleaning process easier and more effective.

    Removing Loose Dirt And Debris

    Start by brushing off loose dirt and dust. Use a soft brush or a dry cloth. This prevents scratches during cleaning. Pay attention to corners and edges. Dirt tends to gather there. Removing loose debris stops it from spreading.

    Protecting Surrounding Areas

    Cover nearby parts with tape or plastic sheets. This avoids damage from cleaning solutions. Protect your car’s paint and windows. Be careful near rubber seals and trim. Protecting these areas keeps your car looking good. It also prevents stains and marks during cleaning.

    Step-by-step Cleaning Process

    Cleaning car window visors is simple with the right steps. Follow this guide to keep them clear and looking new. A clean visor helps reduce glare and improves your car’s appearance.

    Applying The Cleaning Solution

    Start by choosing a mild cleaning solution. Mix water with a few drops of dish soap. Use a soft cloth or sponge to apply it. Cover the entire surface of the visor. Let it sit for one to two minutes to loosen dirt.

    Scrubbing Gently

    Use a soft brush or sponge to scrub the visor. Move in small circles to remove grime and stains. Avoid using hard brushes that can scratch the surface. Take care around edges and curves for a thorough clean.

    Rinsing Thoroughly

    Rinse the visor with clean water to remove soap. Make sure no residue stays on the surface. Use a gentle stream of water or a damp cloth. Dry the visor with a soft towel to prevent water spots.

    Drying And Polishing Tips

    Drying and polishing your car window visors is key to keeping them clear and bright. Proper drying stops water spots. Polishing adds a smooth shine. Both steps protect the visors from dirt and damage. Follow these simple tips to get the best results after cleaning.

    Using Microfiber Towels

    Microfiber towels are soft and absorbent. They dry visors without scratching the surface. Use a clean towel to gently wipe the visors. Avoid rough cloths that can cause marks. Pat dry rather than rubbing hard. This keeps the visor’s finish smooth and clean.

    Avoiding Water Spots

    Water spots form when drops dry on the visor. Dry the visors quickly after washing. Use a microfiber towel to soak up all water. Do not let water air dry. Water spots can leave white marks. Wiping immediately stops these from forming.

    Enhancing Shine With Polish

    Apply a small amount of plastic or vinyl polish. Use a soft cloth to spread it evenly. Polish in circular motions for a smooth finish. This brings out the visor’s shine and protects it. Avoid using too much polish, which can leave residue. Let the polish dry before driving.

    Maintaining Clean Visors

    Maintaining clean car window visors keeps your vehicle looking neat and protects the visors from damage. Clean visors improve visibility and help avoid stains or buildup. A simple routine can keep them clear and shiny for a long time.

    Regular Cleaning Schedule

    Set a weekly or biweekly cleaning time for your visors. Use mild soap and water with a soft cloth. Avoid harsh chemicals that can damage the visor’s surface. Regular cleaning stops dirt from sticking and keeps the visors clear.

    Protective Coatings

    Apply a protective coating designed for plastic or acrylic surfaces. These coatings help repel dirt and water. They also prevent fading caused by sun exposure. Use a small amount and spread it evenly on the visors.

    Quick Cleanups After Rain

    Rain can leave spots and dirt on your visors. Wipe them down with a soft cloth or microfiber towel soon after rain stops. Quick cleanups stop water marks and keep visors looking fresh. This simple step saves time on deep cleaning later.

    Common Mistakes To Avoid

    Cleaning car window visors seems easy but many make simple mistakes. These errors can damage the visors or reduce their lifespan. Avoid these common pitfalls to keep your visors clean and looking good.

    Using Abrasive Materials

    Do not use rough cloths or scrubbers. Abrasive materials scratch the surface of the visor. Scratches make visors look old and dirty. Soft microfiber cloths work best for cleaning. Use gentle circular motions for best results.

    Neglecting Drying Steps

    Leaving visors wet causes water spots and streaks. Always dry visors after cleaning. Use a clean, dry cloth to wipe away moisture. Drying also prevents dirt from sticking back quickly. This keeps the visor clear and shiny longer.

    Ignoring Manufacturer Guidelines

    Each visor may need special care. Some materials need specific cleaners or techniques. Check the manual or product instructions. Following guidelines protects the visor from damage. Avoid harsh chemicals that can ruin the finish.

    How to Clean Car Window Visors: Easy Tips for a Spotless Shine

    Credit: www.pirouette-editions.fr

    Frequently Asked Questions

    How Often Should I Clean Car Window Visors?

    Clean your car window visors every 2 to 4 weeks. Regular cleaning prevents dirt buildup and maintains visibility. It also extends the lifespan of the visors and keeps your car looking neat and well-maintained.

    What Is The Best Cleaner For Car Window Visors?

    Use a mild soap mixed with water or a gentle automotive cleaner. Avoid harsh chemicals to prevent damage. Always use a soft cloth or sponge to clean without scratching the surface.

    Can I Use A Pressure Washer On Window Visors?

    It’s best to avoid pressure washers on window visors. High pressure can loosen or damage the adhesive. Use gentle hand washing instead to protect the visors and keep them secure.

    How Do I Remove Stubborn Stains From Visors?

    Apply a mixture of baking soda and water to the stain. Gently scrub with a soft cloth or sponge. Rinse thoroughly with clean water and dry with a microfiber cloth for best results.

    Conclusion

    Keeping car window visors clean helps maintain their look and function. Use gentle soap and water for the best results. Avoid harsh chemicals to protect the material. Regular cleaning stops dirt and grime from building up. Clean visors improve your car’s appearance and visibility.

    A little care goes a long way in keeping them clear. Try to clean your visors every few weeks or after bad weather. Clean visors make driving safer and more comfortable. Simple steps lead to lasting benefits for your car.

  • How to Clean Car Windshield on the Inside: Easy Expert Tips

    How to Clean Car Windshield on the Inside: Easy Expert Tips

    Your car’s windshield is more than just a window; it’s your clear view of the road ahead. But have you ever noticed that stubborn film or smudges on the inside glass that blur your vision and distract you while driving?

    Cleaning the inside of your windshield might seem tricky, but it doesn’t have to be. You’ll discover simple, effective ways to get your windshield spotless from the inside. Keep reading, and you’ll soon enjoy a clearer, safer drive every time you hit the road.

    How to Clean Car Windshield on the Inside: Easy Expert Tips

    Credit: www.youtube.com

    Tools You Need

    Cleaning the inside of your car windshield is easier with the right tools. These tools help you remove dirt, grease, and fog quickly. Using proper supplies keeps the glass clear and streak-free. Below are the basic tools you need for this task.

    Cleaning Cloths And Towels

    Choose soft, lint-free cloths to avoid scratches. Microfiber towels work best for cleaning glass surfaces. They absorb moisture and trap dust well. Avoid paper towels as they can leave fibers behind.

    Glass Cleaner Options

    Use a cleaner made specifically for glass. Spray bottles with ammonia-free formulas are gentle on car interiors. You can also use a mix of vinegar and water for a natural option. Avoid cleaners with harsh chemicals that might damage the dashboard or tint.

    Additional Supplies

    A spray bottle helps apply cleaner evenly. A soft-bristle brush can remove stubborn dirt in corners. Use gloves to protect your skin from chemicals. Keep a small squeegee handy for large windshields to remove excess liquid.

    How to Clean Car Windshield on the Inside: Easy Expert Tips

    Credit: cleanmycar.ca

    Preparing Your Windshield

    Preparing your car windshield for cleaning inside is important for a clear view. Dirt and dust can block your vision. Cleaning without preparation can make the job harder. Take a few simple steps first. These help to clean the glass faster and better.

    Start by removing dust and debris from the surface. This stops particles from scratching the glass. Also, choose the right time to clean. This ensures no streaks or spots stay behind. Preparation makes cleaning easier and safer.

    Removing Dust And Debris

    Use a soft cloth or microfiber towel to wipe the windshield gently. Avoid rough materials that can scratch the glass. Dust can hide in corners and edges. Check these spots carefully. Remove loose dirt before applying any cleaner. This prevents smudges and streaks.

    Vacuuming the dashboard and vents helps reduce dust inside the car. Dust can settle back on the glass after cleaning. Keep the car clean to maintain a clear windshield longer.

    Choosing The Right Time To Clean

    Clean your windshield when the car is cool and out of direct sunlight. Heat causes cleaning products to dry too fast. This leaves streaks and spots on the glass. Early morning or late afternoon are good times to clean.

    Choose a dry day to clean. Moisture can mix with dirt and make cleaning harder. Avoid cleaning inside the car if it is very humid. A dry and cool environment gives the best results.

    Step-by-step Cleaning Process

    Cleaning the inside of your car windshield is simple when you follow the right steps. A clean windshield improves visibility and keeps your car looking fresh. This step-by-step process ensures a clear, streak-free finish every time.

    Initial Wipe Down

    Start by removing dust and loose dirt. Use a dry microfiber cloth to wipe the windshield gently. This prevents scratching during cleaning. Pay attention to corners and edges where dirt collects. A clean surface helps the cleaner work better.

    Applying Cleaner Properly

    Choose a cleaner made for glass or a mix of water and vinegar. Spray it lightly on the cloth, not directly on the glass. This stops drips and spots. Wipe the windshield in a circular motion to cover all areas. Use a fresh cloth if the first one gets dirty.

    Buffing For A Streak-free Finish

    Use a dry microfiber cloth to buff the glass. Move in small circles or horizontal strokes. This removes leftover cleaner and prevents streaks. Keep buffing until the glass shines clear. Check from different angles to spot missed areas.

    Tips For Hard-to-reach Areas

    Cleaning the inside of a car windshield can be tricky, especially in hard-to-reach areas. Dirt and dust often hide in corners and edges. These spots need special care to keep your windshield clear and safe. Using the right tools and methods helps to clean these tight spaces effectively. Here are some useful tips for those difficult areas.

    Using Cotton Swabs Or Brushes

    Cotton swabs are perfect for small, narrow spaces. They reach spots that cloths cannot touch. Dip a swab lightly in glass cleaner. Gently scrub the dirt in corners or seams. Small brushes with soft bristles also work well. They remove dust without scratching the glass. Use a clean swab or brush for each area to avoid spreading dirt.

    Handling Corners And Edges

    Edges and corners often collect grime and film. Use a microfiber cloth folded into a small shape. This helps to reach tight angles. Spray cleaner on the cloth, not directly on the glass. Wipe gently to avoid streaks. For stubborn spots, a plastic scraper can help. Move it carefully to prevent damage. Regular cleaning keeps these areas clear and improves visibility.

    Preventing Future Smudges

    Preventing future smudges on your car’s windshield inside is key to clear vision. Clean glass looks better and keeps you safer on the road. Small habits make a big difference in stopping dirt and fingerprints from building up.

    Regular Maintenance Routine

    Wipe the inside of your windshield at least once a week. Use a soft cloth and a gentle glass cleaner. Avoid paper towels because they can leave scratches or lint. Keep a small cleaning kit in your car for quick touch-ups. Regular cleaning stops dirt from sticking and spreading.

    Avoiding Common Mistakes

    Do not spray cleaner directly on the glass. Spray on your cloth first to avoid drips. Avoid using household cleaners with ammonia as they can damage the glass. Do not use dirty or rough cloths that cause streaks. Avoid touching the glass with oily or dirty hands to keep smudges away.

    How to Clean Car Windshield on the Inside: Easy Expert Tips

    Credit: www.amazon.com

    Natural Cleaning Alternatives

    Natural cleaning alternatives offer safe, affordable ways to clean your car windshield inside. They use common household items that are gentle yet effective. These methods avoid harsh chemicals that can irritate your skin or damage surfaces.

    Natural cleaners also reduce streaks and leave your glass clear. They are easy to make and apply. Here are two simple recipes you can try at home.

    Diy Vinegar Solution

    Mix equal parts white vinegar and water in a spray bottle. Vinegar breaks down dirt and grime on glass surfaces. Spray the solution on the inside of your windshield. Use a clean microfiber cloth to wipe it down. The vinegar helps remove fog and smudges quickly. This solution is safe and eco-friendly.

    Using Baking Soda And Water

    Combine a tablespoon of baking soda with a cup of water. Stir until the baking soda dissolves completely. Dip a soft cloth into the mixture and gently scrub your windshield. Baking soda acts as a mild abrasive, lifting stubborn stains. Rinse with a clean damp cloth afterward. This mixture is perfect for tough spots without scratching the glass.

    Frequently Asked Questions

    How Do I Clean The Inside Of My Car Windshield Effectively?

    Use a microfiber cloth and a glass cleaner designed for cars. Spray the cleaner on the cloth, not directly on the glass. Wipe in circular motions to remove dirt and streaks. Finish with vertical strokes for a clear, streak-free windshield.

    What Is The Best Cleaner For Inside Car Windshields?

    Use an ammonia-free, automotive glass cleaner. These cleaners avoid damaging tinted windows and interior surfaces. Avoid household cleaners with ammonia, as they can cause streaks and damage. Choose products labeled safe for automotive interiors for the best results.

    How Often Should I Clean My Car Windshield Inside?

    Clean your windshield inside every two to four weeks. Frequent cleaning prevents buildup of dust, fingerprints, and film. Regular cleaning improves visibility and driving safety. Adjust frequency based on weather and driving conditions.

    Can I Use Homemade Solutions For Cleaning Inside Windshields?

    Yes, a mix of vinegar and water works well. Use a 50/50 ratio of white vinegar and water. Spray lightly on a microfiber cloth and wipe the glass. This solution is effective and safe for most car interiors.

    Conclusion

    Cleaning your car windshield inside keeps your view clear and safe. Use gentle cleaners and a soft cloth for best results. Regular cleaning stops fog and dirt buildup. A clean windshield helps you drive with confidence. Small effort, big difference.

    Keep this simple routine often to enjoy a clear, streak-free windshield every time. Drive safer, see better.

  • How to Clean Car Windows Youtube: Easy Steps for Crystal Clear Glass

    How to Clean Car Windows Youtube: Easy Steps for Crystal Clear Glass

    Are your car windows looking foggy, streaky, or just plain dirty? You want a clear view while driving, but cleaning them can feel tricky.

    What if you could learn a simple, step-by-step way to make your windows shine like new? This guide will show you exactly how to clean your car windows using easy tips and tricks you can find on YouTube. By the end, you’ll have the confidence and know-how to get spotless windows every time.

    Ready to see the difference? Let’s dive in!

    How to Clean Car Windows Youtube: Easy Steps for Crystal Clear Glass

    Credit: www.youtube.com

    Tools And Materials Needed

    Cleaning car windows well needs the right tools and materials. These tools make the job easier and give better results. Having the correct supplies helps you clean faster and avoid streaks. This section covers the main tools needed for this task.

    Essential Cleaning Supplies

    Start with a good spray bottle filled with water or cleaner. Use a squeegee to remove excess liquid and avoid streaks. Paper towels or old newspapers work, but cloths are better. Gloves can protect your hands from chemicals. A small brush helps clean corners and edges well.

    Choosing The Right Glass Cleaner

    Select a glass cleaner made for cars or homes. Avoid cleaners with ammonia because they can damage window tint. Look for cleaners that remove dirt and grease easily. A non-toxic and eco-friendly cleaner is safer for you and the environment. Clear, streak-free windows need a good quality cleaner.

    Microfiber Cloths And Towels

    Microfiber cloths work best for cleaning car windows. They absorb dirt and liquid without scratching glass. Use a dry microfiber cloth for polishing after cleaning. Avoid cotton towels because they leave lint behind. Have several cloths ready for different parts of the window.

    Preparing Your Car Windows

    Preparing your car windows is the first step for a clear, streak-free shine. Clean windows make driving safer and improve your car’s look. Taking time to prepare windows correctly helps avoid scratches and smudges. Start with simple steps to get the best results.

    Removing Dust And Debris

    Use a soft brush or microfiber cloth to wipe dust off the windows. Dust and dirt can scratch glass during cleaning. Remove all loose debris before applying any cleaner. Pay attention to window edges and corners. Clean windows allow cleaning solutions to work better.

    Protecting Surrounding Areas

    Cover door frames, mirrors, and paint near the windows with tape or cloth. Protect these areas from cleaner splashes or drips. Use paper towels or plastic sheets to catch any spills. Protecting surrounding parts saves time and avoids damage. It keeps your car looking neat during cleaning.

    Step-by-step Cleaning Process

    Cleaning car windows can improve visibility and safety. A clear window also makes your car look well cared for. Follow a simple step-by-step process to get your windows spotless. This helps avoid streaks and spots on the glass. It also saves time and effort.

    Applying Cleaner Correctly

    Start by choosing the right window cleaner. Spray the cleaner evenly on the glass surface. Avoid soaking the edges to prevent drips inside the car. Use a clean microfiber cloth to spread the cleaner. Cover the entire window in gentle, circular motions. This prepares the glass for easy dirt removal.

    Scrubbing Techniques

    Use a soft cloth or sponge for scrubbing. Apply light pressure to avoid scratches. Move the cloth in vertical strokes first. Then switch to horizontal strokes for full coverage. Focus on removing all dirt and grime. Change cloth sides often to keep it clean. This step clears the window without damage.

    Handling Tough Stains

    For stubborn stains, use a bit more cleaner. Let it sit on the stain for a minute. Use a soft brush or sponge to scrub gently. Avoid hard scrubbing to protect the glass. Repeat if needed but keep the cloth clean. Tough stains will lift with patience and care.

    How to Clean Car Windows Youtube: Easy Steps for Crystal Clear Glass

    Credit: skylineclean.com

    Tips For Streak-free Windows

    Cleaning car windows can be tricky. Streaks often spoil the clear look. Follow these simple tips to get shiny, streak-free windows every time. These easy steps help your windows look clean and clear without much effort.

    Using the right method makes a big difference. Small changes in how you clean can stop streaks from forming. Let’s explore the best ways to keep your car windows spotless.

    Best Time To Clean

    Choose a cool, shaded spot to clean your windows. Avoid direct sunlight or hot days. Heat can dry the cleaner too fast and cause streaks. Early morning or late afternoon works best. This gives you more control while cleaning.

    Using Circular Motions

    Apply cleaner in small circles. Circular motions help lift dirt evenly. Wipe gently to avoid scratches. This method spreads the cleaner well and removes grime completely. It also reduces streaks compared to straight wiping.

    Drying Methods

    Use a clean, dry microfiber cloth for drying. Microfiber absorbs moisture without leaving lint. Pat the window dry instead of rubbing hard. For best results, use a second dry cloth to polish the glass. This step ensures no streaks or spots remain.

    Common Mistakes To Avoid

    Cleaning car windows might seem simple. Yet many make mistakes that hurt results. Avoiding these errors saves time and keeps windows clear. Here are common mistakes to watch out for during the cleaning process.

    Using Harsh Chemicals

    Many use strong chemicals to clean windows fast. These can damage glass and car paint. Harsh cleaners leave streaks or spots. Choose gentle, car-safe cleaning solutions instead. They clean well without harm.

    Cleaning In Direct Sunlight

    Cleaning windows under bright sun dries cleaner too fast. This causes streaks and water spots. The heat makes it hard to wipe evenly. Pick a shady spot or clean when the car is cool. This gives better, streak-free results.

    Ignoring Window Edges

    Edges collect dirt and grime easily. Many skip these spots when cleaning. Dirt on edges can spread or cause stains. Clean edges carefully with a soft cloth or brush. This step ensures a fully clean window.

    How to Clean Car Windows Youtube: Easy Steps for Crystal Clear Glass

    Credit: www.etsy.com

    Maintaining Clean Windows

    Maintaining clean car windows improves visibility and safety. Clean windows also enhance your car’s look. Dirt and grime build up fast. Regular care keeps windows clear and streak-free. Simple habits make a big difference over time.

    Regular Cleaning Schedule

    Set a routine for cleaning your windows. Wash them at least once every two weeks. Dust and bugs dry quickly on glass. Frequent cleaning stops hard stains from forming. Use water and a gentle cleaner for best results. Wipe with a microfiber cloth to avoid scratches.

    Protective Coatings

    Apply a protective coating to your windows. These coatings help repel water and dirt. They make cleaning easier and faster. Some coatings also reduce glare while driving. Use products designed for car glass only. Follow instructions carefully for best protection.

    Quick Touch-up Tricks

    Keep a small spray bottle of glass cleaner handy. Use it for quick spots and smudges. Clean fingerprints and bird droppings immediately. Use a soft cloth or paper towel. Avoid using harsh materials that can scratch the glass. Quick touch-ups keep windows clear between deep cleans.

    Frequently Asked Questions

    How Do I Clean Car Windows Without Streaks?

    Use a microfiber cloth with a glass cleaner. Wipe in horizontal and vertical motions. Avoid direct sunlight to prevent streaks. Use a separate dry cloth to buff the glass for a clear finish.

    What Is The Best Homemade Cleaner For Car Windows?

    Mix equal parts of water and white vinegar in a spray bottle. Spray on windows and wipe with a microfiber cloth. This solution removes dirt and grease effectively without harsh chemicals.

    How Often Should I Clean My Car Windows?

    Clean your car windows at least once every two weeks. More frequent cleaning is needed in dusty or rainy environments. Regular cleaning improves visibility and maintains window clarity.

    Can I Use Household Glass Cleaner On Car Windows?

    Yes, but choose an ammonia-free glass cleaner. Ammonia can damage window tint and rubber seals. Always test a small area first to ensure no adverse effects.

    Conclusion

    Cleaning car windows is simple with the right steps. Use a good cleaner and a soft cloth for best results. Avoid streaks by wiping in a circular motion. Don’t forget to clean both inside and outside surfaces. Regular cleaning keeps your windows clear and safe while driving.

    Try watching YouTube videos for easy tips and tricks. Keep your car windows spotless without much effort. Clean windows make your drives more enjoyable and safer. Give these methods a try today.

  • How to Clean Your Car Windows With Vinegar: Easy & Streak-Free Tips

    How to Clean Your Car Windows With Vinegar: Easy & Streak-Free Tips

    Are your car windows looking foggy, streaky, or just plain dirty? You might think cleaning them requires expensive products or complicated tools.

    But what if the answer to sparkling, clear windows is already sitting in your kitchen? Using vinegar to clean your car windows is simple, affordable, and incredibly effective. You’ll discover how to get crystal-clear glass with just a few easy steps—and why vinegar might become your new favorite cleaning hack.

    Keep reading, and say goodbye to grime and hello to a clearer view every time you drive.

    Benefits Of Using Vinegar

    Vinegar is a popular choice for cleaning car windows. It offers several benefits that make it a smart option. Using vinegar helps keep your windows clear and streak-free without harsh chemicals. It is gentle yet effective for everyday cleaning tasks.

    Natural Cleaning Power

    Vinegar contains acetic acid, which breaks down dirt and grime. It dissolves tough stains and water spots easily. This natural ingredient cleans without leaving harmful residues. Vinegar also fights bacteria and mold on surfaces.

    Cost-effective Solution

    Vinegar is very affordable compared to commercial cleaners. A small bottle lasts a long time for many cleaning jobs. It saves money while providing excellent results. No need to buy expensive or specialized products.

    Safe For Car Surfaces

    Vinegar is safe to use on glass and car paint when diluted. It does not damage window tint or rubber seals. This makes it ideal for regular car window cleaning. Always use a soft cloth to avoid scratches.

    How to Clean Your Car Windows With Vinegar: Easy & Streak-Free Tips

    Credit: autoglassmn.com

    Gathering Supplies

    Gathering the right supplies makes cleaning car windows easier and faster. Having everything ready saves time and helps you clean better. Start by knowing what you need. This way, the process goes smoothly and your windows shine.

    Choosing The Right Vinegar

    Use white distilled vinegar for the best results. It cleans well and does not leave stains. Avoid apple cider vinegar as it can leave residue. Mix vinegar with water in a spray bottle for easy use. A 50/50 ratio works well for cleaning car windows.

    Essential Cleaning Tools

    Get a spray bottle to hold your vinegar solution. Use microfiber cloths because they do not scratch glass. Paper towels can leave lint behind, so avoid them. A soft-bristled brush helps remove dirt from edges. Have a squeegee ready to remove excess liquid for streak-free windows.

    Preparing Your Cleaning Area

    Choose a shaded spot to clean your car windows. Sunlight can dry the solution too fast and leave streaks. Park on a flat surface to keep tools steady. Keep your cleaning cloths and spray bottle nearby. This setup helps you clean quickly without hassle.

    Preparing The Vinegar Solution

    Preparing the vinegar solution is the first step to clean your car windows well. A good mix helps remove dirt and leaves glass clear. Making the solution right means better cleaning and no streaks.

    Mixing Ratios For Best Results

    Use white vinegar and water to make the cleaning solution. The best ratio is one part vinegar to two parts water. This mix cleans dirt without damaging your car’s glass. Avoid using pure vinegar; it can be too strong.

    Adding Water And Optional Ingredients

    Use clean, cold water for the best results. You can add a few drops of dish soap to cut grease faster. A few drops of essential oil can help with smell, but this is optional. Stir the solution well before use to blend all parts evenly.

    How to Clean Your Car Windows With Vinegar: Easy & Streak-Free Tips

    Credit: www.youtube.com

    Step-by-step Cleaning Process

    Cleaning car windows with vinegar is simple and effective. Follow these steps to get clear, streak-free glass. The process starts with removing loose dirt. Then, apply the vinegar solution evenly. Finally, use the right wiping techniques to avoid streaks. This method saves money and gives great results.

    Removing Loose Dirt And Debris

    Begin by brushing off dust and loose dirt. Use a soft brush or dry cloth. This prevents scratching during cleaning. Make sure to clean corners and edges well. Clear windows make the vinegar work better.

    Applying The Vinegar Solution

    Mix equal parts vinegar and water in a spray bottle. Spray the solution evenly on the window surface. Avoid soaking the edges to protect seals. Let the solution sit for 1-2 minutes. This helps break down grime and grease.

    Wiping Techniques To Avoid Streaks

    Use a clean microfiber cloth for wiping. Start at the top and move downward in straight lines. Wipe gently to remove dirt and liquid. Flip the cloth often to keep it clean. Dry the edges last for a polished look.

    Dealing With Stubborn Spots

    Stubborn spots on car windows need extra care. These marks often resist regular cleaning. Using vinegar can help break down tough grime. Understanding how to treat different stains makes cleaning easier. Focus on the right methods to remove each type of spot effectively.

    Handling Bug Residue And Sap

    Bug residue and tree sap stick firmly to glass. Vinegar’s acidity softens these sticky spots. Soak a cloth in vinegar and press it on the stain. Let it sit for a few minutes. This loosens the residue, making it easier to wipe away. Use gentle scrubbing with a soft cloth to avoid scratches. Repeat if the spot stays stubborn.

    Removing Hard Water Stains

    Hard water stains leave white, chalky marks on windows. Vinegar breaks down the minerals causing these stains. Spray vinegar directly on the spots and let it sit. After a few minutes, scrub gently with a non-abrasive sponge. Rinse with clean water to clear away residues. Repeat the process for heavy stains. Dry the window with a clean cloth to prevent new spots.

    Tips For Maintaining Clean Windows

    Keeping your car windows clean makes driving safer and more pleasant. Dirt and grime block your view and reduce light inside. Regular care helps keep windows clear and bright. Here are some simple tips to maintain spotless windows after cleaning with vinegar.

    Regular Cleaning Schedule

    Set a routine to clean your windows. Try every two weeks or once a month. More often if you drive in dusty or rainy areas. Regular cleaning stops dirt from building up. It also keeps your car looking fresh and neat.

    Avoiding Common Mistakes

    Do not use paper towels; they leave lint behind. Avoid cleaning in direct sunlight to prevent streaks. Use a soft cloth or microfiber towel instead. Do not spray too much vinegar solution. Wipe gently to protect window seals and trims.

    Protecting Windows From Future Build-up

    Apply a water repellent after cleaning to reduce dirt sticking. Park in shaded or covered areas to avoid dust and bird droppings. Wash off road salt quickly during winter. These steps help keep windows clear longer and reduce cleaning time.

    How to Clean Your Car Windows With Vinegar: Easy & Streak-Free Tips

    Credit: www.youtube.com

    Frequently Asked Questions

    How Effective Is Vinegar For Cleaning Car Windows?

    Vinegar is highly effective for cleaning car windows. It removes dirt, grime, and water spots without streaks. Its natural acidity breaks down buildup, leaving windows clear and shiny. Plus, it’s safe, affordable, and eco-friendly compared to commercial cleaners.

    Can Vinegar Damage Car Window Tint?

    Vinegar can damage some car window tints if used undiluted. Always dilute vinegar with water before cleaning. Test on a small area first to avoid discoloration or peeling. Use a gentle cloth and avoid harsh scrubbing to protect the tint’s longevity.

    What Is The Best Vinegar-to-water Ratio For Cleaning?

    The ideal vinegar-to-water ratio is 1:1. Mix equal parts white vinegar and water in a spray bottle. This ratio effectively cleans windows without causing damage or streaks. Adjust concentration slightly if windows are very dirty or lightly soiled.

    Can Vinegar Remove Stubborn Stains On Car Windows?

    Yes, vinegar can remove stubborn stains like hard water spots and bird droppings. Apply vinegar solution and let it sit for a few minutes. Then gently scrub with a microfiber cloth. Repeat if necessary for tough stains.

    Conclusion

    Cleaning your car windows with vinegar is simple and effective. Vinegar removes dirt and leaves windows clear. Use a soft cloth to avoid scratches. This natural cleaner saves money and helps the environment. Regular cleaning keeps your windows bright and safe to drive.

    Try this easy method and enjoy spotless windows every time.

  • How to Clean Plastic Car Windows: Easy Tips for a Crystal Clear Shine

    How to Clean Plastic Car Windows: Easy Tips for a Crystal Clear Shine

    Your car’s plastic windows can get cloudy, scratched, or covered in grime, making it hard to see clearly. If you’ve ever struggled to clean them without causing damage, you’re not alone.

    But don’t worry—this guide will show you simple, effective ways to clean your plastic car windows safely. By the end, you’ll know exactly how to restore their shine and keep your view crystal clear every time you drive. Ready to make your windows look like new?

    Let’s dive in!

    How to Clean Plastic Car Windows: Easy Tips for a Crystal Clear Shine

    Credit: www.youtube.com

    Choosing The Right Cleaner

    Choosing the right cleaner for plastic car windows is important. The wrong product can cause scratches or cloudiness. Plastic windows need gentle care to stay clear and bright. Using the right cleaner keeps the surface smooth and free of damage.

    Safe Cleaners For Plastic Windows

    Use cleaners made specifically for plastic surfaces. These products clean without harming the material. Mild soap mixed with water works well. Spray bottles with diluted solutions help control the amount used. Avoid abrasive scrubbing tools; soft cloths or sponges are best.

    Commercial plastic cleaners often include ingredients that protect against UV rays. This helps prevent yellowing and cracking. Look for cleaners labeled safe for polycarbonate or acrylic windows. These are common plastics in car windows.

    Avoiding Harsh Chemicals

    Harsh chemicals can damage plastic car windows fast. Solvents like ammonia, alcohol, or acetone cause clouding or cracks. Avoid household glass cleaners with these ingredients. They may work on glass but harm plastic surfaces.

    Stay away from abrasive powders or strong degreasers. These scratch and dull the plastic. Stick to gentle, plastic-safe formulas. Testing a small area first prevents surprises. Keep your windows clear and lasting longer with proper care.

    Gathering Essential Tools

    Cleaning plastic car windows needs the right tools. Using the right items makes the job easier and safer for your windows. Gather these tools before you start. This saves time and helps prevent damage to the plastic surface.

    Soft Cloths And Microfiber Towels

    Soft cloths and microfiber towels are gentle on plastic windows. They avoid scratches and swirl marks. Microfiber towels absorb dirt and water well. Use them to wipe off dust and clean surfaces without streaks. Avoid rough fabrics or paper towels that can harm the plastic.

    Squeegees And Sponges

    Squeegees help remove water and cleaning solution quickly. They leave windows clear and dry without streaks. Choose a squeegee with a soft rubber blade. Use sponges with a smooth texture to apply soap or cleaner. Avoid harsh scrubbers that can scratch plastic. These tools make cleaning fast and effective.

    Preparing The Car Window

    Preparing the car window is the first step in cleaning plastic windows. It helps to avoid scratches and ensures a clear finish. Taking time to prepare the surface makes the cleaning easier and better.

    Removing Loose Dirt And Dust

    Start by removing loose dirt and dust from the window. Use a soft brush or a microfiber cloth to gently wipe the surface. This prevents dirt from scratching the plastic during cleaning. Work in small sections to cover the entire window evenly.

    Protecting Surrounding Surfaces

    Protect areas around the window before cleaning. Cover door handles, paint, and trim with masking tape or cloth. This stops cleaner or water from damaging these parts. Protecting nearby surfaces keeps the car looking good after cleaning.

    How to Clean Plastic Car Windows: Easy Tips for a Crystal Clear Shine

    Credit: www.webstaurantstore.com

    Step-by-step Cleaning Process

    Cleaning plastic car windows needs care and the right steps. This process helps keep windows clear and scratch-free. Follow these simple steps for the best results.

    Applying Cleaner Properly

    Choose a cleaner safe for plastic surfaces. Spray or apply it evenly on the window. Avoid soaking the plastic to prevent damage. Use a soft cloth or sponge to spread the cleaner gently. Cover the whole window, focusing on dirty spots. Let the cleaner sit for a minute to loosen grime.

    Wiping And Buffing Techniques

    Use a clean microfiber cloth for wiping. Move the cloth in small, circular motions. Apply light pressure to avoid scratching the plastic. Remove all dirt and cleaner residue carefully. After wiping, use a dry cloth to buff the window. Buffing makes the plastic shine and removes streaks. Check for missed spots and repeat if needed.

    Dealing With Stubborn Stains

    Stubborn stains on plastic car windows can be tough to remove. Dirt, grease, and water spots often leave marks that regular cleaning cannot fix. These stains need special care to avoid damage to the plastic surface.

    Using the wrong method might scratch or cloud the window. Patience and the right tools work best. The goal is a clear, shiny window without any harm.

    Using Gentle Scrubbing Methods

    Start by using a soft cloth or sponge. Avoid rough materials like steel wool or hard brushes. They can scratch the plastic and make the problem worse.

    Apply a small amount of mild soap mixed with water. Gently rub the stained area in circular motions. Take your time and repeat if needed. Rinse with clean water and dry with a microfiber cloth to prevent streaks.

    When To Use Specialized Products

    Some stains may not come off with soap and water. Use products made specifically for plastic surfaces. These cleaners remove tough grime without harming the window.

    Check the label to ensure it is safe for plastic. Test the product on a small area first. Follow the instructions carefully for best results. Avoid harsh chemicals that can damage or cloud the plastic.

    How to Clean Plastic Car Windows: Easy Tips for a Crystal Clear Shine

    Credit: www.amazon.com

    Preventing Future Smudges And Fog

    Keeping plastic car windows clear means stopping smudges and fog before they start. Clean windows improve your view and keep your car looking neat. Simple steps help protect the windows and make cleaning easier next time.

    Applying Protective Coatings

    Protective coatings form a thin layer on the plastic surface. This layer stops dirt and oils from sticking easily. Use a coating made for plastic windows to avoid damage.

    Apply the coating with a soft cloth in small, circular motions. Let it dry fully before touching the window. The coating also helps reduce fog by repelling moisture.

    Regular Maintenance Tips

    Wipe windows often with a clean, dry cloth to remove light dust and smudges. Avoid harsh cleaners that can scratch or cloud the plastic.

    Keep the car interior dry to cut down on fogging inside the windows. Use the car’s ventilation system to control moisture levels after rain or washing.

    Regular checks and gentle cleaning keep plastic windows clear and easy to see through. Small efforts prevent buildup and save time later.

    Common Mistakes To Avoid

    Cleaning plastic car windows needs care and the right method. Many people make mistakes that can cause scratches or leave smudges. Avoiding these common errors helps keep your windows clear and lasting longer.

    Using Abrasive Materials

    Abrasive materials can scratch plastic windows easily. Avoid using rough cloths, brushes, or sponges. These materials damage the surface and make cleaning harder. Use soft microfiber cloths instead. They clean well without scratching or harming the plastic.

    Cleaning In Direct Sunlight

    Cleaning plastic windows in direct sunlight causes streaks. The heat dries the cleaner too fast. This leaves spots and marks behind. Choose a shaded or cool place for cleaning. It helps the cleaner work better and gives a clear finish.

    Frequently Asked Questions

    How Do I Clean Plastic Car Windows Without Scratches?

    Use a soft microfiber cloth and a mild soap solution. Avoid abrasive cleaners or rough materials. Gently wipe in circular motions to prevent scratches and maintain clarity.

    What Household Products Safely Clean Plastic Car Windows?

    Mild dish soap mixed with water is effective. Avoid ammonia-based cleaners as they can damage plastic surfaces. Use a gentle cleaner to preserve the window’s transparency.

    Can I Use Vinegar To Clean Plastic Car Windows?

    No, vinegar’s acidity can cause plastic to become cloudy. It’s best to use specially formulated plastic cleaners or mild soap to protect the window’s surface.

    How Often Should I Clean Plastic Car Windows?

    Clean plastic car windows every two weeks or as needed. Regular cleaning prevents dirt buildup and maintains clear visibility for safe driving.

    Conclusion

    Cleaning plastic car windows keeps them clear and safe to drive. Use gentle cleaners and soft cloths to avoid scratches. Regular cleaning stops dirt from building up and spoiling your view. Always dry windows well to prevent streaks and spots.

    A clean window means better visibility and a nicer car look. Try these simple steps to keep your plastic windows shining bright. Easy care brings long-lasting results. Keep your car windows clean and enjoy a safer ride every day.

  • How to Clean Car Headlight Glass at Home: Easy & Effective Tips

    How to Clean Car Headlight Glass at Home: Easy & Effective Tips

    Is your car’s headlight glass looking cloudy or dull? This not only makes your car look older but can also reduce your visibility at night.

    The good news is, you don’t need expensive tools or professional help to fix it. You can clean your car’s headlight glass quickly and easily right at home. Keep reading, and you’ll discover simple steps that will restore your headlights to clear, bright condition—helping you drive safer and making your car shine like new.

    How to Clean Car Headlight Glass at Home: Easy & Effective Tips

    Credit: www.homedepot.com

    Tools And Materials Needed

    Cleaning car headlight glass at home requires a few simple tools and materials. Having the right items makes the job easier and more effective. You do not need expensive products to get clear headlights. Many household items work well for this task. Specialized cleaning products can speed up the process and provide longer-lasting results. Below are the main tools and materials you will need.

    Household Items

    Start with basic items found in most homes. Soap and water help remove dirt and grime. Use a soft cloth or sponge to avoid scratches. Toothpaste works as a mild abrasive to polish the glass. Baking soda mixed with water creates a gentle scrub. Old newspapers or microfiber cloths dry the headlights without leaving lint. Masking tape protects areas around the headlights during cleaning. These simple items make a good DIY cleaning kit.

    Specialized Cleaning Products

    Specialized products are designed to clean and restore headlights. Headlight restoration kits often include sandpaper, polish, and sealant. These kits remove tough oxidation and yellowing. Plastic cleaner and polish improve clarity and shine. UV sealants protect headlights from future damage. Using these products gives professional results at home. Follow the instructions carefully for best results.

    How to Clean Car Headlight Glass at Home: Easy & Effective Tips

    Credit: www.youtube.com

    Preparing Your Car For Cleaning

    Before cleaning your car’s headlight glass, proper preparation is essential. This step helps protect your car and ensures a better cleaning result. Taking time to prepare makes the process smooth and safe.

    Safety Precautions

    Park your car in a shaded area to avoid direct sunlight. Sunlight can cause cleaning products to dry too fast. Wear gloves to protect your hands from chemicals. Avoid using harsh cleaners that can damage the glass or paint. Keep a bucket of water nearby to rinse off spills quickly. Make sure the engine is off and the headlights are cool before starting.

    Cleaning The Surface

    Start by rinsing the headlights with water to remove loose dirt. Use a soft cloth or sponge with mild soap to clean the surface gently. Avoid scrubbing too hard to prevent scratches. Rinse the headlights again to remove soap residue. Dry the glass with a clean microfiber cloth for a clear view. This step removes grime and prepares the glass for deeper cleaning.

    Diy Cleaning Methods

    Cleaning car headlight glass at home is easy and cost-effective. DIY methods use common household items. These methods help remove dirt, grime, and yellowing. They restore clarity and improve night driving safety.

    Using Toothpaste

    Toothpaste works as a mild abrasive cleaner. It removes dirt and light scratches from headlights. Apply a small amount to a soft cloth. Rub the toothpaste on the headlight in circular motions. Continue for a few minutes for best results. Rinse the headlight with water and dry it with a clean cloth.

    Baking Soda Paste

    Baking soda is a natural cleaner that brightens headlights. Mix baking soda with water to make a paste. Spread the paste on the headlight glass. Use a soft cloth to scrub gently in circles. Let it sit for five minutes. Rinse well with water and wipe dry. This method removes tough stains and haze effectively.

    Vinegar And Water Solution

    Vinegar helps dissolve mineral deposits and grime. Mix equal parts white vinegar and water in a spray bottle. Spray the solution on the headlight surface. Let it sit for a few minutes to loosen dirt. Use a soft cloth to wipe the headlights clean. Rinse with water and dry with a towel. This solution is gentle and safe for headlights.

    How to Clean Car Headlight Glass at Home: Easy & Effective Tips

    Credit: www.homedepot.com

    Using Commercial Headlight Cleaners

    Using commercial headlight cleaners makes restoring clarity easy and quick. These products are designed to remove dirt, yellowing, and haze from car headlight glass. They save time compared to DIY methods with household items. Many cleaners come with polishing pads or cloths to help you apply them smoothly.

    Choosing The Right Product

    Pick a cleaner made for car headlights. Some products work better on plastic lenses, but many suit glass headlights as well. Check the label to ensure it matches your headlight type. Look for a product with good reviews and clear instructions. Avoid harsh chemicals that may damage the glass or surrounding paint.

    Application Steps

    Start by washing your headlights with soap and water. Dry them completely before applying the cleaner. Follow the product instructions carefully. Usually, you apply a small amount to a soft cloth or pad. Rub the cleaner gently in a circular motion across the headlight surface.

    Keep polishing until the haze starts to fade. Wipe off any excess cleaner with a clean cloth. Some products require rinsing with water afterward. Let the headlights dry fully before driving. Repeat the process if needed for better results.

    Polishing And Sealing

    Polishing and sealing your car’s headlight glass helps restore clarity and protect it from damage. This process removes haze, yellowing, and small scratches. It also keeps the headlights clear for longer.

    Polishing smooths the surface, making the glass look new. Sealing adds a protective layer to block dirt and UV rays. Both steps improve your car’s appearance and safety.

    Polishing Techniques

    Start with a clean, dry headlight surface. Use fine-grit sandpaper or a polishing compound. Rub gently in circular motions to remove haze and scratches. Keep the surface wet to avoid damage.

    Use a microfiber cloth or a polishing pad for best results. Work slowly and evenly across the whole headlight. Stop when the glass looks clear and smooth.

    Applying Protective Coating

    Choose a good quality sealant or clear coat made for headlights. Apply a thin, even layer over the polished glass. Use a soft cloth or applicator pad for smooth coverage.

    Let the coating dry completely before touching or driving. This layer protects the headlights from UV rays, dirt, and moisture. Reapply the coating every few months for lasting protection.

    Maintenance Tips

    Keeping your car headlights clean is important for safe driving. Clear headlights improve night vision and make your car look newer. Simple maintenance helps avoid costly repairs or replacements. Follow these tips to keep your headlight glass bright and clear for a long time.

    Regular Cleaning Schedule

    Clean your headlights at least once a month. Use a soft cloth and mild soap to wipe away dirt. Avoid harsh chemicals that can damage the glass. Dry the headlights fully to prevent water spots. A regular routine stops grime from building up. It also helps spot any cracks or damage early.

    Avoiding Future Cloudiness

    Protect headlights from the sun’s UV rays. Apply a UV-resistant sealant after cleaning. Park your car in the shade or garage when possible. Avoid abrasive materials that scratch the glass. Check headlights for moisture inside the lens. Seal any leaks quickly to stop fogging. These steps keep your headlights clear longer.

    Frequently Asked Questions

    How Often Should I Clean Car Headlight Glass?

    Clean headlights every 3 to 6 months to maintain brightness. Regular cleaning prevents dirt buildup and oxidation, improving visibility and safety while driving at night.

    What Household Items Clean Car Headlights Effectively?

    Use toothpaste, baking soda, or vinegar to clean headlights. These mild abrasives remove grime and haze gently without damaging the glass or plastic surface.

    Can I Use Toothpaste To Polish Headlight Glass?

    Yes, toothpaste works well for polishing headlights. It removes oxidation and restores clarity. Apply with a soft cloth, rub gently, then rinse and dry.

    Is It Safe To Use Sandpaper On Headlight Glass?

    Sandpaper can be used cautiously on plastic headlights, not glass. Use fine grit and wet sanding techniques to avoid scratches. Avoid on actual glass headlights.

    Conclusion

    Cleaning your car headlights at home is simple and saves money. Use common household items like toothpaste or baking soda. Regular cleaning keeps headlights clear and bright. Clear headlights improve night driving safety. Try these easy steps to keep your lights shining.

    Small effort brings big difference. Your car looks better, and you drive safer. Give your headlights some care today.

  • How to Clean Windshield Visor: Quick Tips for a Crystal Clear View

    How to Clean Windshield Visor: Quick Tips for a Crystal Clear View

    Your windshield visor plays a big role in keeping your driving safe and comfortable. But over time, dust, dirt, and smudges can build up, making it hard to see clearly.

    If you’ve ever struggled with glare or blurry views, you know how frustrating it can be. The good news? Cleaning your windshield visor is easier than you think—and it can make a huge difference in your driving experience. Keep reading, and you’ll discover simple, effective steps to get your visor spotless and your vision crystal clear.

    Choosing The Right Cleaning Tools

    Choosing the right tools makes cleaning your windshield visor easier and more effective. Proper tools protect the visor surface and remove dirt without scratches. Using the wrong cloth or solution can cause damage or leave streaks. Simple tools and safe solutions ensure a clear, clean visor every time.

    Best Cloths And Sponges

    Soft microfiber cloths are ideal for cleaning visors. They trap dirt and dust without scratching. Avoid rough fabrics like paper towels or old rags. These can cause tiny scratches on the visor surface. Use a clean cloth each time to avoid spreading dirt. Sponges with a soft texture also work well. Choose one that does not shed fibers during cleaning.

    Recommended Cleaning Solutions

    Use gentle cleaning solutions made for plastics or glass. Mild soap mixed with water is a safe and easy option. Avoid harsh chemicals like ammonia or bleach. These can damage the visor’s coating. Commercial visor cleaners are available and usually safe. Always test a small area first to check for any reaction. Clear, streak-free results come from mild, well-chosen solutions.

    How to Clean Windshield Visor: Quick Tips for a Crystal Clear View

    Credit: www.youtube.com

    Preparing The Windshield Visor

    Preparing the windshield visor is the first step to effective cleaning. This step helps protect the visor from damage and ensures a clear view. Taking time to prepare the surface makes cleaning easier and safer.

    Removing Loose Dirt And Debris

    Start by gently brushing away loose dirt and debris. Use a soft brush or cloth to avoid scratches. Removing loose particles prevents rubbing dirt into the visor during cleaning. This simple action keeps the visor smooth and ready.

    Checking For Damage Or Scratches

    Next, check the visor for any damage or scratches. Look closely under good light to spot cracks or marks. Identifying damage early helps you handle the visor carefully. It also guides you to choose the right cleaning method or products.

    Step-by-step Cleaning Process

    Cleaning your windshield visor is simple when done step-by-step. This process helps remove dirt and smudges quickly. A clean visor improves visibility and safety while driving. Follow these clear steps for the best results.

    Applying Cleaner Effectively

    Start by choosing a mild glass cleaner or a mix of water and vinegar. Spray the cleaner evenly on the visor surface. Avoid soaking the visor to prevent drips inside the car. Let the cleaner sit for a few seconds. This loosens dirt and grime for easy removal.

    Wiping Techniques For Streak-free Finish

    Use a soft microfiber cloth for wiping. Begin wiping gently in a circular motion. Focus on dirty spots first, then cover the entire visor. Flip the cloth to a dry side for a streak-free shine. Avoid harsh scrubbing to prevent scratches.

    How to Clean Windshield Visor: Quick Tips for a Crystal Clear View

    Credit: www.dubizzle.com

    Dealing With Tough Stains

    Tough stains on your windshield visor need special care. Simple cleaning may not remove them. These stains include bug residue and water spots. They can block your vision and make driving unsafe. Use the right methods to clean them effectively. This keeps the visor clear and in good shape.

    Removing Bug Residue

    Bugs leave sticky marks that are hard to wipe off. Start by softening the residue. Spray warm water mixed with a little dish soap on the area. Let it sit for a few minutes. Use a soft cloth or sponge to gently scrub the stains. Avoid harsh scrubbing to protect the visor’s surface. Rinse with clean water and dry with a microfiber towel.

    Handling Water Spots And Mineral Deposits

    Water spots and mineral deposits look like cloudy marks. These come from hard water drying on the visor. Use white vinegar to break down the minerals. Mix equal parts vinegar and water in a spray bottle. Spray the solution on the spots and let it sit for five minutes. Wipe gently with a soft cloth. Rinse well and dry to avoid new spots.

    Maintaining A Clear Windshield Visor

    Maintaining a clear windshield visor is essential for safe driving. Dirt, dust, and grime can blur your vision. A clean visor helps you see the road clearly. It also reduces glare and eye strain. Simple steps can keep your visor spotless and effective.

    Regular Cleaning Schedule

    Clean your windshield visor often to avoid build-up. Wipe it gently with a soft cloth. Use mild soap and water for better results. Avoid harsh chemicals that can damage the visor. Set a weekly or bi-weekly cleaning routine. This keeps your vision sharp and clear.

    Protective Treatments To Consider

    Apply protective treatments to keep your visor clear longer. Anti-fog sprays prevent moisture from forming. Water-repellent coatings help rain slide off easily. These treatments improve visibility in bad weather. Follow product instructions for best use. Reapply treatments regularly for ongoing protection.

    Safety Tips While Cleaning

    Cleaning a windshield visor needs care and attention. Safety is important to avoid damage and keep the area around the visor safe. This section shares key tips to keep cleaning safe and easy. Follow these steps to protect your visor and the environment.

    Avoiding Damage To Visor And Surrounding Areas

    Use soft cloths or microfiber towels to clean the visor. Avoid rough materials that can scratch the surface. Do not use strong chemicals or abrasive cleaners. These can damage the visor and nearby car parts. Clean gently with smooth, circular motions. Rinse the area with water before and after cleaning. Check for cracks or loose parts before starting. Avoid spraying cleaner directly on electronic parts near the visor.

    Using Non-toxic And Eco-friendly Products

    Choose cleaning products that are safe for you and the environment. Look for labels that say non-toxic and biodegradable. These products reduce pollution and protect nature. Avoid harsh chemicals like ammonia or bleach. Use homemade solutions like diluted vinegar or mild soap. Test any cleaner on a small, hidden spot first. This ensures the product does not harm the visor’s material.

    How to Clean Windshield Visor: Quick Tips for a Crystal Clear View

    Credit: www.dubizzle.com

    Frequently Asked Questions

    How Often Should I Clean My Windshield Visor?

    You should clean your windshield visor every 2 to 4 weeks. Regular cleaning prevents dirt buildup and improves visibility. Frequent cleaning also extends the visor’s lifespan and maintains its clarity for safer driving.

    What Materials Are Best For Cleaning A Windshield Visor?

    Use a microfiber cloth and mild soap solution to clean your windshield visor. Avoid abrasive materials or harsh chemicals as they can scratch or damage the surface. This method ensures a streak-free and clear visor.

    Can I Use Household Cleaners On Windshield Visors?

    Avoid household cleaners containing ammonia or alcohol on windshield visors. These chemicals can cause fogging or damage the visor’s coating. Stick to specialized automotive cleaners or mild soap and water for safe cleaning.

    How Do I Remove Stubborn Stains From A Windshield Visor?

    To remove tough stains, apply a mixture of water and vinegar or use a dedicated plastic cleaner. Gently scrub with a soft cloth in circular motions. Rinse thoroughly and dry with a clean microfiber towel to prevent residue.

    Conclusion

    Cleaning your windshield visor keeps your view clear and safe. Use gentle cleaners and soft cloths to avoid scratches. Regular cleaning stops dirt and grime from building up. A clean visor helps block sun glare better. Taking a few minutes to clean it often makes driving easier.

    Try these simple steps to keep your visor in good shape. Clear vision means safer trips every time. Don’t forget to clean it before long drives or bright days. Your eyes will thank you.

  • How to Clean Windshield Glue: Easy Steps for a Spotless Finish

    How to Clean Windshield Glue: Easy Steps for a Spotless Finish

    You’ve just removed your windshield, but now there’s stubborn glue left behind. It’s sticky, tough, and frustrating.

    You might wonder, “How do I get this mess off without damaging my glass or paint? ” The good news is, you’re closer to a clean, smooth surface than you think. In this guide, you’ll discover simple, effective ways to clean windshield glue quickly and safely.

    Stick with me, and you’ll tackle this sticky problem like a pro—no stress, no guesswork. Ready to get started?

    How to Clean Windshield Glue: Easy Steps for a Spotless Finish

    Credit: www.reddit.com

    Tools And Materials Needed

    Cleaning windshield glue requires specific tools and materials. Using the right items makes the job easier and safer. Prepare everything before starting to avoid interruptions.

    This section lists the essential tools and materials. Each item plays a key role in removing glue effectively.

    Plastic Scraper

    A plastic scraper helps lift glue without scratching glass. It is gentle but firm enough to remove sticky residue. Avoid metal tools to protect your windshield.

    Rubbing Alcohol

    Rubbing alcohol softens glue for easier removal. It dissolves sticky spots and cleans the surface. Use a high concentration, like 70% or above.

    Microfiber Cloth

    A microfiber cloth wipes away glue and dirt. It is soft and absorbs liquids well. Avoid rough cloths that may scratch the glass.

    Goo Gone Or Adhesive Remover

    Goo Gone or similar adhesive removers break down stubborn glue. They work faster than alcohol on tough spots. Use sparingly and follow safety instructions.

    Gloves

    Gloves protect your skin from chemicals and glue. Choose disposable gloves for easy cleanup. They keep your hands safe and clean.

    Warm Soapy Water

    Warm soapy water helps loosen glue and dirt. It cleans the surface before and after glue removal. Use mild dish soap for the best results.

    Preparing The Work Area

    Preparing the work area is the first step to clean windshield glue safely and effectively. A clean and organized space helps you work faster and avoid mistakes. Take time to set up everything before starting the cleaning process.

    Clear the area around your car to have enough room. This makes moving easy and prevents accidents. Remove any items that might get in the way or get damaged by glue or cleaning products.

    Choose A Well-ventilated Spot

    Pick a place with fresh air to avoid breathing in strong fumes. Open doors or windows if you work inside a garage. Good airflow keeps you safe and comfortable during the cleaning.

    Gather Your Tools And Materials

    Collect all needed tools before starting. Use a plastic scraper, adhesive remover, gloves, and rags. Having everything ready saves time and keeps you focused on the task.

    Protect Your Car And Surroundings

    Cover areas near the glue with painter’s tape or cloth. This stops accidental scratches or damage. Protect car paint and glass edges from harsh chemicals or sharp tools.

    Safety Precautions

    Cleaning windshield glue requires careful attention to safety. The chemicals and tools used can cause harm if not handled properly. Protecting yourself is the first step to a successful job. Simple safety measures prevent accidents and injuries.

    Wear Protective Gloves

    Gloves protect your skin from strong adhesives and chemicals. Choose gloves made of nitrile or latex. Avoid touching glue or solvents with bare hands. Change gloves if they get damaged or sticky.

    Use Eye Protection

    Glue and solvents can splash into your eyes. Wear safety goggles to keep your eyes safe. Avoid rubbing your eyes during and after cleaning. Keep water nearby to rinse your eyes if needed.

    Work In A Well-ventilated Area

    Fumes from glue and cleaning solvents can be harmful. Open windows or work outside to get fresh air. Use a fan to move air if indoors. Avoid breathing in strong fumes for long periods.

    Read Product Labels Carefully

    Each cleaning product has specific instructions. Follow the guidelines to avoid misuse. Check for warnings about flammability or toxicity. Store products away from children and pets.

    Keep Fire Safety In Mind

    Many solvents are flammable. Do not smoke or use open flames near them. Store solvents in cool, dry places. Dispose of rags and materials safely to prevent fires.

    How to Clean Windshield Glue: Easy Steps for a Spotless Finish

    Credit: www.dreamstime.com

    Softening The Glue

    Removing windshield glue can be tough without softening it first. The glue hardens quickly and sticks firmly to glass surfaces. Softening the glue makes scraping easier and prevents damage to your windshield.

    Two common ways to soften glue are using heat and applying solvents. Both methods break down the glue’s hold. Choose the best method based on your tools and glue type.

    Using Heat

    Heat loosens the glue by making it more flexible. Use a hairdryer or heat gun on low settings. Hold it a few inches from the glue. Move the heat source slowly over the glued area. Avoid overheating to prevent glass damage or burns.

    Heat softens the glue in minutes. Test the glue with a plastic scraper. If it peels easily, heat has worked. Reheat if the glue stays hard. Heat works best on fresh or slightly aged glue.

    Applying Solvents

    Solvents dissolve glue and make it easier to remove. Use adhesives removers, rubbing alcohol, or acetone carefully. Apply a small amount on a cloth or cotton ball. Dab the glued area gently. Let it sit for a few minutes.

    Check if the glue softens. Repeat if needed. Avoid harsh chemicals that may damage the glass or car paint. Always test solvents on a small hidden spot first. Solvents work well on older, hardened glue.

    Removing Glue Residue

    Removing glue residue from your windshield can be tricky. The sticky remains often resist simple washing. Using the right methods helps clear the glass without damage. Focus on gentle scraping and careful wiping for best results.

    Scraping Techniques

    Start with a plastic scraper or a razor blade held at a low angle. Move slowly to avoid scratching the glass. Work from the edges toward the center. Apply light pressure to lift the glue. Avoid pushing hard, as this may cause damage. Change the blade if it becomes dull. Always keep the glass wet to ease scraping. This reduces the risk of scratches and helps loosen the residue.

    Wiping And Cleaning

    After scraping, use a clean cloth with warm soapy water. Wipe the area gently to remove leftover glue bits. Rubbing alcohol or adhesive remover also works well. Apply a small amount to a soft cloth. Rub the sticky spots in a circular motion. This breaks down the glue for easier removal. Finish by wiping with a damp cloth to clear any cleaner residue. Dry with a microfiber towel to prevent streaks.

    How to Clean Windshield Glue: Easy Steps for a Spotless Finish

    Credit: www.dreamstime.com

    Dealing With Stubborn Spots

    Stubborn spots of windshield glue can test your patience. These sticky patches resist simple cleaning and need extra care. Tackling them requires patience and the right approach to avoid damaging your glass.

    Repeat Application

    Apply the glue remover again on tough spots. Let it sit for a few minutes. This softens the glue, making it easier to scrape off. Use a plastic scraper to avoid scratches. Wipe the area with a clean cloth after scraping. Repeat this process as needed. Patience is key to clear the glass without damage.

    Alternative Methods

    Try using rubbing alcohol or nail polish remover on small glue spots. Dab a cotton ball with the liquid and press it on the glue. Wait a few minutes to break down the glue. Gently rub the area in circles. Avoid harsh chemicals that can harm the glass. Use warm soapy water to clean off any residue. These alternatives work well when standard removers fail.

    Final Cleaning And Polishing

    After removing windshield glue, the final step is cleaning and polishing. This step makes the glass clear and smooth again. It removes any leftover residue and restores shine. A clean windshield improves visibility and safety while driving.

    Use gentle products and soft cloths to avoid scratches. Take time to work carefully on the glass surface. The right cleaning and polishing will give your windshield a fresh, new look.

    Preparing The Windshield Surface

    Start by wiping the glass with a damp microfiber cloth. This removes dust and loose dirt. Next, use a glass cleaner to clean the whole area. Avoid harsh chemicals that can damage the glass.

    Dry the surface well before moving to polishing. A clean base helps polish work better and last longer.

    Choosing The Right Polishing Product

    Select a polish made for automotive glass. These products remove small scratches and haze. Avoid polishes meant for metal or plastic. Use a small amount to cover the cleaned area.

    Apply polish in a circular motion with a soft cloth. Work gently but firmly for even coverage. Do not overuse polish to prevent streaks.

    Polishing And Buffing Techniques

    Buff the glass with a clean microfiber cloth. Use light pressure and quick strokes. Buff until the glass shines and feels smooth. Change cloth sections often to avoid smearing dirt.

    Check the glass from different angles. This helps spot any spots missed during polishing. Repeat polishing if needed for better clarity.

    Preventing Future Glue Residue

    Preventing future glue residue on your windshield saves time and effort. Small steps stop sticky messes from building up again. Clean surfaces and smart habits make a big difference. This section shows simple ways to keep your windshield clear and glue-free.

    Clean The Surface Before Applying Glue

    Always clean the windshield before adding glue. Dirt or dust makes glue stick harder. Use a glass cleaner and a soft cloth to wipe the area. A clean surface helps glue stick only where needed.

    Use The Right Amount Of Glue

    Too much glue causes extra residue. Apply only the glue needed for the job. A thin, even layer works best. Excess glue can squeeze out and leave a mess.

    Protect Edges With Tape

    Cover edges around the glue area with painter’s tape. Tape stops glue from spreading to unwanted spots. Remove the tape carefully before the glue fully dries. This keeps the windshield neat and clean.

    Remove Glue Immediately After Use

    Clean any glue spills right after application. Fresh glue is easier to remove. Use a plastic scraper or cloth with rubbing alcohol. Quick action prevents hard residue buildup.

    Frequently Asked Questions

    How Do I Remove Windshield Glue Residue Safely?

    Use a plastic scraper to gently lift glue. Apply adhesive remover or rubbing alcohol. Wipe with a clean cloth until glue dissolves. Avoid harsh chemicals that damage glass or paint.

    What Tools Help Clean Windshield Glue Effectively?

    Plastic scrapers, adhesive removers, rubbing alcohol, microfiber cloths, and warm soapy water work best. These tools prevent scratches and dissolve glue efficiently.

    Can Household Items Remove Windshield Glue?

    Yes, rubbing alcohol, vinegar, and warm soapy water can help soften glue. Use plastic tools to scrape gently. Avoid abrasive materials that may scratch glass.

    How Long Does Windshield Glue Take To Clean?

    Cleaning time depends on glue thickness and remover used. Usually, it takes 10 to 30 minutes. Patience and gentle scraping improve results without damage.

    Conclusion

    Cleaning windshield glue does not have to be hard. Use the right tools and gentle cleaners. Take your time to avoid scratches or damage. Small steps lead to clear, smooth glass. Regular care keeps your windshield looking good. Remember, patience helps achieve the best results.

    Stay safe and enjoy a clean view on the road.

  • How to Clean Car Windows With 0000 Steel Wool: Expert Tips

    How to Clean Car Windows With 0000 Steel Wool: Expert Tips

    Are your car windows looking cloudy or covered with stubborn grime that won’t budge? You might think cleaning them requires expensive products or a trip to the car wash.

    But what if you could restore that clear, sparkling shine right at home with a simple, affordable tool? Using 0000 steel wool might sound unusual, but it’s a secret weapon for removing tough stains and buildup without scratching your glass.

    You’ll discover exactly how to clean your car windows with 0000 steel wool safely and effectively—giving you crystal-clear views and a car that looks freshly detailed. Keep reading to unlock this easy cleaning trick that could save you time and money!

    Choosing The Right Steel Wool

    Choosing the right steel wool is important for cleaning car windows safely and effectively. Not all steel wool grades work well on glass. Picking the wrong type can cause scratches or leave behind fibers. Using the right steel wool helps remove dirt, grime, and water spots without harming your windows.

    Why 0000 Grade Works Best

    0000 steel wool is the finest grade available. It has very thin and soft strands. This softness allows it to clean glass without scratching the surface. Thicker steel wool grades are too rough for car windows. They can leave marks or damage the glass over time.

    Using 0000 steel wool gently removes stubborn stains. It also polishes the glass to a clear shine. This grade works well with water or glass cleaner. It is safe and effective for regular window cleaning.

    Avoiding Damage To Glass

    Always use clean 0000 steel wool to avoid dirt buildup. Dirt trapped in steel wool can cause tiny scratches. Light pressure is key when cleaning windows. Pressing too hard can still harm the glass, even with fine wool.

    Test on a small spot before full cleaning. This step ensures no damage or haze appears. Rinse the wool often to keep it free of debris. Proper care protects your car windows and keeps them looking clear.

    How to Clean Car Windows With 0000 Steel Wool: Expert Tips

    Credit: www.reddit.com

    Preparing Your Cleaning Supplies

    Preparing your cleaning supplies is key to cleaning car windows with 0000 steel wool effectively. Having the right tools ready saves time and prevents damage. Organize everything before you start.

    Essential Tools And Materials

    Gather these items for a smooth cleaning process. You need 0000 steel wool, soft microfiber cloths, and a spray bottle. Gloves protect your hands from scratches and chemicals. A bucket with clean water helps rinse the cloths. Also, keep a plastic scraper handy for stubborn dirt.

    Selecting The Right Cleaning Solution

    Choose a gentle cleaner suitable for glass surfaces. Avoid harsh chemicals that can damage paint or tint. A mix of water and mild dish soap works well. Vinegar diluted with water is another safe option. Test the solution on a small spot first. Make sure it does not leave streaks or residue.

    Step-by-step Cleaning Process

    Cleaning car windows with 0000 steel wool requires a careful approach. Follow these simple steps for clear, streak-free windows. Each step helps remove dirt and grime safely without scratching the glass.

    Removing Loose Dirt And Debris

    Start by wiping the windows with a soft cloth or brush. This removes loose dirt and dust that can scratch the glass. Use gentle, circular motions to lift debris off the surface. Avoid pressing hard to protect the glass finish.

    Using Steel Wool On Windows

    Take a small piece of 0000 steel wool and dampen it slightly. Lightly rub the glass in small circles, focusing on stubborn spots. The fine steel wool removes tough grime without damaging the window. Keep the wool wet to prevent scratching and replace it if it gets dirty.

    Rinsing And Drying Techniques

    Rinse the windows with clean water to wash away residue. Use a spray bottle or a gentle stream from a hose. After rinsing, dry the glass with a soft, lint-free cloth. Pat the surface gently to avoid streaks and ensure a clear finish.

    How to Clean Car Windows With 0000 Steel Wool: Expert Tips

    Credit: www.reddit.com

    Handling Stubborn Stains

    Stubborn stains on car windows can block your view and make driving unsafe. Using 0000 steel wool gently can clear these tough marks. This wool is very fine and safe for glass if used carefully. It helps remove dirt without scratching the surface.

    Focus on small areas and clean in soft, circular motions. Avoid pressing too hard to protect the glass. Let’s explore how to handle common tough stains.

    Removing Water Spots And Mineral Deposits

    Water spots and mineral deposits leave cloudy marks on windows. These stains form from hard water drying on the glass. Dampen the 0000 steel wool with water or a mild cleaner. Rub the stained spots gently. The fine steel wool breaks down the minerals without harming the glass.

    Rinse the area with clean water after scrubbing. Dry with a soft cloth to avoid new spots. Repeat if necessary until the stains fade.

    Cleaning Bug Splatter And Road Grime

    Bug splatter and road grime stick firmly to car windows. They need careful scrubbing to remove. Use damp 0000 steel wool to soften these residues. Work slowly and avoid hard scrubbing. This stops scratches and glass damage.

    Wipe the glass clean with a microfiber cloth after scrubbing. This removes loosened dirt and leaves the window clear. Regular cleaning prevents buildup and keeps your windows spotless.

    Safety Tips For Using Steel Wool

    Using 0000 steel wool to clean car windows can be effective but needs care. Steel wool is abrasive and can cause injury or damage. Following safety tips protects you and your car. Keep these tips in mind before starting your cleaning job.

    Protecting Your Hands And Eyes

    Steel wool can scratch or irritate your skin. Wear gloves to keep your hands safe. Eye protection is important too. Tiny steel fibers can fly up and harm your eyes. Use safety goggles or glasses during cleaning. Keep your face away from the wool as you work.

    Preventing Scratches On Surrounding Surfaces

    Steel wool may scratch paint or plastic near the windows. Cover these areas with painter’s tape or cloth. Work slowly and carefully. Avoid pressing too hard on the steel wool. Check your progress often to stop damage early. Clean only the glass surface for best results.

    Maintaining Clean Windows Longer

    Keeping car windows clean for a longer time makes driving safer and more pleasant. Clean windows improve visibility and reduce glare. Using 0000 steel wool gently removes dirt and stains without scratching. After cleaning, taking steps to protect the glass helps maintain that clear look. Simple habits can keep your windows spotless and fresh.

    Applying Protective Coatings

    Protective coatings create a barrier on the glass surface. These coatings repel water, dust, and grime. Apply a thin layer of glass sealant or wax after cleaning. Let the coating dry completely for best results. This layer helps dirt slide off easily during rain or car washes. It also reduces the need for frequent cleaning.

    Regular Care And Upkeep

    Check your windows weekly for spots and smudges. Use a microfiber cloth and gentle cleaner for quick touch-ups. Avoid harsh chemicals that can damage the glass or coating. Clean off bird droppings and bug splatters right away. These can stain the glass if left too long. Regular care saves time and keeps windows clear longer.

    How to Clean Car Windows With 0000 Steel Wool: Expert Tips

    Credit: www.youtube.com

    Frequently Asked Questions

    What Is 0000 Steel Wool Used For On Car Windows?

    0000 steel wool is ultra-fine and perfect for gently removing stubborn grime. It cleans without scratching glass surfaces. Use it carefully on car windows for a streak-free shine. It effectively removes tough residues like sap or tar.

    How Do I Safely Clean Car Windows With 0000 Steel Wool?

    First, rinse the window to remove loose dirt. Lightly dampen the steel wool and gently rub in a circular motion. Avoid pressing too hard to prevent scratches. Finish by wiping with a microfiber cloth for a clear, polished look.

    Can 0000 Steel Wool Damage Car Window Tint?

    When used gently, 0000 steel wool won’t damage tint films. Always test a small hidden area first. Avoid aggressive scrubbing, which can cause scratches or lift the tint. Use it mainly on untinted or tough spots for best results.

    Is 0000 Steel Wool Better Than Glass Cleaners Alone?

    Yes, 0000 steel wool enhances cleaning by removing stubborn residues. Glass cleaners can’t remove tough grime or sap as effectively. Combined, they leave windows spotless and clear. It’s a great tool for deep cleaning car windows.

    Conclusion

    Cleaning car windows with 0000 steel wool works well when done carefully. This method removes dirt and stains without scratching glass. Always use gentle pressure and clean cloths for best results. Remember to test a small area first to avoid damage.

    Regular cleaning keeps windows clear and improves driving safety. Try this simple technique to keep your car windows shining bright.